


In the Account section, you can configure the following account settings:
- Name: The name of your account. The account name should be unique.
- Blocked (Y/N): Displays if the account is blocked or not.
- Allow sharing data between the accounts (Y/N): Select this option, to allow data sharing between accounts. For more information, see Data Sharing.
- Display CStoreOffice® interface in Beta mode: Turns on the Beta mode for the account. For details, see Home Page in Beta Mode.
- Enable Item activation by Shift Parser: This option is selected by default for each newly created account. When the Enable Item activation by Shift Parser option is selected, the items that were deactivated for both account and stations, are activated back only on the account level during the process of reparsing the closed shift in CStoreOffice®. If you need to keep the deactivated items in inactive status on the account level after the process of reparsing the closed shift is completed, clear the Enable Item activation by Shift Parser option in the Setup Account form and save the changes.
- Has Corporate News (Y/N): Select this option, to display the News block on the main CStoreOffice® page. For more information, see Working with News.
- Products and Service promotions menu: Turns on or off the set of advertising blocks on the right side of the CStoreOffice® pages. This option is selected by default.
- Enable Inactive Items Monitoring (Y/N)
- Apply Items Inventory Tickets Adjustments to Store Inventory (Y/N): Select this option, to consider all cycle count tickets data during inventory. If this option is not selected, the inventory is performed only starting from the last cycle count ticket's date, if any, but not for the whole inventory period. The same option exists at the station level. For details, see MISC > Station Options.
- Apply Store Inventory Adjustments to GPM (Y/N)
- Apply Items Inventory Tickets Adjustments to GPM (Y/N)
- GPM by Cost of goods sold (Y/N): Select this option, to calculate COGS for IMoA categories based on two inventories which are the nearest to the report period. If the option is selected, the COGS value is calculated based on the following formula: COGS = Beginning Inventory Cost + Purchase Cost - Ending Inventory Cost, where:
- Beginning Inventory: The nearest inventory to the following date: Date From – (Date From – 90 days).
- Ending Inventory: The nearest inventory to the following date: Date To – (Date To + 90 days)
- Purchases: All purchases made during the period between Beginning Inventory and Ending Inventory
- Sales: All sales made during the period between Beginning Inventory and Ending Inventory
- Use Retail History in invoices (Y/N): Select this option, to define the invoice retail automatically based on the invoice date and changes history. If this option is not selected, then for the items without inventory, the item's retail is editable in the Pending Invoice report, while for the items with inventory, then current retail is displayed in the Pending Invoice report and this retail is not editable. For more information, see Pending Invoices Report.
- Users don't be able to select any Company/Location of current Account in Recon. deposit form (Y/N)
- Autofixing manually changed retail (Y/N)
- Use Lottery Purchases Serial Restrictions (Check number symbols): Use this option to set up the limit for amount of digits used in serial numbers of lottery purchases. When the limit is set, it is checked on the lottery purchases form during serial number entering. The following values can be selected:
- Do not Use: The limit for amount of digits is not set and not checked.
- Check 2 Digits
- Check 3 Digits
- Check 4 Digits
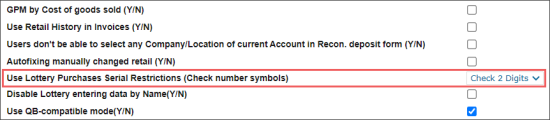
For more information, see Creating New Lottery Invoice.
- Disable Lottery entering data by Name (Y/N): Select this option, if you need to turn off the Lottery Count data entering by the name of the lottery game.
- Use QB-compatible mode(Y/N): Select this option, to be able to synchronize the data types you need with QuickBooks. When this option is selected, the QB Export Item column is enabled in the Transaction Assignment tab.
- Export Accounting to QB by: After enabling the previous Use QB-compatible mode(Y/N) option, configure the following settings. To enable the Choose button in the QB Export Item column of the Transaction Assignment tab, select Documents or Documents (Custom Settings).
- Other Charges are included into the invoice total cost (Y/N): Select this option to include the Other Charges value into the cash reconciliation form > Daily Data section > Short/Over value. For details, see Cash Reconciliation.
- Show Other Charges section on Invoice Form (Y/N): Enables or disables the Other Charges section on the Vendors > Bills > Invoices form.
- GL# attribute on some forms (Station, Departments, Category, Vendors) should be mandatory(Y/N): Select this option if you need to make the GL# field mandatory in the Station, Department, Category, and Vendor forms.
- Negotiated Cost change (Y/N): Select this option, if you need to allow the user to change the Unit Cost value during the manual invoice entry. If this option is not selected, the user cannot edit the Unit Cost value in the Manual Invoice Entry form. For details, see Merchandise Invoice.
- Library
- Master Account: The basic account for price book synchronization.
- Not Allow InComplete Items in Invoices: Select this option to forbid users from this account to accept invoices with incomplete items. In addition, the user must have the Allow to accept merchandise invoices with incomplete items permission granted. For more information, see Accept Pending Invoices.
- Do not skip invoices validation when accepting/ rejecting multiple invoices: Select this option, to turn on all validations that are applied when user accepts/ rejects multiple invoices in the Pending Invoices report one by one with the Allow accepting/rejecting multiple invoices permission granted. This option is unselected by default for all accounts except for 2870. For more information, see Accept Pending Invoices.
- System of measuring: The measurement units applied in the account.
- Currency: The currency symbol used in the forms and reports.
- Disable IUM Checkboxes (Y/N)
- Pacific Pride
- Pacific Pride Name
- Time zone: Select the time zone for your account from the list.
- Credit Card Estimated Fee %
- Fuel Deposit (Y/N)
- Allow Fuel Order Generation: Select this option to activate gasoline purchases prediction for your account. For details, see Order Gasoline report.
- Disable Reconcile Deposits form for days before previous working day.: Select this option, to forbid the Reconcile Deposits data editing for all previous working days before current working day. For more information, see Enabling the Reconcile Deposits Functionality.
- Lottery Ticket Sales Commission (%)
- Not use projected data for LY on KPI (Y/N): Select this option, to display actual data for the last year (LY) in the Key Performance Indicators (KPI) report on the CStoreOffice® home page. Clear this option, to display only projected data in the KPI report, even for the last year columns. For more information, see Home Page in Beta Mode and Key Performance Indicators Video Guide.
- Consider PLU items as missed items when processing inventory tickets (Y/N): Select this option, to include the items with PLU into itemized inventory. If this option is disabled, the items with PLU will be considered in the inventory results only on the category level.
- Automatic population of lottery tickets for this state from the global price book to this account (Y/N)
- Enable Linked Items (Y/N): With this option selected, the Linked Items section is available in the item setup form. For details, see Linked Items.
- Loyalty Discount Name: In this field, enter the name of the fuel loyalty program. This name will be displayed in the MISC section of the station options form in CStoreOffice®. For details, see MISC > Station Options.
- Plenti Loyalty Discount Name: The name of the Plenti loyalty discount.
- Merchandise Loyalty Discount Name: In this field, enter the name of the Merchandise Loyalty report, if you need to assign a specific name to this report. If no, leave this field blank. In case this field is left blank, the Merchandise Loyalty report has its default name - Merchandise Loyalty.
- Use Taxes For Shelf Tags (Y/N)
- Is Test Account (Y/N)
- Reset password after selected days: The system will request password reset after a certain amount of days selected in the list:
- Do not use: Password reset is not requested by the system.
- 30 days
- 60 days
- 90 days
- 120 days
- 180 days
- 1 year
- Inactive user log out
- Inactive user log out (minutes)
- New user activation (days)
- Auto populate blank and negative on-hand quantity fields with "0" for price change tickets: Select this option, to add zero on-hand value in the price change tickets.
- Sorting Reports
- Credit Card Batches Validate
- Credit Card Batches + Debit Validate
- Hide CMA Stations for pricebook forms
- Enable Loyalty Program in Promotions: Select this option, to activate the loyalty settings for your account in order to be able to use the old loyalty programs supported only by the SmartPOS cash register. For new nine Go Loyalty promotion types supported by both SmartPOS and Verifone cash register, this option is not applicable. For details, see Activating Loyalty Settings and Setting Up Go Loyalty Programs.
- Account is a merchandise vendor
- Old Shelf Tags
- InRhythm Account Numbers: In this field, the Altria contract number should be entered to make it possible to officially send the Tobacco Scan Data supporting Altria report. This field can be also populated directly on the report form in the Altria Account Number field. This field should be populated only when the following conditions are met:
- The tobacco items are sold.
- One report file for all stations is sent.
- Doc Flow documents available only for account's own operators (Y/N)
- Extended decimals on reports to support weight/volume (Y/N): Configure the format for numerical values in the store reports:
- Select the option, to display the numerical values with an accuracy of two decimal points.
- Clear the option, to display the numerical values as integer values.
- Use FIFO method to calculate reporting cost (Y/N): Turns on or off the FIFO (First-In First-Out) method for calculating cost on the account.
- Dead inventory timeout, days: Use this option in case you need to exclude the outdated inventory data from the inventory calculation. This can be useful, if more than one year has passed since the last inventory at your station. Enter the number of days for calculating inventory. For example, 365 days. All inventory data in an earlier period, which is more than one year ago in our example, will be excluded from the calculation.
- Enable PES Integration
- Allow advanced locations setup: Select this option, to display and configure advanced location settings. For more information, see Advanced Location Options.
- Allow alternative location name setup: Select this option, to display and configure the Alternative Name field in the location settings. For more information, see General Station Options.
- Request price book sync on first CR update: Select this option in case you use the Radiant and/or Clear Vision (ITL) cash registers and you need to enable the Price Book synchronization for your account. For details, see Price Book Synchronization.
- LP discounts source: Select the source, from which the data to perform card validation and discount values mapping should be taken:
- CSO LP Ranges: The data is taken from the corresponding fields configured in CStoreOffice®. This option is selected by default for all accounts.
- External source:
- API URL: Provide the API URL for receiving discount range.
- Default discount value: The system will take the discount value from this field, in case the response from API provided in the API URL field is not received.

- Import Price Book from Cash Register: Select this option to populate your empty price book in CStoreOffice® for the first time automatically by pulling it from your cash register. For details, see Disabling Empty Price Book Autofill from CR.
- Autogenerated external promo id for Promotions: This option defines the way of filling out the External Promo # field in the promotion setup form:
- Option is selected: The External Promo # field is populated automatically by the system.
- Option is unselected: The External Promo # field is populated manually by the user.
- Do not use Promotions for promotion cost management: This option defines the way of managing promotion cost. Select this option, if you want to set up promotion costs for the item regardless of the item's participation in any active promotions.
- Allow to specify extended logic for manual invoice entry and electronic invoices: If this option is turned on for the account, the following settings and permissions can be turned on and off for the account users:
- The Allow Vendor to Update PB option on the Vendor Setup form.
- The Allow to edit Item's Vendor Information permission.
- Show External Number in Item Tag: Select this option, if you need to turn on the External Number field in the item tag form. For more information on how to work with the item tags, see Item Tags.
When this option is selected in the Account Setup form, the Beta mode cannot be turned off in the Profile form. For details, see Turning the Beta Mode On and Off.
Please note that all items created by the parser have only the CR Department value configured while the Category value is empty.
For more information about CStoreOffice® advertising blocks, go to Viewing Ads.
For more information, see Itemized Inventory by Tags Report.

For more information on how to set up a data type to synchronize it with QuickBooks, see Setting Up Data Types as Accounting Items.
The Other Charges value will be deducted from the Short/Over value in the Daily Data section of the Cash Reconciliation form, in case this option is selected and only for the invoices with the Cash method of payment applied.
Please note that the Unit Cost value can be always changed in the Manual Invoice Entry form regardless the Negotiated Cost change Y/N option's value in two following cases:
- When the EDI invoice is entered.
- When the invoice is entered manually by DPS operators.
The Merchandise Loyalty report can be found in CStoreOffice® in Reports > Accounting > Review Sales > Merchandise Loyalty report.
If there is a separate file report sent for each station, the contract number should be entered in the Altria Acc Number column in the report form.
For more information on how to work with the report, see Tobacco Scan Data supporting Altria. For more information on how to troubleshoot the report issues, see Troubleshooting "Empty Report" Issue.
The option is unselected by default. For more information, see Store Reports.

This option is selected automatically when the Send external promo # to CR option is selected in the cash register settings.
- For more information about the cash register settings, see Advanced Settings.
- For more information about the External Promo # field, see Promotion Setup Form.
- For more information on how to send the External Promo ID values from CStoreOffice® to the cash register in different cases, see Sending External Promo ID to CR.


