


To define employee properties, follow the steps:
- Go to Settings > General > Employees.
- Click New to add a new employee or click an employee to edit its properties.
As a result, you can see a new web form on the screen to add a new employee or edit an existing one.
The New Employee web form provides you with the following properties of the employee profile:
Personal Data
Type in an authentication email, name, address, personal details, contact information, identifiers within a company (PIN or employee ID).
For more information on how to set up an authentication email, see Setting Up Authentication Email.
To specify the contact information, choose a country on the drop-down list Country, and type in an employee's address in the Address text field. CStoreOffice® will display variants that match the entered address or a part of it, and automatically populate the address fields below depending on the selected variant.
- Active: Select this option if an employee shall be active in the system for day-to-day routine operations.
- Access to CSO: Select this option to authorize the employee to log in to CStoreOffice®. The Authentication Email field appears below after selecting this option.
- First Name: Enter the employee's first name.
- Last Name: Enter the employee's last name.
- Two-Factor Authentication: Turn the switch on or off to enable or disable multifactor authentication (MFA) for the user.
- Unlink device: Click this link to unlink the connected MFA app from the user account (only available for existing users).
- Authentication Email: Enter the email the employee will use to log in to CStoreOffice®.
- Gender: Select the employee's gender.
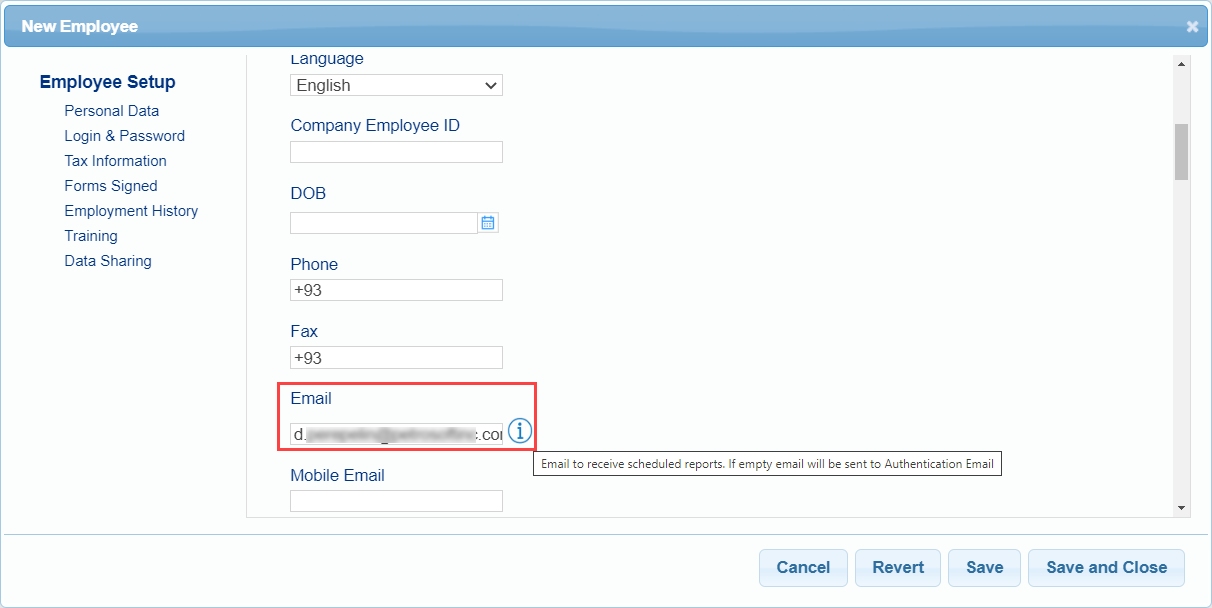
- Language: Select the preferred employee's language.
- Company Employee ID: Type in an employee identifier. It can be found in the cash register settings. This value affects the employee payroll data automatic update in CStoreOffice®. The payroll data in CStoreOffice® shift reports is uploaded from the cash register automatically only if the Company Employee ID field is populated with the employee identifier from the cash register.
- DOB: Choose a date of birth from the calendar. If this property is specified, information about the employee's birthday can be shown on the Home page on due date.
- Phone: Enter the employee's contact phone number.
- Fax: Enter the employee's fax number.
- Email and Mobile Email: These email addresses are used to send CStoreOffice® updates and notifications to the employee, for example, Fuel Report or Inventory Report. Please, notice if you leave the text field Email empty, a notification will be sent to an Authentication Email.
- Enter the employee's country, ZIP code, city, and other location information in the corresponding fields.
- PIN: Enter the employee's PIN code.
- SmartPOS PIN: Enter the PIN code the employee will use to access SmartPOS unit.
Only one MFA app can be linked to a user account at a time. Unlink it if the user has lost MFA device, accidentally removed the app, or wants to switch to a new device.
Login & Password
Enter credentials for logging in to the system and define access level — what exactly the employee can see, monitor and do. The properties in this section are security related and sensitive, so all of them are recommended:
- Enable Access: Choose this option if the employee is allowed to log in to the system. This property is usually used in combination with Active property in the Personal Data section.
- Login: Note that login is entered when the new employee is added and cannot be edited.
- Interface: Select interface type the user will see when they log in. For more information on the interface types, see Switching Between Home Page Views.
- Workplaces: Select locations the employee will have access to:
- In the left list select a location and move it to the right list by means of arrows.
- Use the Control key on your keyboard to select several locations at once. Click double arrows to move all available locations at once.
- If you need to grant an employee an access to all locations within one company, including newly added locations, select a company instead of locations. For details, see How to assign all newly created locations to an employee in bulk.
- Roles: Assign a role to the employee. A role is a specific set of permissions required to perform a job function. It is an important property because it determines what information the employee can access and what tasks they can perform within CStoreOffice®. For more information about roles see About Permissions, Roles, and Role Templates and Managing Roles.
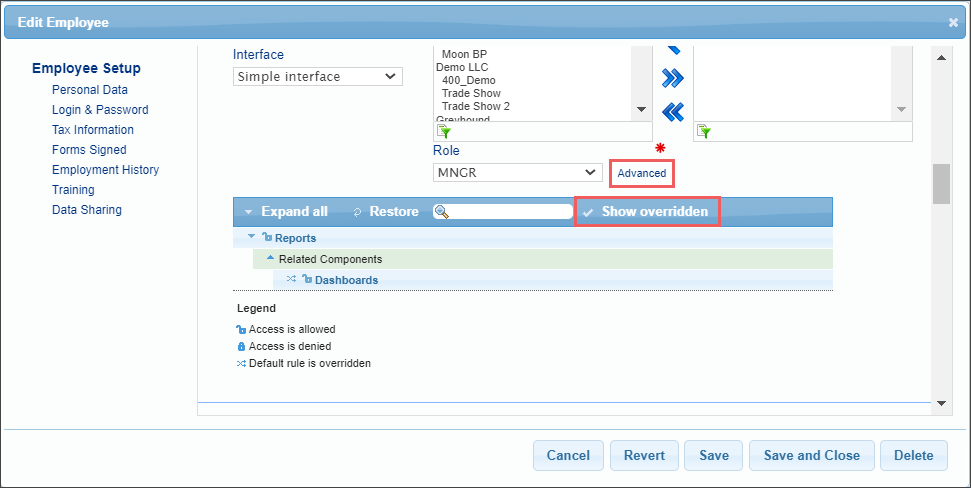
- Roles (advanced): The advanced mode provides the ability to assign permissions directly to users. To view and edit permissions assigned directly to the employee, click advanced. Work with the permissions the same way as with permissions for roles. For more information, see Managing Roles.
Only users with appropriate permissions can assign roles to the employees.
Please note that all permissions edited at the user level overwrite the user role permissions. To view the list of all overwritten permissions, click Advanced > Show overridden.
Assigning permissions directly to users is a legacy feature and it is recommended to avoid it. The feature is retained to prevent breaking workflow of our customers who have not switched to role-based permission management yet. Role-based model provides better control over permissions within your account.
Tax Information
Use this section to store information for calculating taxes withheld from the employee. These properties are not used in CStoreOffice® payroll calculations.
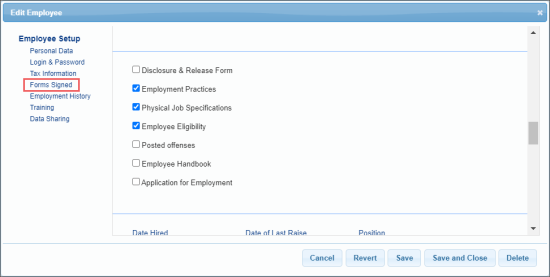
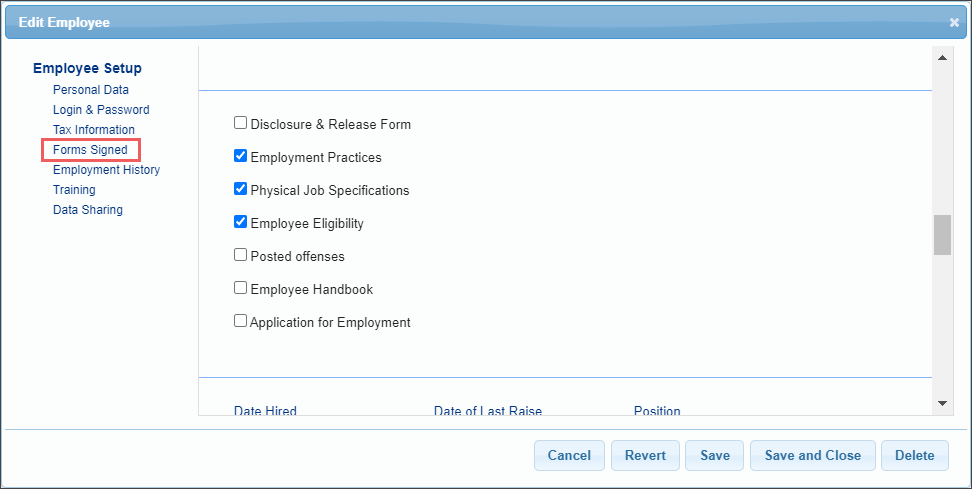
Forms Signed
In the Forms Signed section, you can view the list of forms signed by the user:
- Disclosure & Release Form
- Employment Practices
- Physical Job Specifications
- Employee Eligibility
- Posted offenses
- Employee Handbook
- Application for Employment
Employment History
When the employee's work record changes, for example, they receive a raise or get a warning, update this section to reflect the change:
- Date Hired
- Date of Last Raise
- Position
- Starting Rate
- Current Rate: This property is used to display information in Payroll Data (in Data Entry) and Payroll report.
- # of Warnings
- Annual Start Salary
- Annual Current Salary
- Date Fired
- Reason
- Notes
Training
Keep track of training sessions taken by the employee and their evaluation.


