


You can perform the following actions with the roles:
Only users with appropriate permissions can create, edit, and delete the roles.
Adding New Role
Adding a new role feature is permission-based.
- Go to Settings > General > Roles.
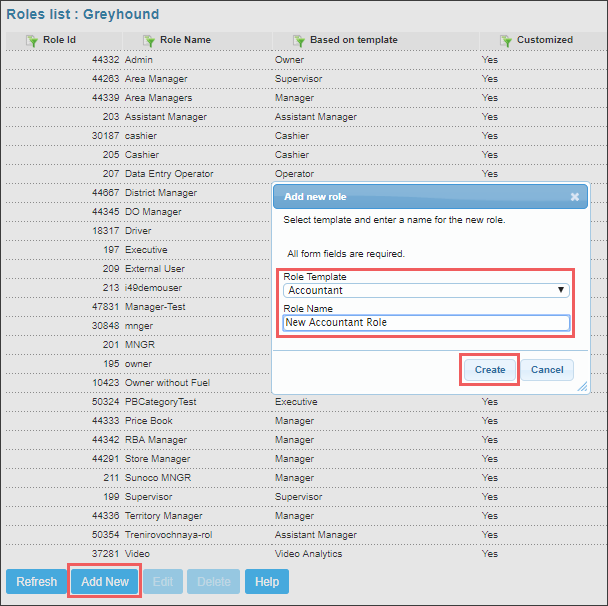
Result: The Roles list opens in a separate window. - At the bottom of the Roles list, click the Add New button.
Result: The Add new role window opens. - In the Add new role window, do the following:
- In the Role Template list, select the template based on which you want to create your role.
- In the Role Name list, type the name for your role.
- At the bottom of the window, click the Create button.

- Wait until your new role is created and the Done successfully message appears.
- To continue working with your role, in the success message, click Close.
You cannot select existing role in the Role Template list, only the template.
(Only for the accounts with the system user role) For more information on how to work with role templates, see Managing System Role Templates.
The new role appears in the roles list. It has the same permissions as the template it is based on. You can change the permissions and customize the role to your needs.
Customizing Role Settings
To customize the role settings, follow the steps:
- Go to Settings > General > Roles.
Result: The Roles list opens in a separate window. - In the Roles list, do the following:
- Select the role you need to customize.
- At the bottom of the list, click the Edit button.
Result: The Role management form opens in a new window. - In the Role management form, do the following:
- Change any of the following role settings:
- In the Role Name field, change the role name.
- Select the Allow assignment for all users check box if you want to have a possibility to assign this role to any other user on your account.
- In the Access Data Types list, change role permissions. For details, see Customizing Role Permissions.
- In the Available roles list to assign, select the roles that can be assigned to the users by the user with the current role.
- At the bottom of the form, click Save and then click Close.
When the Allow assignment for all users check box is selected, the role is available in the Available roles list to assign list for other roles.
Customizing Role Permissions
The role permissions are displayed in the Role management form > Access Data Types section.
You can view and filter permissions; allow or deny access to a module, component, or action; and restore a specific permission or the whole role to its default state.
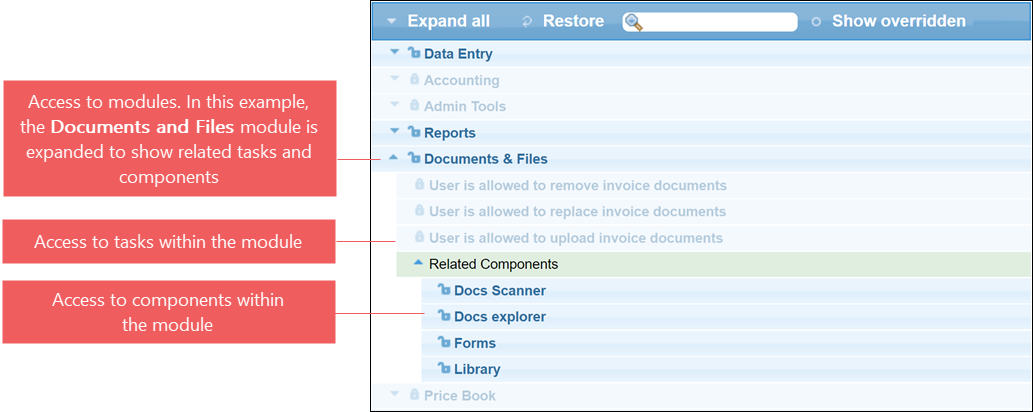
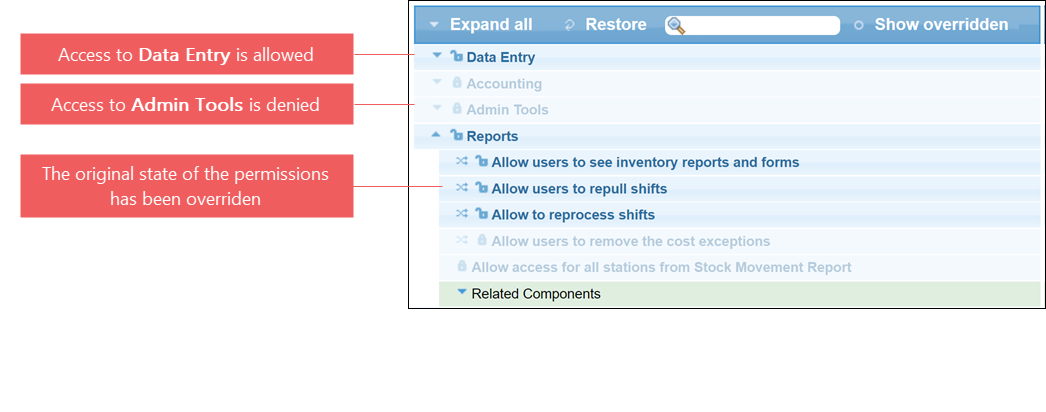
The first level of permissions, which is displayed when you open the page, is access to modules. Components and tasks are displayed within the modules they are related to. Icons to the left of each permission indicate its status: allowed or denied, and whether the default state of the permission has been overridden. Additionally, permissions with denied access are dimmed.
The following table shows what you can do to edit the role permissions.
| To... | Do the following: |
|---|---|
|
To view tasks related to a module |
Click the "module" permission to expand or shrink it. |
|
To view components related to a module |
Expand the"module" permission and click Related Components within it. Another click hides the related components |
|
To allow or deny access for a permission |
Hover over the permission and click the corresponding icon ( |
|
To restore a permission to its default state (as in the template) |
Hover over the permission and click the Back to default ( |
|
To restore the whole role to its default state (template) |
Click Restore on the menu bar above permissions. |
 or
or  ) in the right part of the form.
 )icon in the right part of the form.
The menu bar above the permissions provides you with additional view and filtering capabilities, as presented in the following table.
| To... | Do the following: |
|---|---|
|
To expand (or shrink) all the modules at once |
Click Expand All (or Shrink All). |
|
To search for a permission by name |
In the search box, start entering full or partial name of the permission. Only the permissions whose name contains the entered combination are displayed. |
|
To show only permissions with overridden default state |
Click Show overridden. Click it again to show all the permissions. |
|
To restore a permission to its default state (as in the template) |
Hover over the permission and click the Back to default ( |
|
To restore the whole role to its default state (template) |
Click Restore in the menu bar above permissions. |
If a user seems to have (or lack) a permission that contradicts the permission settings for the assigned role, for example, sees a form that is denied for the role, please check that this permission is not assigned directly to the user in the employee properties. For more information, see Employees.
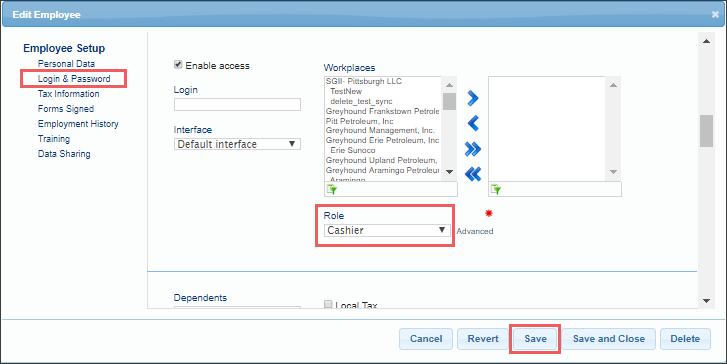
Assigning Role to Employee
- Go to Settings > General > Employees.
Result: the Employees list report opens. - In the Employees list report, click the employee to whom you want to assign the role.
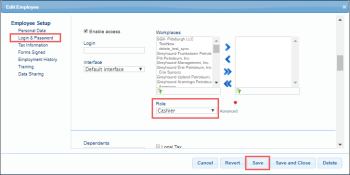
Result: The Edit Employee form opens in a new window. - In the Edit Employee form, do the following:
- Go to the Login & Password section.
- In the Role list, select the role you want to assign to this employee.
- At the bottom of the form, click the Save button.
Each role has the predefined list of roles that can be assigned to the users. This role list is customized in the Role management form > Available roles list to assign list by the user with higher permissions.
Deleting Role
To delete the existing role, follow the steps:
- Go to Settings > General > Roles.
Result: The Roles list opens in a separate window. - In the Roles list, do the following:
- Select the role you want to delete.
- At the bottom of the list, click the Delete button.
- In the dialog window, confirm role deletion.


