


The Accepting Pending Invoice feature is permission-based and can be granted to the user or denied with the following permissions:
- Allow accepting/rejecting multiple invoices: If this permission is turned on, the user can accept and reject multiple invoices without additional system validation checks, such as:
- Invoices with new items that are not in the price book.
- Invoices with different UiC (units in case) values.
- Invoices with incomplete items. This validation check is skipped only when multiple invoices are processed in a batch. The invoices with incomplete items are not processed and remain in the Pending state when the following conditions are met:
- Multiple invoices are processed one by one, not in a batch.
- The Allow to accept merchandise invoices with incomplete items: permission is not granted to the user. If both permissions are granted, invoices with incomplete items can be accepted in both ways, in a batch and one by one. - Allow to accept merchandise invoices with incomplete items: If this permission is turned on, the user can accept invoices with incomplete items. To forbid the user to accept invoices with incomplete items, both these permissions must be turned off.
For more information on how to grant a permission to the user, see Roles and Permissions Management. Please note that in addition to the permissions above, corresponding system settings must be configured at the account level. In case the permissions do not work as described, contact Petrosoft Support Team to adjust account settings.
To accept a pending invoice in CStoreOffice®:
- Move the CStoreOffice® home page till the Merchandise section.
- In the Pending Invoices subsection, select the station, for which you want to open the pending invoices and then click it.
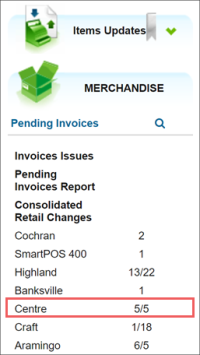
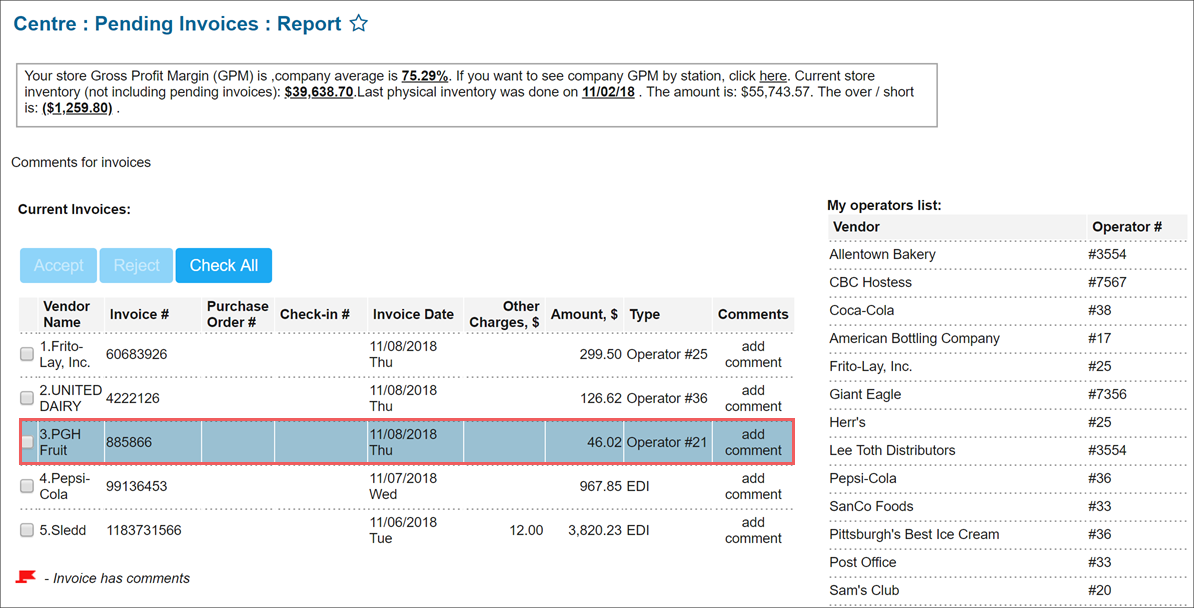
Result: The Pending Invoices report opens for the selected station. - In the Pending Invoices report, go to the Current Invoices section and then click the invoice you want to accept.
- Wait until the invoice data are uploaded and the invoice form opens at the end of the pending invoices report's page.
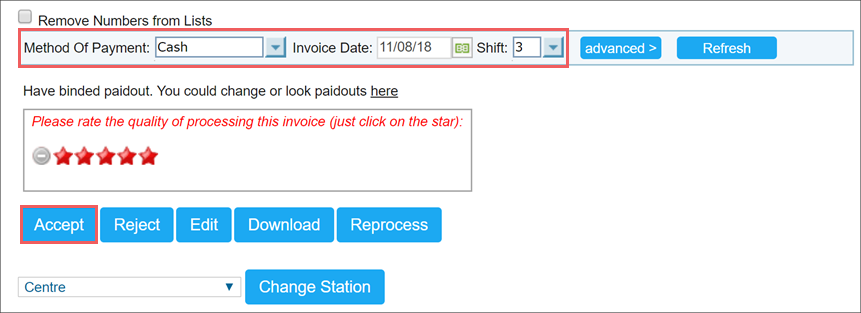
- In the pending invoice form, do the following:
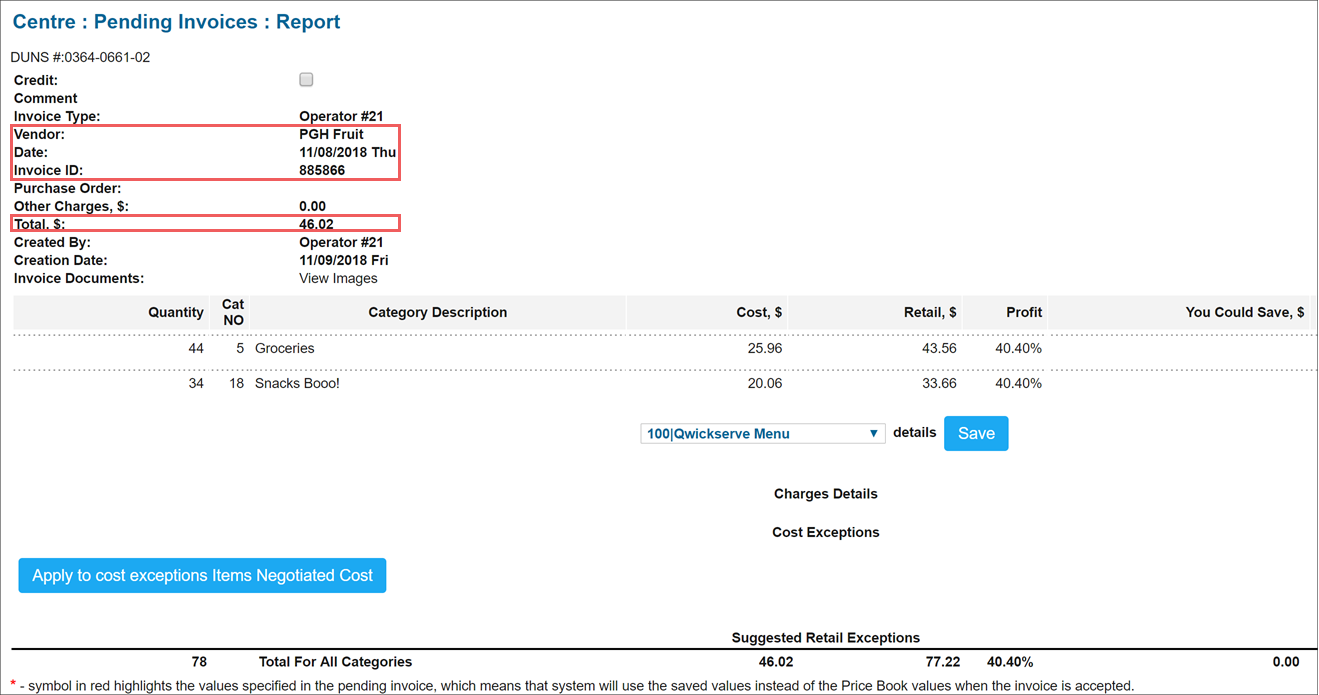
- Make sure the following invoice data are correct:
- Vendor: Invoice vendor.
- Date: Invoice date.
- Invoice ID: Invoice number.
- Total, $: The amount of the invoice.
Please note that the By Children inventory method is applied by default during the pending invoice acceptance. If you want to select the By Parents inventory method, make sure the Allow CR Updates option is selected for the location. For details, see Shared Options.
Please note that the Total For All Categories value includes the Other Charges value if any was stated for the invoice. For more information, see Creating and Invoice.
- (Optional) In the invoice table, click any entry to expand invoice items data and verify that all items have the correct cost and retail price. You can expand all entries at once by clicking the Expand All button.
- At the bottom of the pending invoice form, do the following:
- In the Method of Payment list, select the method of payment.
- In the Invoice Date field, select the invoice date.
- In the Time field, enter the invoice time.
- In the Shift list, select the invoice shift.

You can edit any item's data by right-clicking it and selecting the corresponding option.
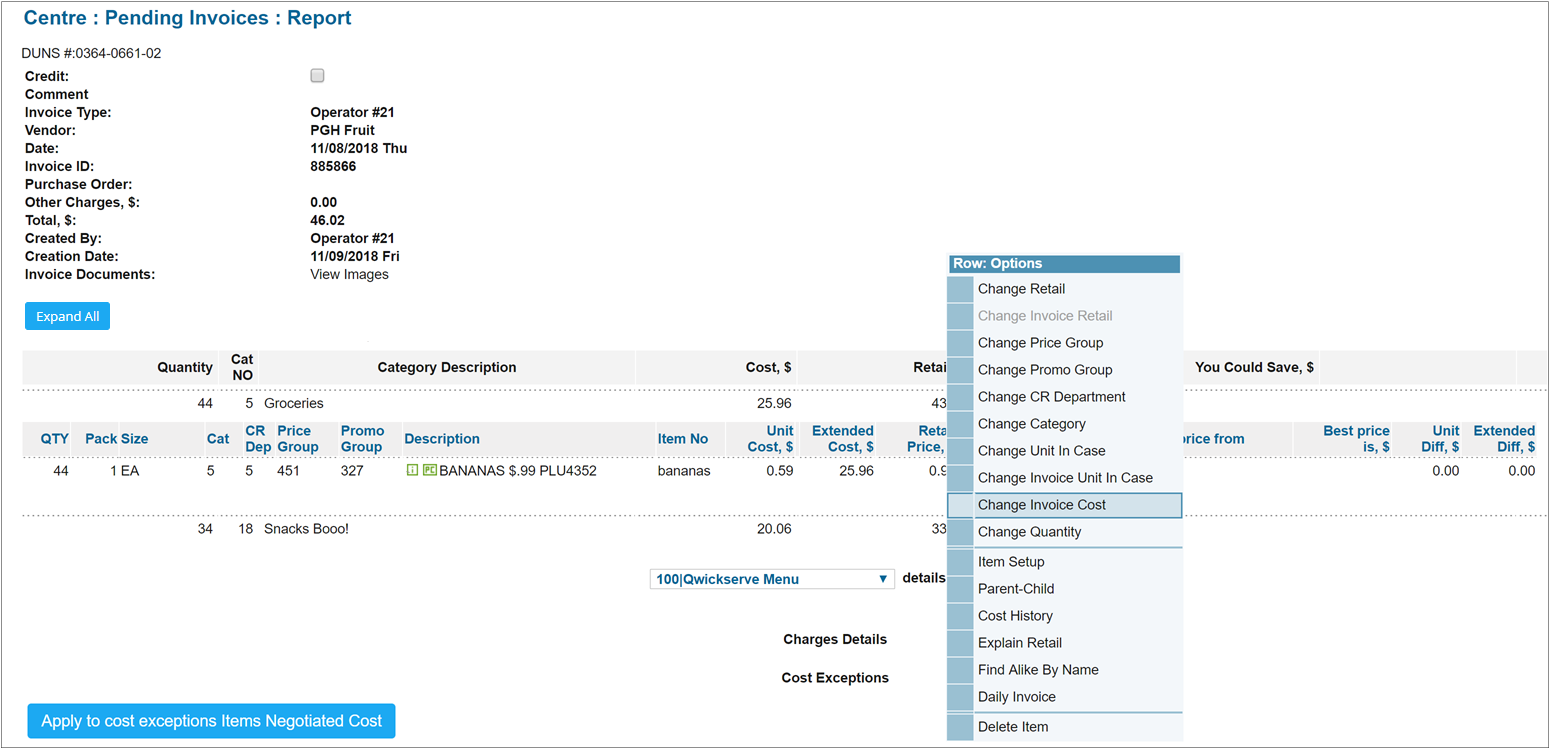
The Delete Items operation in the Options list is permission-based. To be able to delete items from the Pending Invoices report, the user must have the Allow users to delete Items from invoices permission granted. For more information, see Roles and Permissions Management.
The time of the invoice influence the real time inventory. Make sure you enter the invoice time value accurately. You can enter the exact time only if the Use real-time inventory option is enabled for the location. For details, see
- At the bottom left of the pending invoice form, click Accept.
- Wait until the invoice is accepted.
- Make sure the invoice is accepted. Do the following:
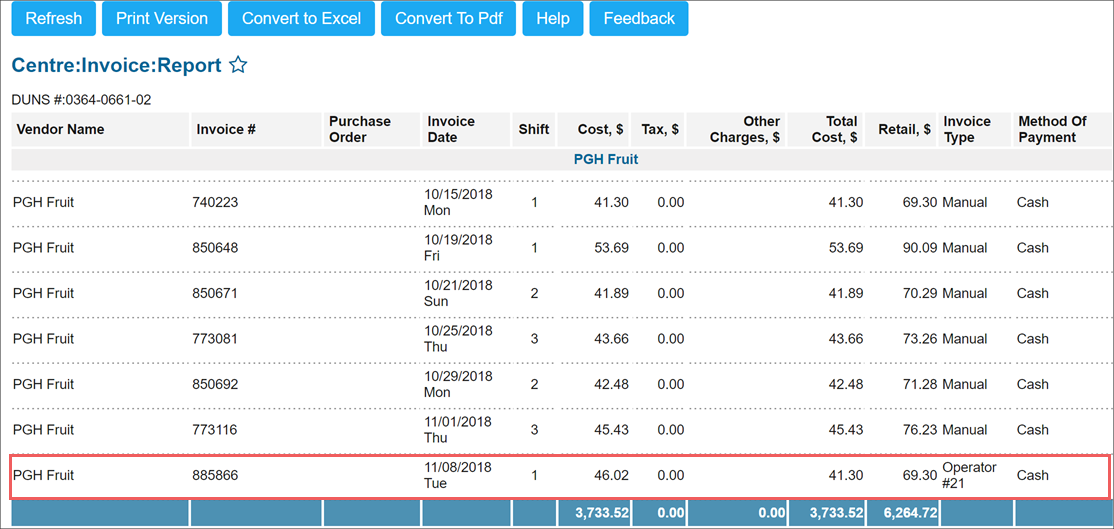
- In the CStoreOffice® home page, go to Reports > Store.
- On the left of the reports list, select your station.
- Go to the Store reports list > Sales section > Deliveries and Invoices subsection.
- Click the Invoices report.
Result: The Invoices report opens for the selected station. - In the Invoices report, select the period, including the date of your invoice acceptance and then click Refresh.
Result: The accepted invoice is displayed in the Invoices report.
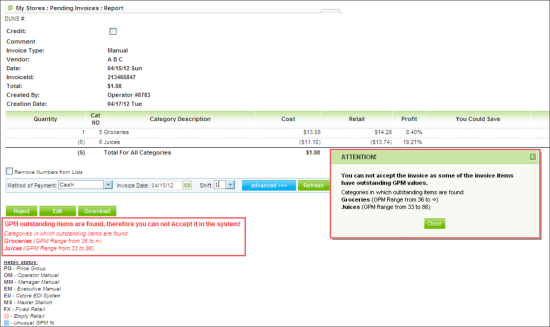
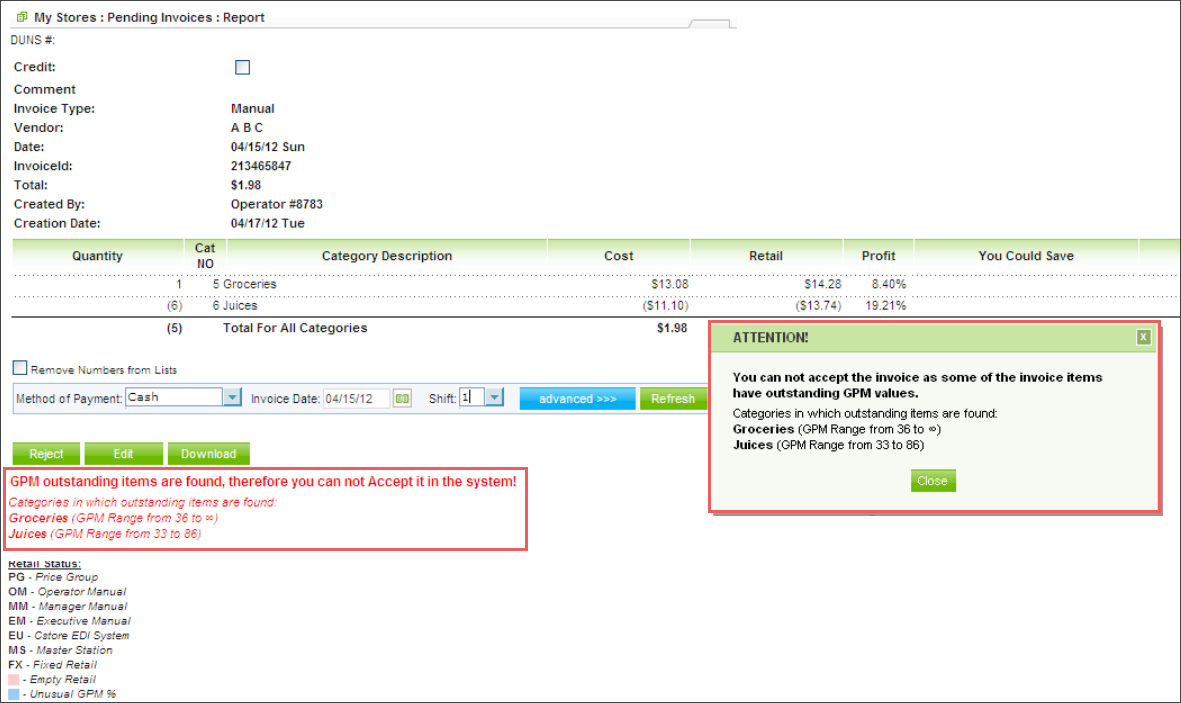
Some items in the pending invoice may have the category's GPM value which is out of range. To be able to accept the invoice with such items, the user must have the Allow users to accept Invoices with Categories out of set GPM range permission granted.
For more information about setting the GPM range for the categories, see GPM Range Management report.
If this permission is not granted, the user is unable to accept the invoice with such items. In this case, when the Accept button is clicked:
- The You cannot accept the invoice as some of the invoice items have outstanding GPM values message is displayed.
- The categories with the GPM value which is out of range are listed.
For more information, see Roles and Permissions Management.
Related Information
Accepting invoice into CStoreOffice®
This training will guide you through the steps that are required in accepting an invoice into CStoreOffice® back-office and creating a corresponding paid-out.


