You can perform the following actions in the Data Sources Panel:
- Import data from different sources
- Process drafts. For details, see Using Draft in Working Area.
Importing Data from Different Sources
The data can be imported to both the newly created draft and the saved (preconfigured) draft selected from the drafts list.
You can import the data to the draft from the following sources:
- Account Price Book
- Location
- Location Price Book
- Location Cash Register
- GateKeeper
- Drafts
- Handheld
- From File
Each Price Book element has its own set of data sources for importing data. For details, see the help section of each Price Book element.
Importing Data from Account Price Book
You can import all Price Book elements from the account price book to a draft.
To import Price Book elements from the Account Price Book, follow the steps:
- Create or select a draft. For details, see Working with Drafts List.
- Go to Data Sources Panel and then click the Add More button.
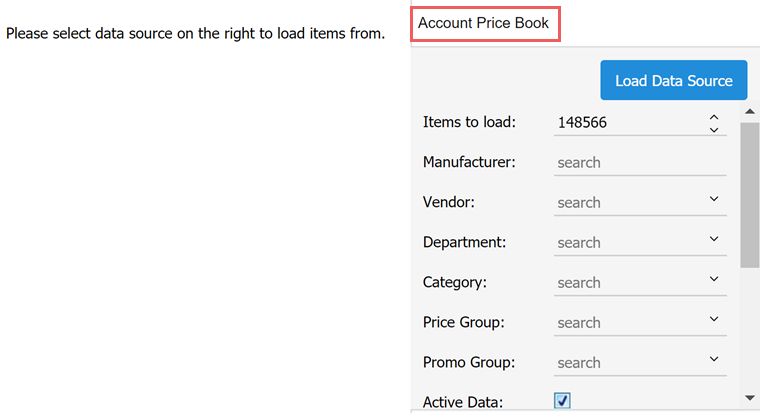
- Expand the Account Price Book section.
- Depending on the imported Price Book element, specify any of the following criteria:
- Categories to load, Departments to load, Items to load, Price Groups to load, Promo Groups to load, or Promotions to load - displays the number of the selected Price Book elements to be uploaded to the buffer
- In case the items are imported:
- Manufacturer: Start typing the manufacturer's name and then select it from the list.
- Vendor: Start typing the vendor's name or select one or several vendors from the list.
- Department: Start typing the department's name or select one or several departments from the list.
- Category: Start typing the category's name or select one or several categories from the list.
- Price Group: Start typing the price group's name or select one or several price groups from the list.
- Promo Group: Start typing the promo group's name or select one or several promo groups from the list.
- Load linked items: Select this option to upload all linked items together with the selected items.
- Load Parent/Child: Select this option to upload all linked parent and child items together with the selected items.
- UPC: Enter the digits the UPCs that the imported data should include.
- Size: Enter the symbols that size of the imported data should include.
- Name: Enter the symbols that name of the imported data should include.

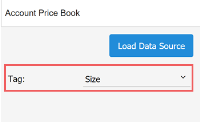
- In case the item tags are imported - in the Tag list, select one or several tags.
- In case the vendors are imported:
- Name: Enter the symbols that the name of the imported data should include.
- Type: Select the vendor type from the list: Fuel, Expenses, Merchandise, Lottery.
- Country: Select the vendor's country from the list.
- State: Select the vendor's state from the list.
- Import vendor items: Select this option to import all items of the selected vendors together with the vendors.
Only valid items are imported if the Import vendor items option is selected.

- (For Items, Vendors only) Select the Active data option to upload the data in the 'Active' status only.
- Click the Load Data Source button.
To upload less elements, enter your number manually. In this case the most popular and frequently used elements will be uploaded.
Please note that for the selected vendor only the items that meet the following conditions are displayed in the Items to load list and can be imported:
- The selected vendor is configured as a primary vendor for the item.
- The item's Cost value is not equal to 0.
For more information, see Setting Up Station Item Attributes and Setting Up Item Cost.


Importing Data from Location
You can import from a location to a draft the following Price Book elements:
- Price Groups
- Promotions
- Vendors
To import the above Price Book elements from the location, follow the steps:
- Create or select a draft. For details, see Working with Drafts List.
- Go to Data Sources Panel and then click the Add More button.
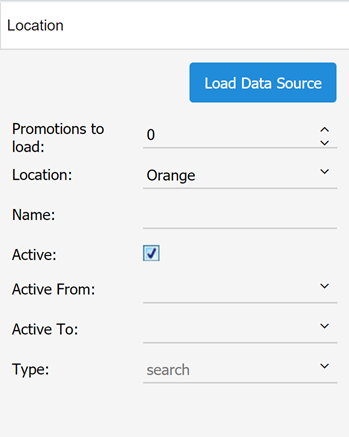
- Expand the Location section, and then specify any of the following search criteria:
- Price Groups, Promotions, or Vendors to load - displays the number of the selected Price Book elements to be uploaded to the buffer.
- Location: Select the location, from which you want to upload the data.
- In the case the vendors are imported:
- Name: Enter the symbols that the name of the imported data should include.
- Type: Select the vendor type from the list: Fuel, Expenses, Merchandise, Lottery.
- Country: Select the vendor's country from the list.
- State: Select the vendor's state from the list.
- Import vendor items: Select this option to import all items of the selected vendors together with the vendors.

- (For the Promotions and Vendors only) Active data - select this option to upload the data in the 'Active' status only.
- Click the Load Data Source button.

To upload less elements, enter your number manually. In this case the most popular and frequently used elements will be uploaded.

Importing Items from Location Price Book
You can import the Price Book elements from any location of the current account.
To import items from the Location Price Book, follow the steps:
- Create or select a draft. For details, see Working with Drafts List.
- Go to Data Sources Panel and then click the Add More button.
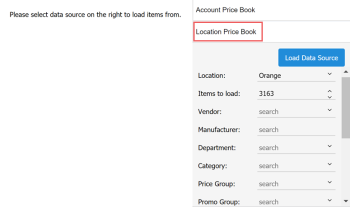
- Click the Location Price Book section and then specify any of the following search criteria:
- Location: Start typing the location's name or select one or several locations from the list.
- Items to load: Displays the number of items to be uploaded to the buffer.
- Vendor: Start typing the vendor's name or select one or several vendors from the list.
Please note that for the selected vendor only the items that meet the following conditions are displayed in the Items to load list and can be imported:
- The selected vendor is configured as a primary vendor for the item.
- The item's Cost value is not equal to 0.
For more information, see Setting Up Station Item Attributes and Setting Up Item Cost. - Manufacturer: Start typing the manufacturer's name and then select it from the list.
- Department: Start typing the department's name or select one or several departments from the list.
- Category: Start typing the category's name or select one or several categories from the list.
- Price Group: Start typing the price group's name or select one or several price groups from the list.
- Promo Group: Start typing the promo group's name or select one or several promo groups from the list.
- Active data: Select this option to upload the data in the 'Active' status only.
- Load linked items: Select this option to upload all linked items together with the selected items.
- Load Parent/Child: Select this option to upload all linked parent and child items together with the selected items.
- UPC: Enter the digits the UPCs of the imported data should include.
- Size: Enter the symbols the size of the imported data should include.
- Name: Enter the symbols the name of the imported data should include.
- Click the Load Data Source button.
To upload less items, enter your number manually. In this case the most popular and frequently used items will be uploaded.

Importing Data from Location Cash Register
You can use the location's cash register as a data source for importing the Price Book items, departments, or promotions, when these elements are already configured on the location's cash register.
The most common case is when you've just created a station (location) and need to quickly add the items, departments, or promotions from the connected cash register.
To import data from the Location Cash Register, follow the steps:
- Create or select a draft. For details, see Working with Drafts List.
- Go to Data Sources Panel and then click the Add More button.
- Expand the Location Cash Register section.
- In the Location list, select the location.
- Click Browse and then select the dump file from the cash register.
- Click the Load Data Source button.
Importing Data from GateKeeper
GateKeeper represents a reference price book containing the most popular and valid CStoreOffice® items.
You can import the categories and items from a cash register to a draft.
To import the categories or items from the GateKeeper, follow the steps:
- Create or select a draft. For details, see Working with Drafts List.
- Go to Data Sources Panel and then click the Add More button.
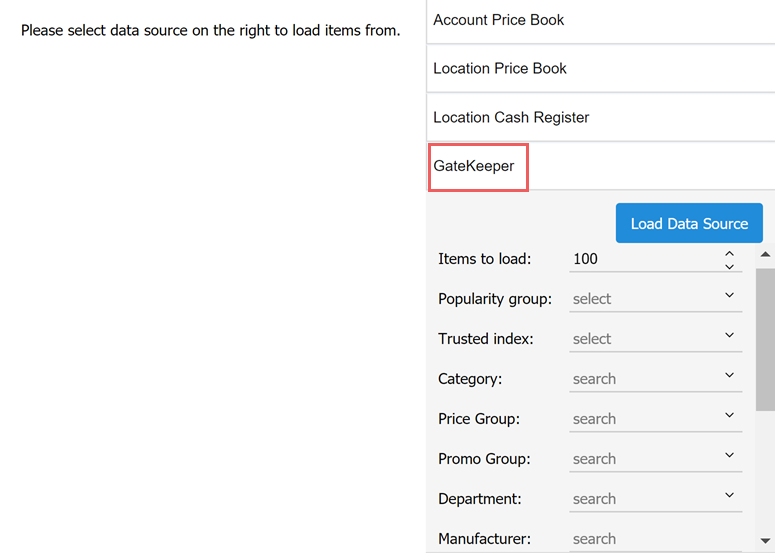
- Click the GateKeeper section and then specify any of the following search criteria:
- Categories or Items to load - displays the number of categories or items to be uploaded to the buffer.
- In case the items are uploaded:
- Popularity group: Select the popularity group from the list.
- Trusted index: Select the trusted index from the list.
- Category: Start typing the category's name or select one or several categories from the list.
- Price Group: Start typing the price group's name or select one or several price groups from the list.
- Promo Group: Start typing the promo group's name or select one or several promo groups from the list.
- Department: Start typing the department's name or select one or several departments from the list.
- Manufacturer: Start typing the manufacturer's name and then select it from the list.
- Vendor: Start typing the vendor's name and then select it from the list.
- UPC: Enter the digits the UPCs of the imported data should include.
- Size: Enter the symbols the size of the imported data should include.
- Name: Enter the symbols the name of the imported data should include.
- Load linked items: Select this option to upload all linked items together with the selected items.
- Click the Load Data Source button.

To upload less categories or items, enter your number manually. In this case the most popular and frequently used categories or items will be uploaded.
Importing Data from Drafts
You can import from the existing drafts to the selected newly created or preconfigured draft all Price Book elements.
To import Price Book data from the draft, follow the steps:
- Create or select a draft. For details, see Working with Drafts List.
- Go to Data Sources Panel and then click the Add More button.
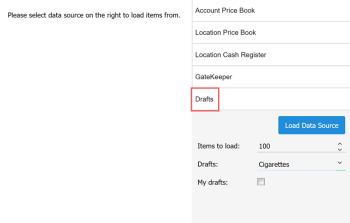
- Expand the Drafts section and then specify any of the following search criteria:
- Items to load: Displays the number of items to be uploaded to the buffer.
- Drafts: Select the draft saved and shared by another user.
- My drafts: Select this option to display your own saved drafts in the Drafts list.
- Click the Load Data Source button.
To upload less items, enter your number manually. In this case the most popular and frequently used items will be uploaded.
You can view the drafts shared by system users only

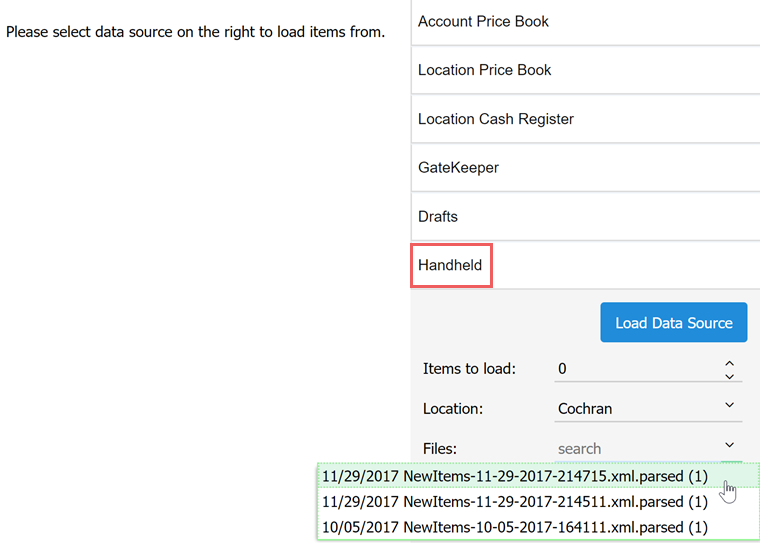
Importing Data from Handheld
You can import Price Book items from the handheld files stored in CStoreOffice® for each location.
To import Price Book items from the handheld file, follow the steps:
- Create or select a draft. For details, see Working with Drafts List.
- Go to Data Sources Panel and then click the Add More button.
- Expand the Handheld section.
- Items to load: Displays the number of items to be uploaded to the buffer.
- Location: Start typing the location's name or select a location from the list of available locations.
- Files: Select one or several stored files from the list of available files.
- Click the Load Data Source button.

To upload less items, enter your number manually. In this case the most popular and frequently used items will be uploaded.
In case two or more files contain the same item, the item from the last created file will be imported only.
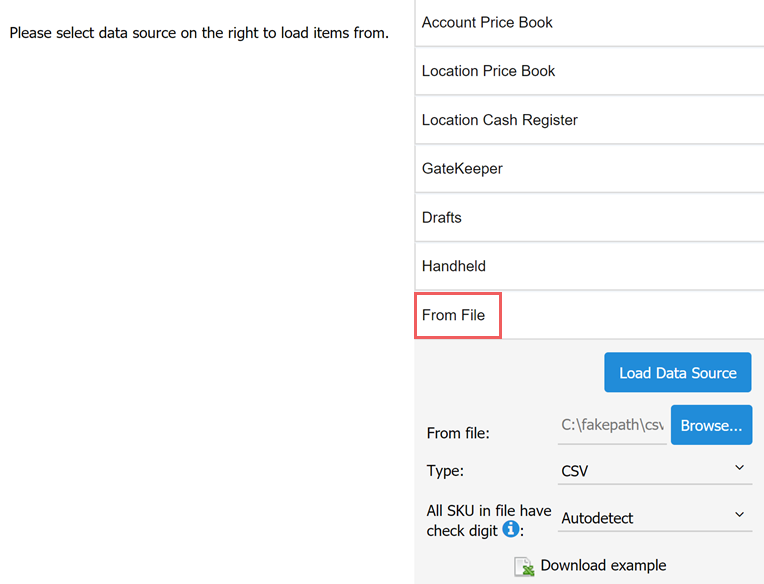
Importing Data from File
You can import all Price Book elements from the file in the CSV or XLSX format to a draft.
To import data from a file, follow the steps:
- Create or select a draft. For details, see Working with Drafts List.
- Go to Data Sources Panel and then click the Add More button.
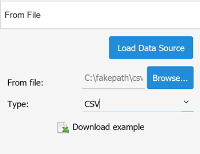
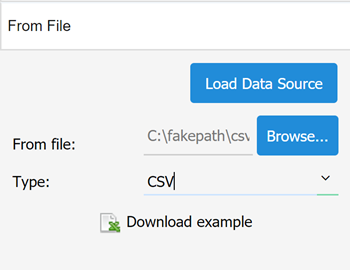
- Expand the From File section.
- Make sure the file you want to import the data from has a correct data structure. To see the data structure example, click Download example.
- Select the file:
- Click Browse.
- Select the file in the CSV or XLSX format.
- Double click the file or click Open.
- In the Type field, select the file type.
- For Price Book Items only. Specify how to process imported items depending on the check digit availability on their SKU codes. Select one of the following options:
- Autodetect: Default value. Leave this option selected, in case you want the system detects and validates check digits for SKU codes of the importing items.

- Yes: Select this option, if all SKU codes in your file have the check digit.
 Items Processing, if Yes is Selected
If Yes is selected, each SKU code of the importing items is checked for its compliance with the length determined by relevant SKU type in the following way:
Option # If the length of SKU code... Then... 1 Equals to the length of the relevant SKU type, 1) The item is marked as valid.
2) The item is imported to the draft.
2 Is not equal to the length of the relevant SKU type, 1) Zero values are added to the beginning of the SKU code to the required length.
2) The length of the SKU code is checked again:
- if it equals to the length of the relevant SKU type, then see option 1.
- if it is not equal to the length of the relevant SKU type, then the item is marked as invalid and its import to the draft is failed. - No: Select this option, if all SKU codes in your file have no check digit.Items Processing, if No is Selected
If No is selected, each SKU code of the importing items is checked for its compliance with the length determined by relevant SKU type in the following way:
If the length of SKU code... Then... Equals to the length of the relevant SKU type, 1) The item is marked as valid.
2) Correct check digit is counted and added to the SKU code.
3) The item is imported to the draft.
Is not equal to the length of the relevant SKU type, 1) The item is marked as invalid.
2) The item is not imported to the draft.
For more information about Price Book items data structure, see Preparing File with Items for Importing.
- Click the Load Data Source button.