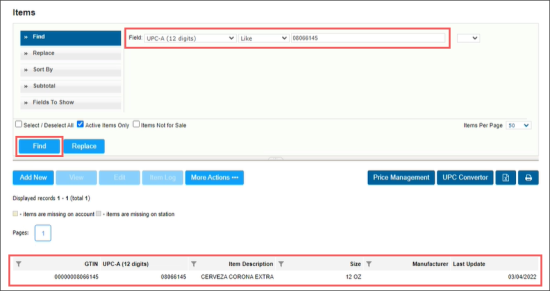
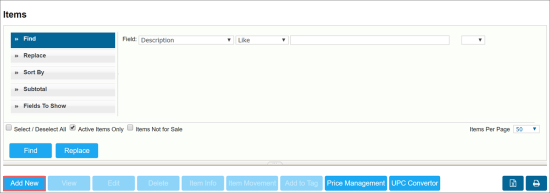
To find the item by its EAN-8 code:
- From the CStoreOffice® home page, go to Price Book > Items.
- Go to the Find section.
- In the Field row, select:
- UPC-A or UPC-E
- Like
- The EAN-8 code
For more information, see Searching for Price Book Elements.
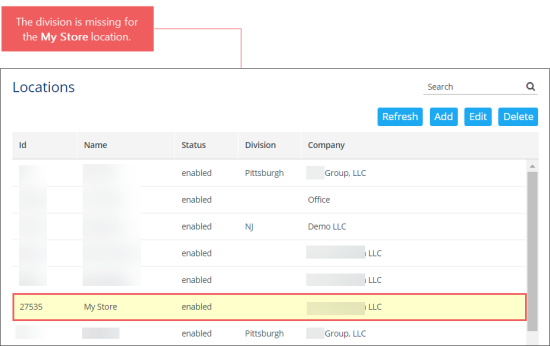
If you cannot find your existing location in the locations list, make sure this location is configured properly and has a division assigned to it.
To check if divisions are assigned to your locations (stations), go to the Settings > Locations.
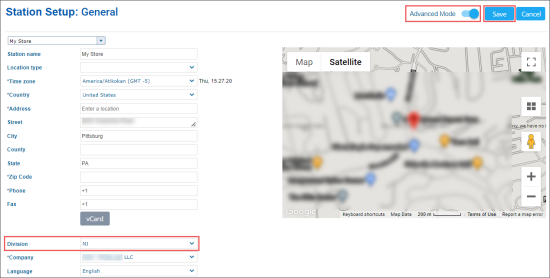
To assign missing division in the Locations list:
- Double-click the corresponding location.
- In the location setup form, switch the Advanced Mode toggle to the On position.
- In the Division list, select the division.
- At the top right of the form, click Save.
For more information, see Setting Up Locations.
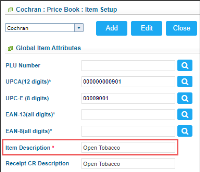
One of the possible reasons is that only the Item Description value only was changed in CStoreOffice® and other item settings remained the same.
The Cash Register Updates Manager in CStoreOffice® does not send the Item Description updates to the Updates section, if there are no changes to other item settings.
To sent the item description updates from CStoreOffice® to the cash register:
- Change another item settings, such as retail price and so on.
- Send updates to the cash register.
For more information on how to send the updated from CStoreOffice® to the cash register, see Cash Register Updates Manager.
Make sure the settings of your departments and categories configured in CStoreOffice® completely match the settings of corresponding departments and categories at the cash register.
Make sure the user, who created an item, has access to all locations you need.
The item created by the user with the limited access to the account's locations, will be available only on those locations the user has an access to.
Example
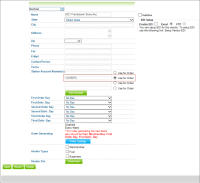
In the image below, the user has access only to the Scottdale location. So, all items created by this user will be available only on the Scottdale location correspondingly.
For more information on how to provide an access to the locations, see Defining Employees Properties.
To export your data from CStoreOffice®, you can use the following reports:
Depending on the type of data you need, you can choose other CStoreOffice® reports. For details, see Reports.
Each report has the Convert to Excel button. If you need to load the report data to a file of the XLSX format, generate the report data you need and click Convert to Excel.
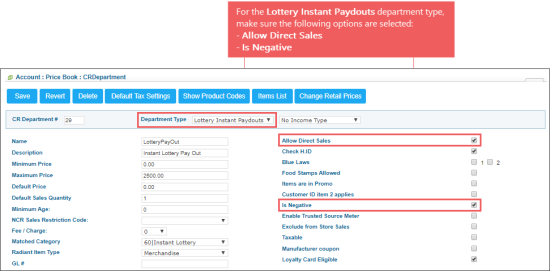
Make sure the Allow Direct Sales and Is Negative options are selected in the department setup form. Otherwise the Scanned value for this department will be equal to zero in the shift report. For details, see CR Departments and PLU Sales Report.
Make sure the Upload PLUs only, Upload UPCs only, or Upload Lottery only options are not selected in the cash register options in CStoreOffice®. For details, see Cash Register Settings.
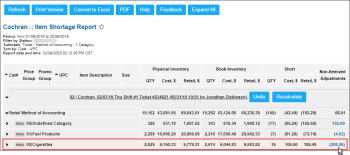
One of the reasons why the non-itemized adjustments are too large is that the parent-child items have different categories. To get the full list of items with different categories for parent and child items:
- From the CStoreOffice® main page, click Reports > Store.
- In the left menu, select your station.
- In the Store reports list, go to Inventory > Shortages and then click Item Shortage.
Result: The Item Shortage report opens. - Generate the Item Shortage report for the period you need.
- In the Item Shortage report, below the inventory ticket, expand the report data.
- In the expanded data, find the category you need to check.
- For the found category, click the value in the Non-Itemized Adjustments column.
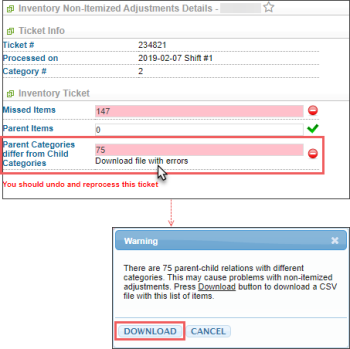
- In the Non-Itemized Adjustments Details window:
- Go to the Inventory Ticket section.
- Below the Parent Categories differ from Child Categories field, click Download file with errors.
- In the Warning window, click Download.
For details, see Item Shortage Report.
One of the reasons why one item is duplicated in the items list is that it is displayed for each vendor in case it has more than one vendor. To eliminate this issue:
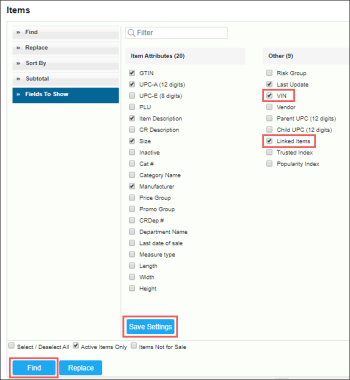
- At the top of the Items list, click Fields To Show.
- Make sure the VIN and Linked Items options are selected. If not, select them.
- Click Save Settings.
- Click the Find button to reload the items list.
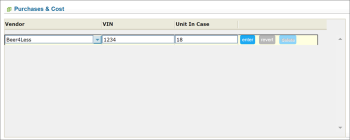
To check if an item has more than one vendor, open the Purchases & Cost section in the Item Setup form. For details, see Purchased & Cost Settings section.
To print shelf tags in CStoreOffice®:
- From the CStoreOffice® home page, go to Price Book > Items.
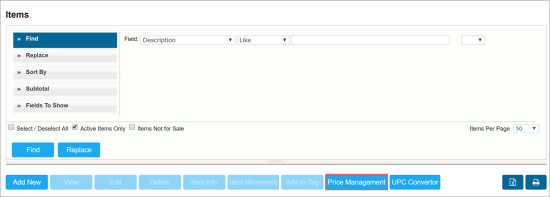
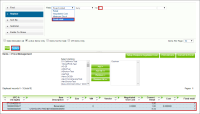
- In the Items form, click Price Management.
- In the text field in the operational panel, enter the item name or a key word that you want to find, for example Coors Light.
- In the Select stations list, select the location.
- Click Find.
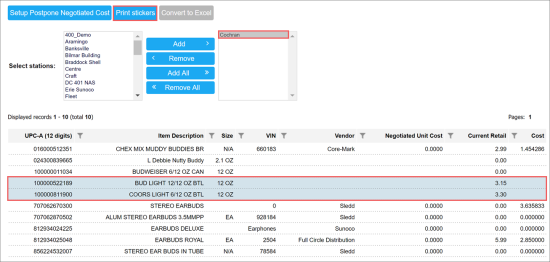
- In the items list below, you can see all items that start with the key word you have entered. Select the items for which you want to print tags.
- In the Select stations list, make sure the location name is selected.
- Click Print stickers.
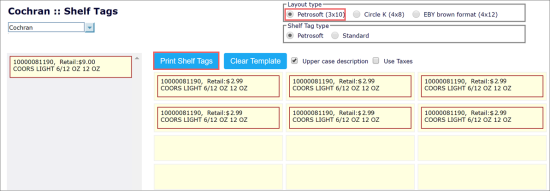
- From the left pane, drag the tags and drop them onto the cells of the sheet.
- Make sure you have #5160 Avery paper in the printer.
- Make sure the Petrosoft (3 x 10) layout type is selected.
- Click Print Shelf Tags.
To print shelf tags for different companies or different items:
- Perform steps 1-3 of the procedure above: How to Print Shelf Tags.
- After you pick the first item, in the operational panel, change the value in the condition list to 'or'. As a result, a new box will appear below the first item.
- In the displayed field, enter the new item name and continue the same procedure by selecting the “or” condition until you have all items that need tags.
- If there are a large number of items to be displayed on the Items per Page list, select how many items you want to display per page. This will help you avoid scrolling through multiple pages.
- Click Find.
- Scroll down to the items list and make sure you select all items that need tags.
- In the Select stations list, make sure the location name is selected.
- Click Print stickers.
- From the left pane, drag the tags and drop them onto the cells of the sheet.
- Make sure you have #5160 Avery paper in the printer.
- Make sure the Petrosoft (3 x 10) layout type is selected.
- Click Print Shelf Tags.
If you are using Safari browser, you need to allow pop-up windows for your browser to be able to continue working with the Shelf Tags form properly.
To adjust inventory total in CStoreOffice®:
- Use the CipherLab handheld scanner to scan, put in new inventory totals and send them to CStoreOffice®.
- From the CStoreOffice® home page, go to Inventory > Inventory Audit.
- In the Pending Inventory Audit list, select the pending inventory ticket.
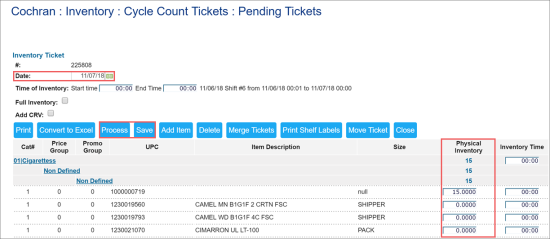
- Enter the date of the inventory count. The date must have the shift number to enter information.
- Adjust the inventory total.
- Click Save, then click Process.
- From the CStoreOffice® home page, go to Price Book > Items.
- In the Items form, click Add New.
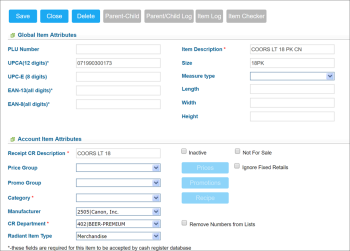
- In the Item form, in the correct UPC field, enter the item UPC (UPCA is 12 digits and UPCE is 8 digits).
If the UPC is known, the Manufacturer field is populated automatically. - In the Item Description field, specify the item description.
- In the Receipt CR Description field, specify the line that must be printed for the item on cash register receipts.
- In the Size field, enter the item size, for example, 12/12 oz.
- Select the category and CR department to which the item relates.
- Click the Tags switcher and assign the necessary tags to the item. Assigning tags is important for further reporting.
- In the Purchases & Cost section, click the line under Vendor. From the Vendor list, select the item vendor, specify the VIN for the item and the number of units in the case.
- At the top of the form, click Save.
- After the item data is saved, click the Cost switcher.
- At the bottom of the Cost section, click Negot'd Cost.
- Pass through the Vendors Cost Wizard:
- Select the vendor for which you want to set the cost.
- Select Unit or Case and specify the item cost.
- Select the location(s) for which you want to set up the cost.
- Unless you are putting the cost for limited time, skip the next step and click Next. Otherwise, specify the timeframe for which the cost must be valid.
- Click Finish to apply the cost to the item.
- After the page reloads, click the Sales and Retails switcher.
- At the bottom of the Sales and Retail section, click Change Prices.

- Pass through the Current Retail Wizard:
- Enter the retail for the item.
- Select the location(s) for which you want to set up the retail.
- Select the date starting from which the new retail must be applied.
- Click Next, then click Finish.
- At the top of the Item form, click Save.
To learn how to create a parent-child relationship between items, refer to the Creating a Parent-Child Relationship procedure.
Step 1: Find the items with the fixed retail.
Price Book > Items > Price Management > Fixed retail > any > Find.
Step 2: Select and replace the items with the fixed retail to the regular retail.
Replace tab > Fixed retail > any > N or 0 > select the items you want to change the retail settings for > Replace.
The buydown goes to the source station from where the item was transferred.
- Go to Price Book > Items.
- Clear the Active Items box.
- Search for the item(s).
- Click the item(s) and click Download to Account.
Categories and departments are both groups of items used for different purposes. Categories - for the reports, Departments - for the cash register. Categories can include several departments.
Not necessarily. It is just a common practice to have the same categories and departments.
You can import categories to the CStoreOffice® via Price Book > Import Items. Make sure you meet the import requirements.
To assign several items at a time, select the items, and then click Add to Tag.
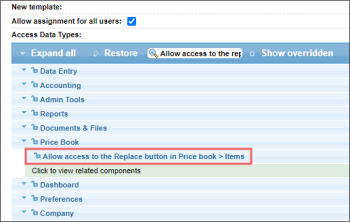
The Add to Tag button is permission-based. To provide access to this button, grant the Allow access to the Replace button in Price book > Items permission to the user. For more information, see Roles and Permissions Management.
Fore more information, see Assigning Items to the Category.
There is no way you can do it yourself. Contact the technical support.
It depends on your permissions. Only system users can delete the Price Book items in bulk. In case you are not the system user, contact Support to have the items deleted in bulk, or delete them yourself one by one.
Each item becomes inactive automatically in CStoreOffice®, in case the following conditions are met:
- Item's PLU equals to zero or item is not a lottery item.
- The item has not been both purchased and sold for the last year.
- There are no pending invoices with the item.
- The item's child items, if any, match all above conditions.
- The item has not been updated for the last year.
The system performs a regular check of all items in CStoreOffice® on a weekly basis to reveal the items matching the above conditions and mark them inactive. All items that don't match the above conditions are included into the PLU Batch Cache.
For more information about activating and deactivating items, see Inactive Items.
