


In the Gilbarco Passport section, you can configure settings for Gilbarco Passport cash registers.
Prerequisites
To automatically import price book items, departments, and promotions from the cash register to CStoreOffice®:
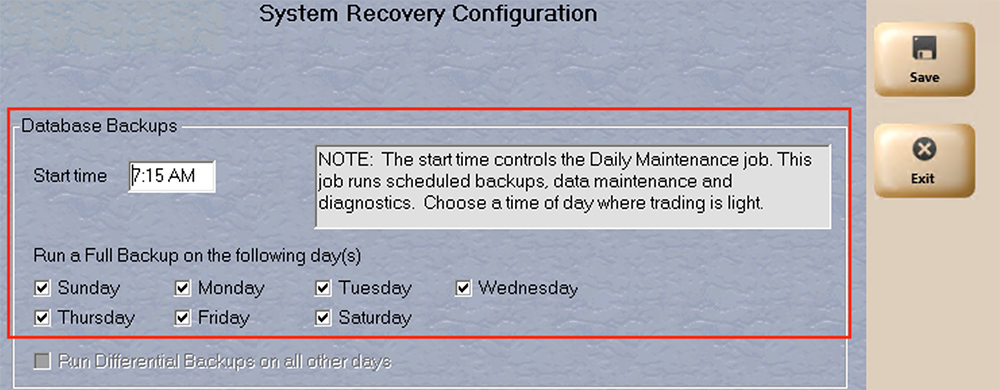
- Configure the cash register to perform daily database backups. To do this, open System Recovery Configuration and select all days of the week in the Database Backups section.
- Perform at least one backup before the cash register is connected to the DC Box.
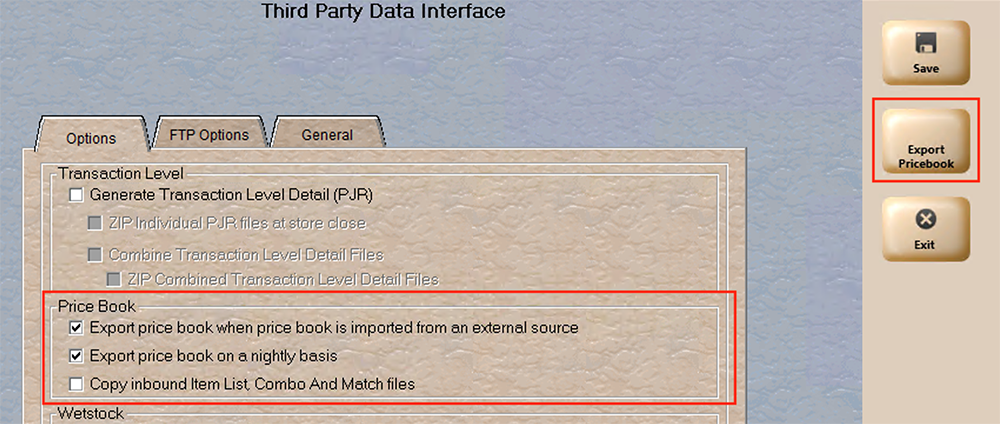
- Open the Third Party Data Interface on the cash register and select Export price book when price book is imported from an external source and Export price book on a nightly basis options in the Price Book section.
After updating and saving the settings, click the Export Pricebook button and wait until the price book export is complete. - Ensure that the following directories, including all subdirectories, are shared and accessible to the BackOffice/BackOffice user:
- Gilbarco/PPXMLData/PricebookData
- Gilbarco/backup
- Ensure that the Gilbarco/backup directory contains the default.sql backup file and that it is shared and reachable through Samba.
- Ensure that the Gilbarco/PPXMLData directory includes the PricebookData subdirectory and that it contains at least one complete set of files reachable through Samba:
- ItemListMaintenance _YYYYMMDDhhmmss.xml
- MixMatchMaintenance _YYYYMMDDhhmmss.xml
- ComboMaintenance_YYYYMMDDhhmmss.xml
It is not possible to complete this step using a standard user account. Contact Gilbarco Support for assistance.
Station cash register settings
To access the Gilbarco Passport settings:
- At the top left of the Cash Register form, select Advanced.
- From the CR brand list, select Gilbarco.
- From the CR model list, select Passport.
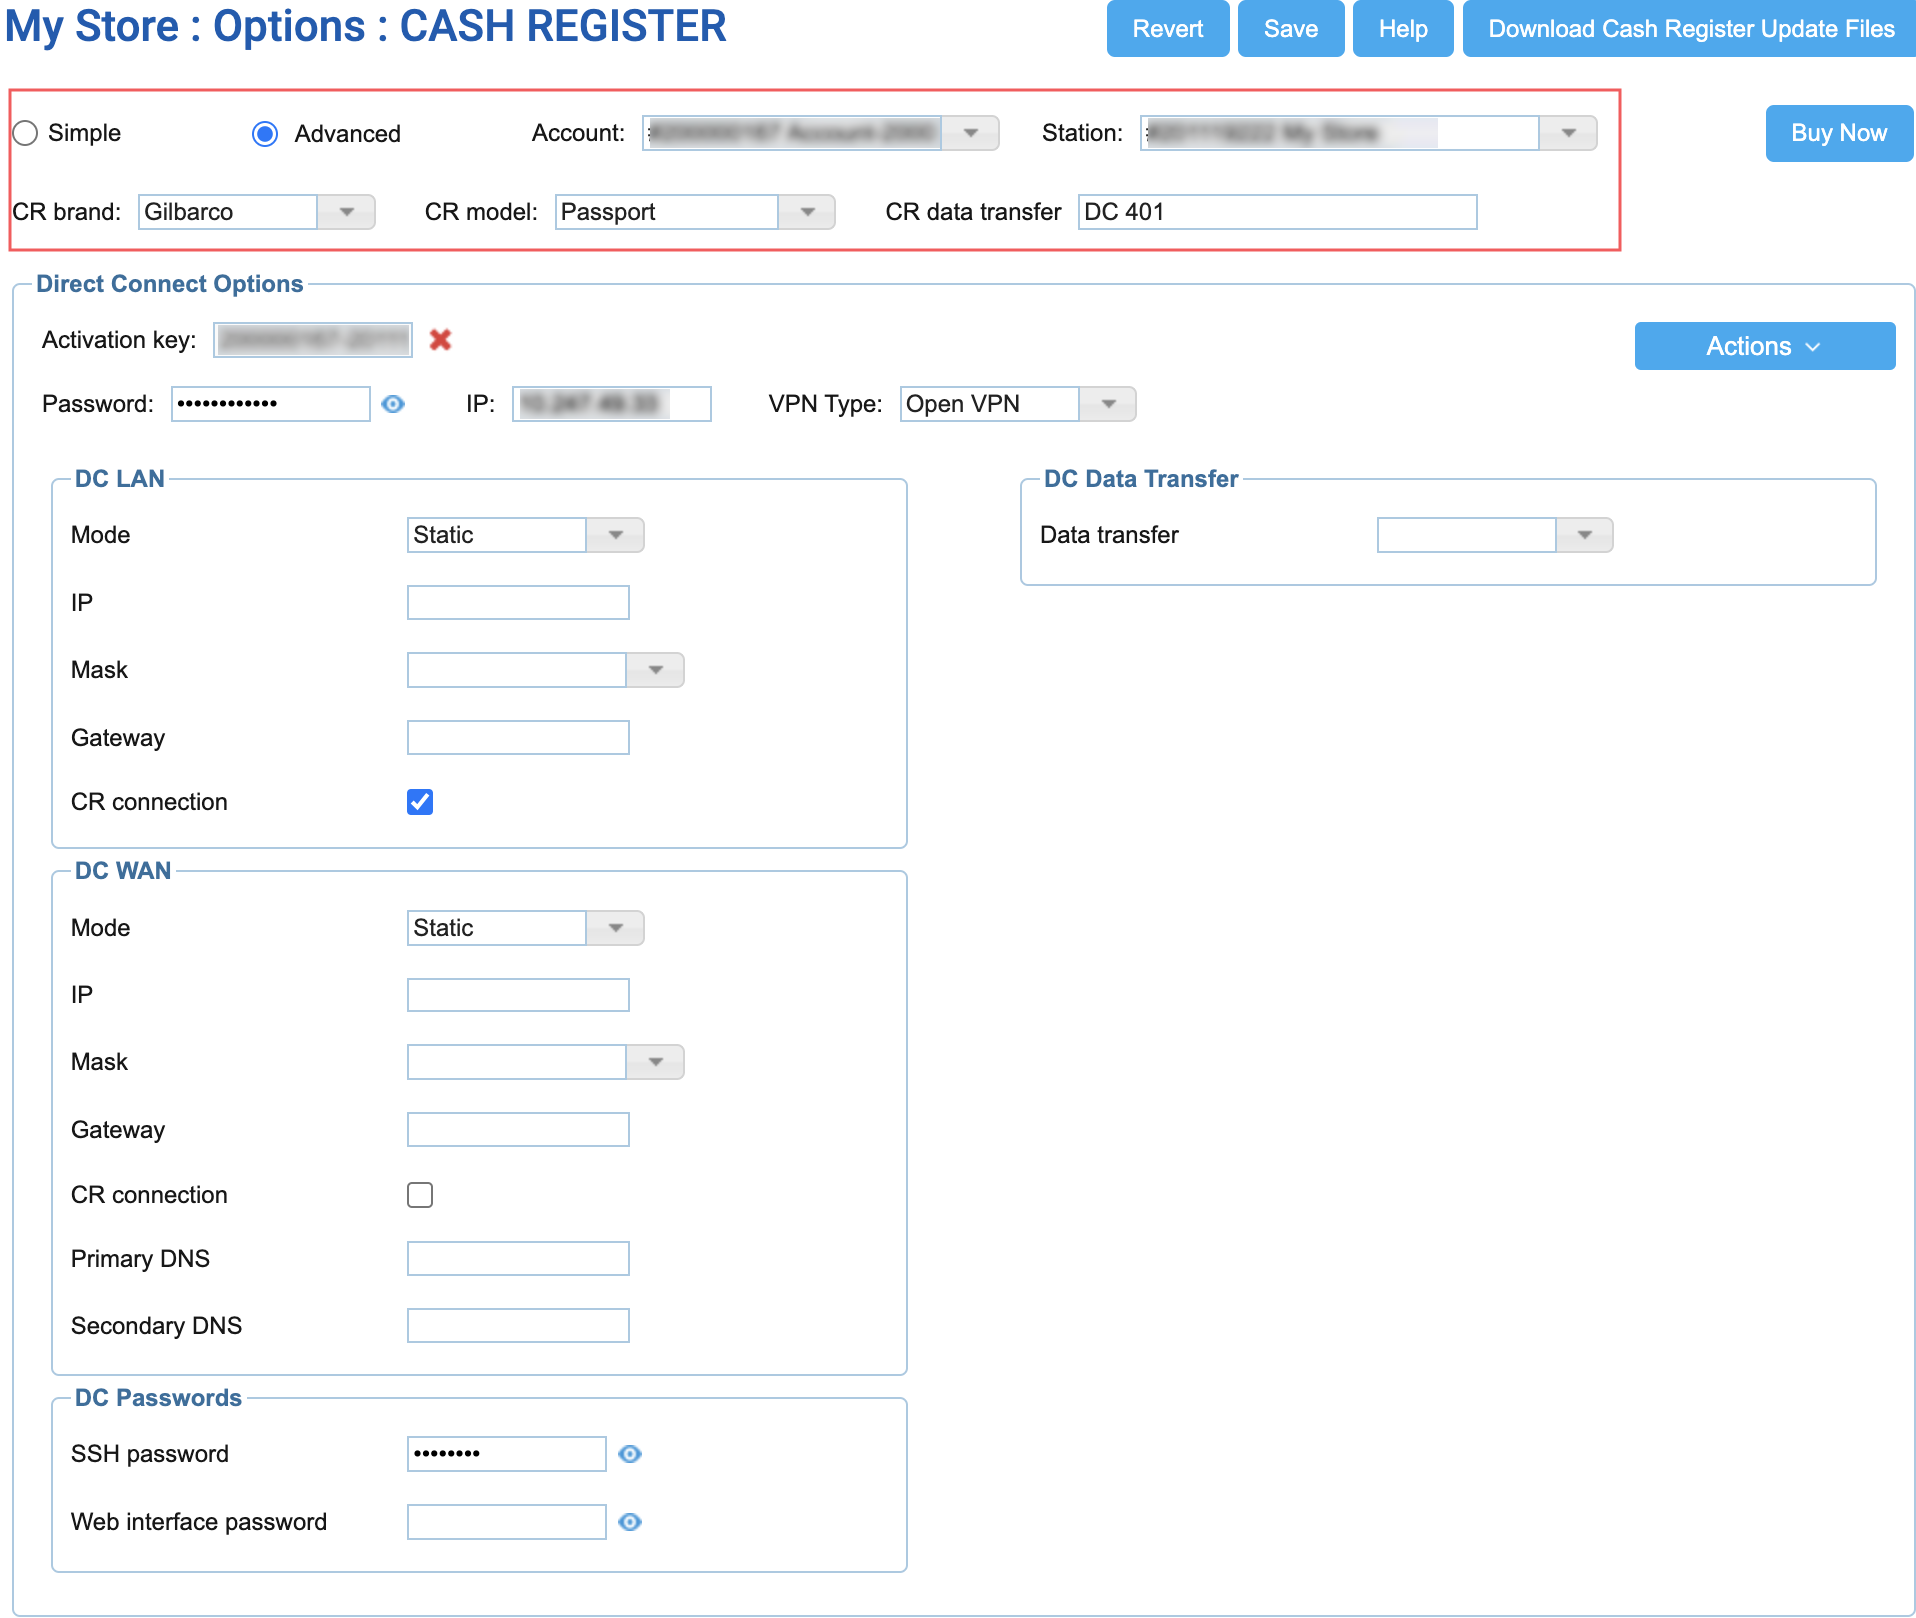
You can configure the following settings:
- CR IP: The IP address of the cash register.
- Tax strategy: The tax strategy settings to be applied at the cash register. For more details, see Configuring Taxation Strategy for Cash Register.
- Tax Combinations: Click the button and configure up to 12 tax combinations. In the Tax Strategy ID column, enter the strategy identifiers for the tax combinations you will use while configuring taxes for items and then click Save to save the changes.
- CR login: The user name to log in to the cash register.
- CR password: The password to log in to the cash register.
- NAXML primary report period: The primary reporting period for the cash register:
- Shift
- Day
- Cashier Report
- CR vendor model version: The cash register firmware version value. CStoreOffice® determines the CR firmware during the shifts parsing process. In case no shifts were parsed, the system sends the newer CR firmware version by default. If you need to send the older CR firmware version, enter this version value into this field.
- CR store location ID: The store identifier assigned to the site.
- CR Sales Restrict Code: The code used to identify age, tender and other restrictions for sales.
- CR POS code modifier (Base Item): 0 by default. This code is used for the item parameters default set in the Price Book download.
- CR POS code modifier name (Base Item): Empty by default. This code is used for the item parameters default setin the Price Book download.
- Process House Account Details: Enable this option to allow parsing of house accounts data from shifts in the back-office system. The house accounts data becomes available in sales transaction and customer reports.
- House Account Details from Transactions: Enable this option to allow parsing detailed house accounts information from the transaction data (PJR) at the cash register in addition to general shifts data. With this option enabled, CStoreOffice® will be able to get additional information about taxes and refunds.
- Wipe out CR Promotions on next sync: Enable this option to delete promotions at the cash register and upload promotions from the CStoreOffice® Price Book instead. This option can be helpful if the promotion data at the cash register and in CStoreOffice® are out of sync and you need to synchronize this data. When the promotions data is updated at the cash register, CStoreOffice® automatically disables this option in the cash register settings.
- Fuel loyalty: See Miscellaneous station options: Fuel loyalty settings for details.
- Allow Price modifier: Enable this option to allow sending Price Modifier promotions to the cash register.
- Allow removal of inactive in PB/deleted items from CR: Enable this option to remove from the cash register the items that have been deleted or marked as inactive in the Price Book. The items are removed when Price Book updates are sent to the cash register.
- Send full item description in update: Enable this option to send the item description instead of the item receipt CR description to the cash register with Price Book updates.
- Calculate net sales: Enable this option to calculate and display net sales in the Departments Sales section of shift reports.
- Display tax names: Enable this option to display tax names configured on a Gilbarco Passport cash register in the Shift Reports and Sales Summary Reports.
- Pay points for cash reconciliation: Enable this option to use paypoints data for cash reconciliation. With this option enabled, CStoreOffice® will process the cash register reports to get paypoints data and present more detailed information on cash reconciliation in the Cash Reconciliation > Daily Data form. As a result, you will be able to trace every cashier's activities at each cash register separately.
If the Pay points for cash reconciliation option is disabled, the cash register reports are not parsed for paypoints data and cash is reconciled by shifts. For more information about reconciling shifts by pay points, see Cash Reconciliation by Paypoints.
- Use as Esso: Set special <ItemTypeCode>mdse</ItemTypeCode> and <POSCodeModifier name="Unit"/> for items.
- Folders: Paths to folders where data is stored at the cash register:
- Smb service name: The name of the Samba network shared folder. Specify the service name if Samba is used as the transport protocol.
- CR inbox folder: The path to the folder where incoming data is stored.
- CR outbox folder: The path to the folder where outgoing data is stored.
- CR archive folder: The path to the folder where archive data is stored.
- CR error folder: The path to the folder where error messages are stored.
- CR PJR folder: The path to the folder where PJR files containing transaction details are stored.
- Set Defaults: Use this button to set default values for paths to folders.
The period must be the same as the period value configured at the POS. Otherwise, movement reports will not be accepted by CStoreOffice®.
In addition to configuring settings, you can perform the following activities:
- Wipe Out Price Book: Click this button to delete the Price Book at the cash register and upload the Price Book from CStoreOffice® to the cash register instead. After clicking this button, click Proceed in the appeared pop-up to confirm the Price Book wipe-out. The button will change the color to indicate that the Price Book wipe-out will be performed if you save the cash register settings and accept changes in the Cash Register Updates Manager. The button will change back the color once the Price Book wipe-out is complete.
- Upload Full Items Price Book: Click this button to upload the Price Book from CStoreOffice® to the cash register. This operation is used in conjunction with items updates. After clicking this button, click Proceed in the appeared pop-up to confirm this operation. The button will change the color to indicate that this operation will be performed if you save the cash register settings and accept changes in the Cash Register Updates Manager. As a result, full price book is uploaded to the cash register. The button will change back the color once the operation is complete.
- Request VCD: Use this button to pull Vendor Codes Definitions (the VCD file) from the cash register to check the fuel departments numbers and set them up in the UTC settings of the cash register.
To save the settings, click Save in the upper part of the page. The cash register settings are applied once you accept changes in the Cash Register Updates Manager. For details, see Reviewing and Accepting Changes. To revert the changes, click Revert in the upper part of the page.


