You can add items to incomplete  invoices. To add items to a pending invoice, undo it first. To add items to an accepted invoice, reject it first. You can also add several items to the invoice at once from the basket. For more information, see Adding Basket Items to the Invoice.
To add a new item to a specific invoice, follow these steps:
- If you are in process of editing an incomplete invoice or creating a new invoice, go to step 5 of this procedure.
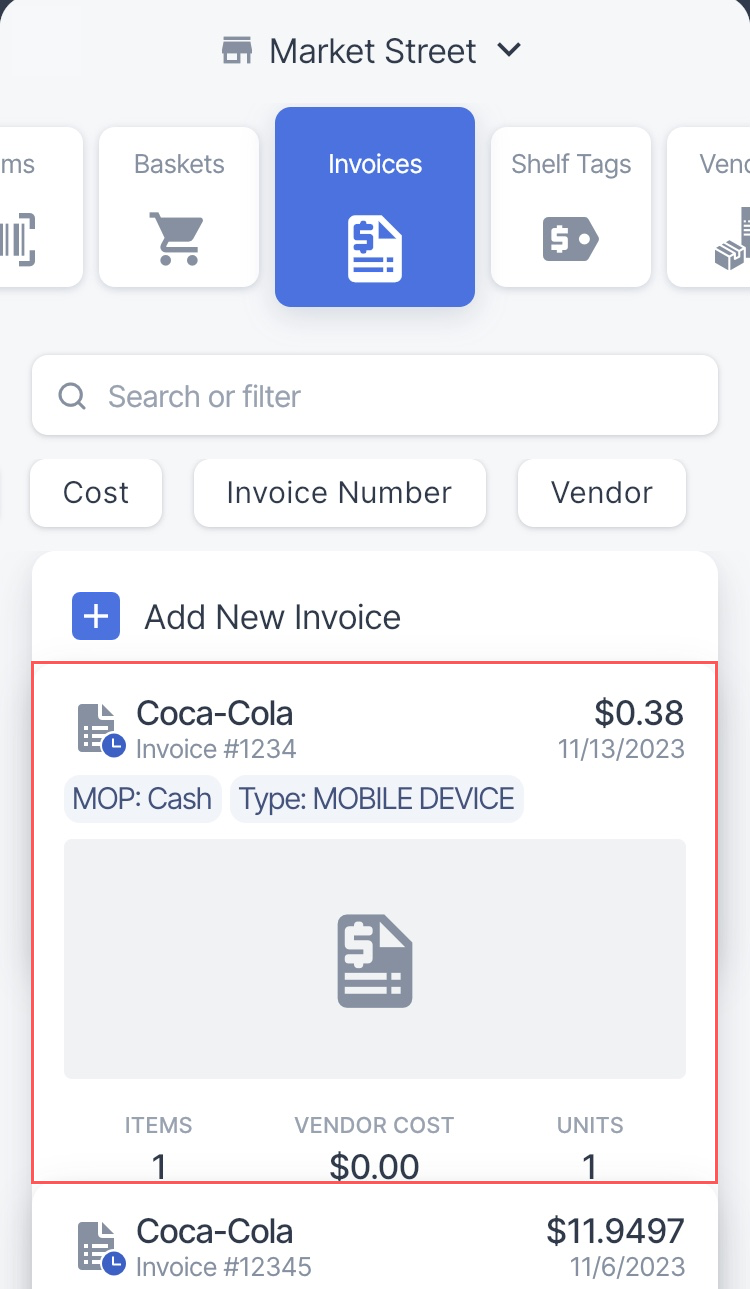
- In the invoices list, select an incomplete invoice you want to add a new item to and tap it.

- Tap the opened invoice card.
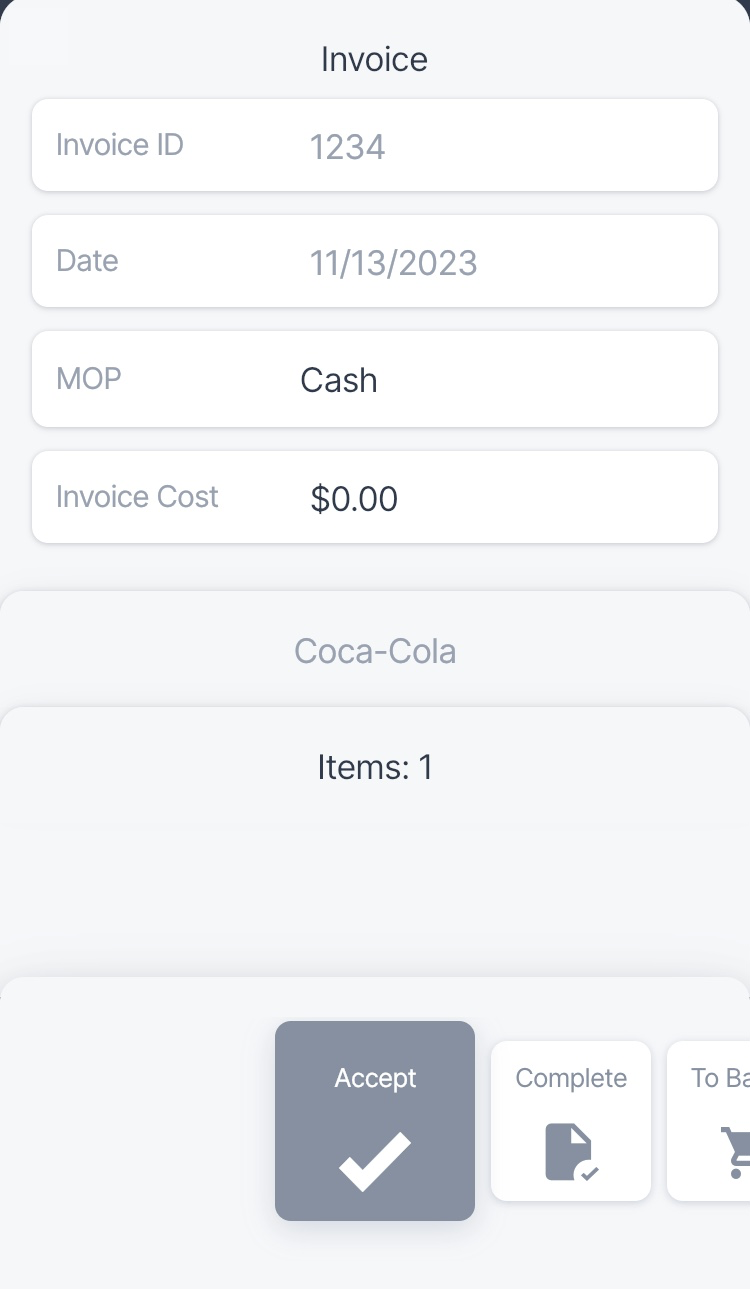
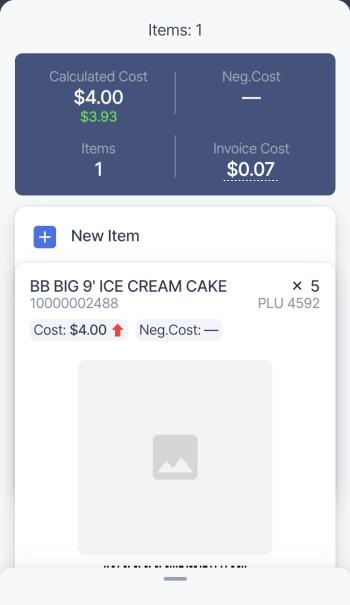
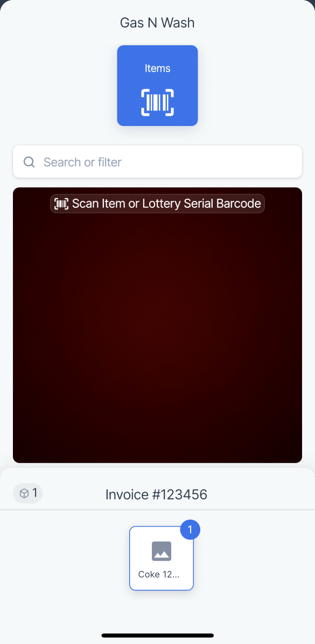
Result: The Invoice screen appears. - In the Invoice screen, tap Items.
If no items were added to the invoice while creating it, the Add Items button appears instead.
Result: The items list for the selected invoice appears. - If you are in process of creating a new invoice and there are no items in the invoice yet, go to step 7 of this procedure.
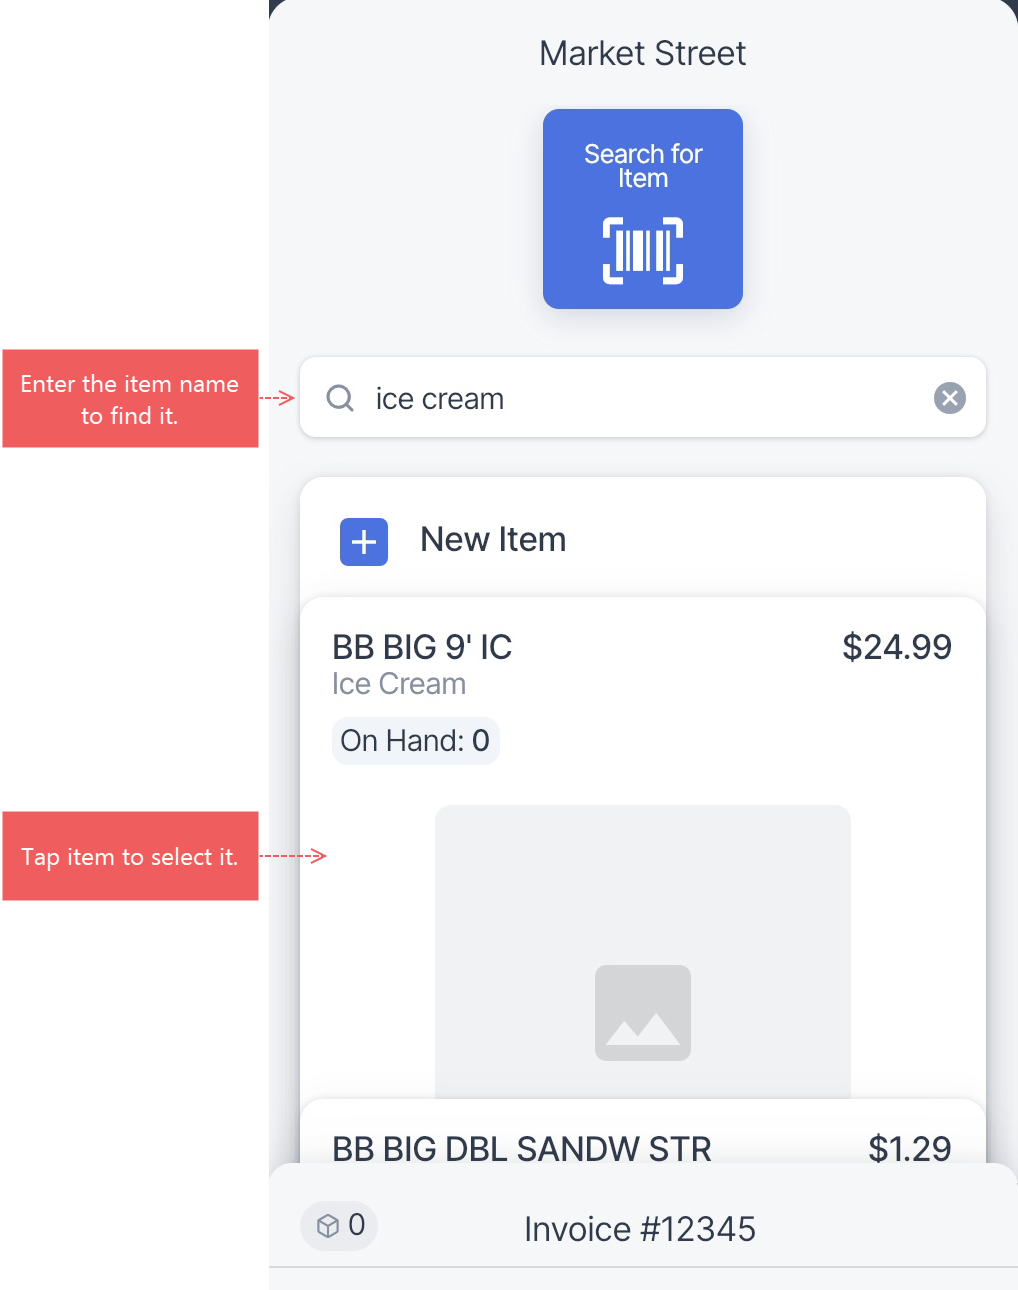
- Tap New Item.
- In the appeared screen, you can add an item in one of these ways:
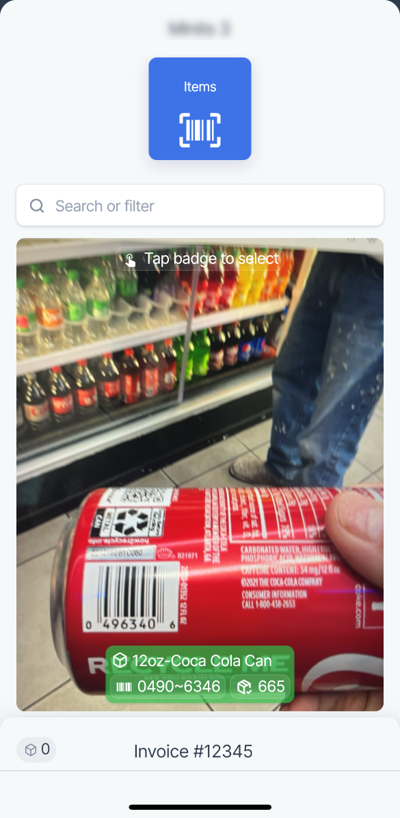
- Scan the item's universal product code (UPC) with the camera of your device, tap the appeared green badge, then go to step 8 of this procedure.

- If you use a CipherLab device, scan the item's UPC with the barcode scanner, then go to step 8 of this procedure.
- To add the item manually, enter the item name in the search box and tap the found item in the items list. Then, go to step 8 of this procedure.

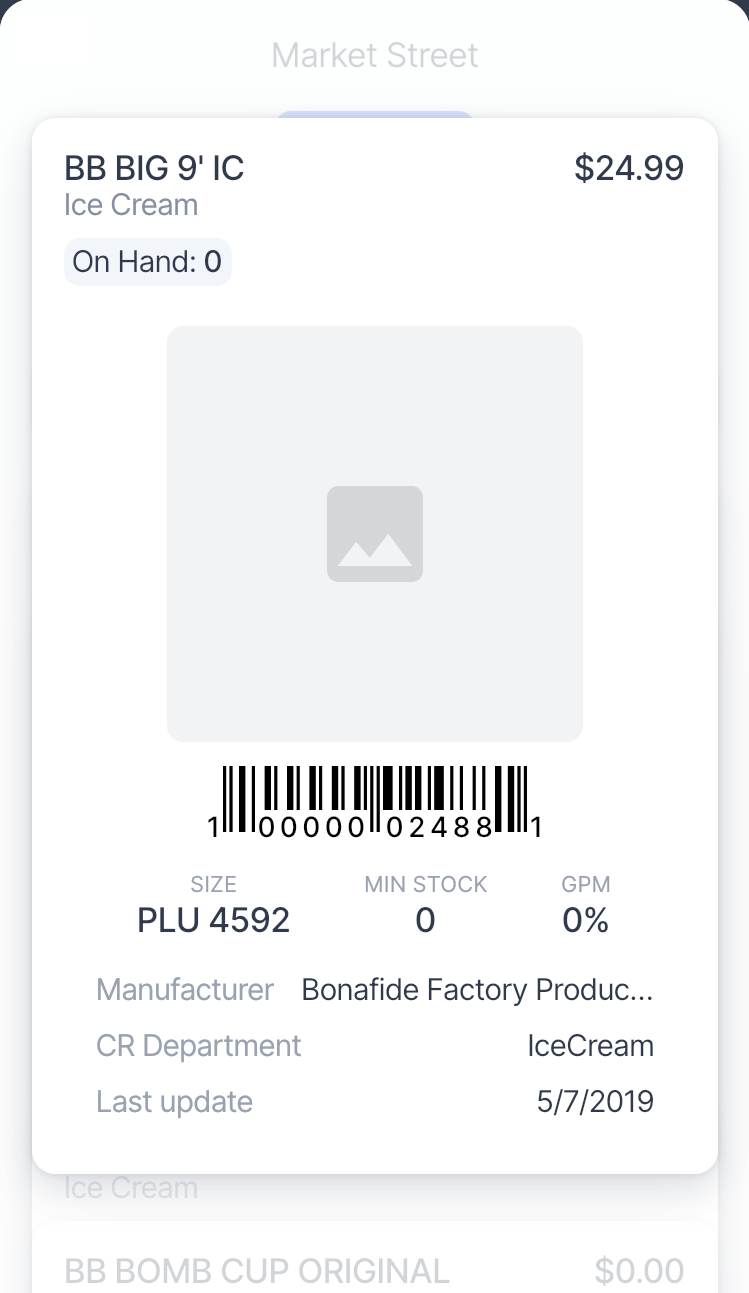
If the item from the global price book was not found in the Retail360 app, go to CStoreOffice® and add the item you need to your location. After that, the item should be available for searching in the Retail360 app. For more information, see Setting Up Items.
- Tap the appeared item card to proceed.
If you want to discard the item, swipe up and return to step 7 of this procedure.
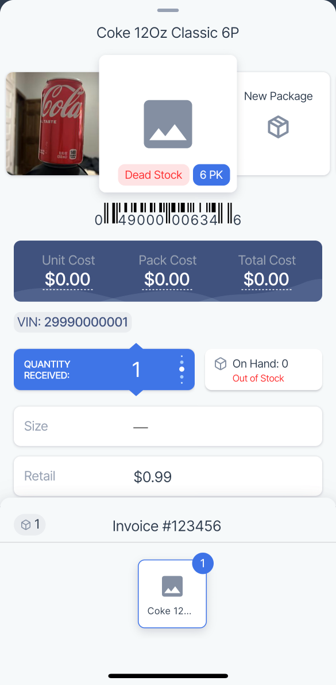
- Depending on how the item was delivered, do the following:
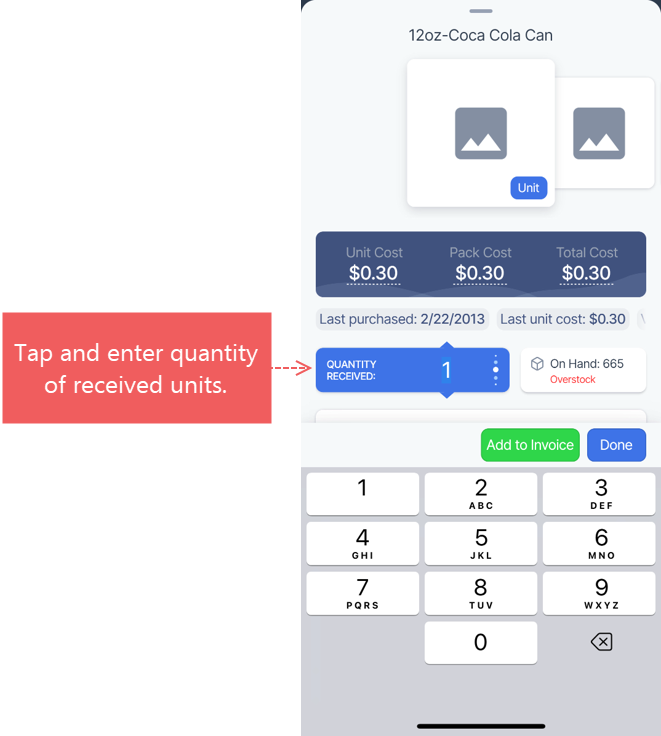
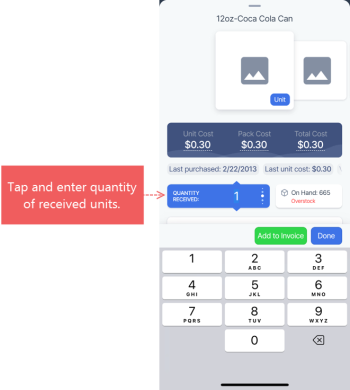
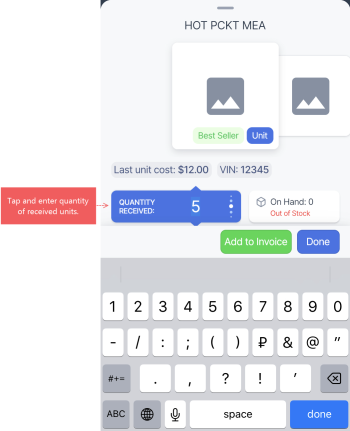
How item delivered? Required actions As an individual item with cost and VIN relationship. If the item was delivered as a single unit and its cost and VIN relationship was defined in CStoreOffice® or the Retail360 app previously, all you need is enter the quantity of received items. To do so, tap the QUANTITY RECEIVED selector and enter the quantity of units you received, then tap Add to Invoice. After that, go to step 7 to add another item to the invoice or step 10 to finish adding items to the invoice.
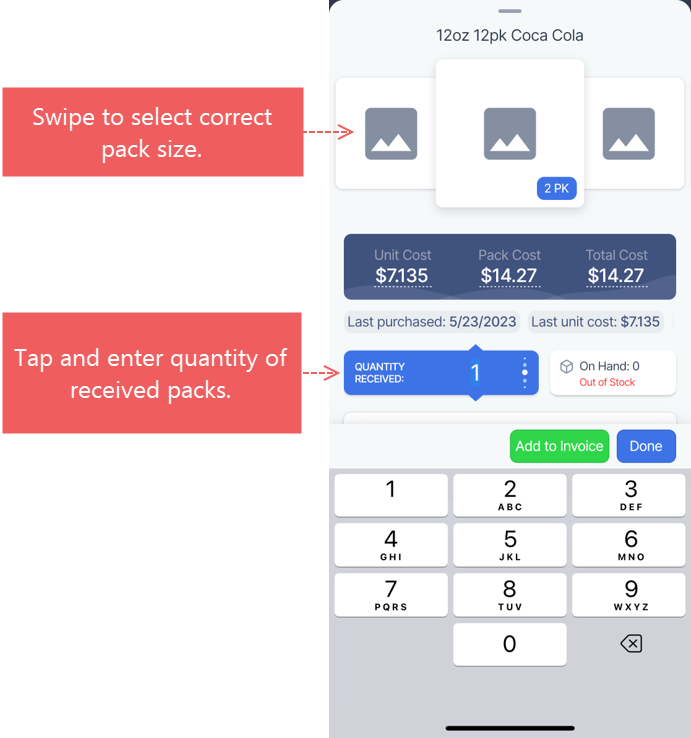
As a pack with cost and VIN relationship. If the item was delivered as a pack and its cost and VIN relationship was defined in CStoreOffice® or the Retail360 app previously, check the pack selected by default to be correct. If the pack size is incorrect, swipe left and select the correct pack size with correct cost and VIN relationship. Then, tap the QUANTITY RECEIVED selector and enter the quantity of packs you received, and tap Add to Invoice. After that, go to step 7 to add another item to the invoice or step 10 to finish adding items to the invoice.

As an individual item delivered for the first time.
or
As an individual item without cost and VIN relationship.
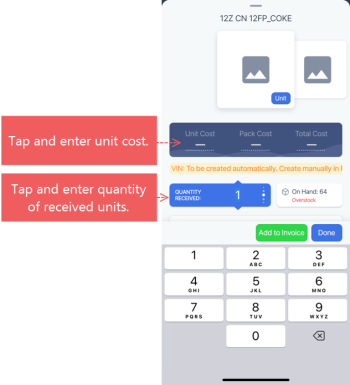
If you receive the item for the first time or the cost and VIN relationship was not defined previously, you need to set up the cost and VIN relationship manually. You can either use the default VIN or define a custom VIN.
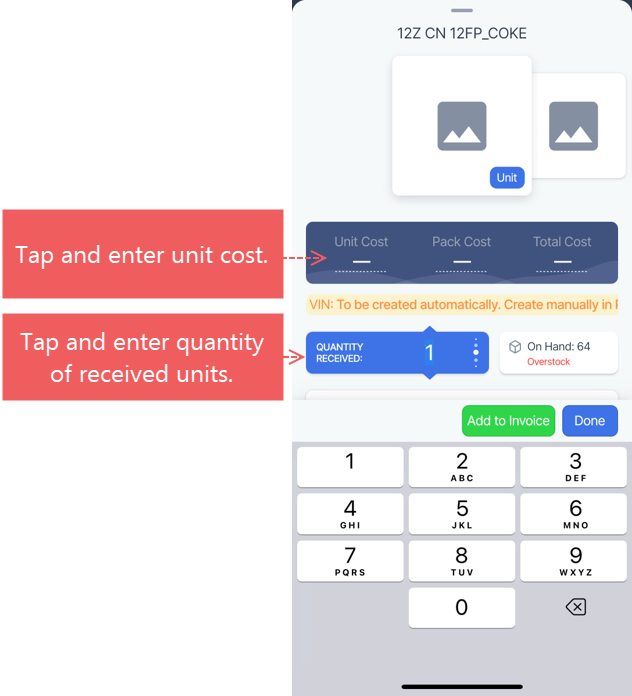
To use default VIN 29990000001, tap the QUANTITY RECEIVED selector and enter the quantity of units you received. Then, tap Unit Cost, enter the unit cost and tap Add to Invoice. After that, go to step 7 to add another item to the invoice or step 10 to finish adding items to the invoice.
If you want to use a custom VIN, do the following:
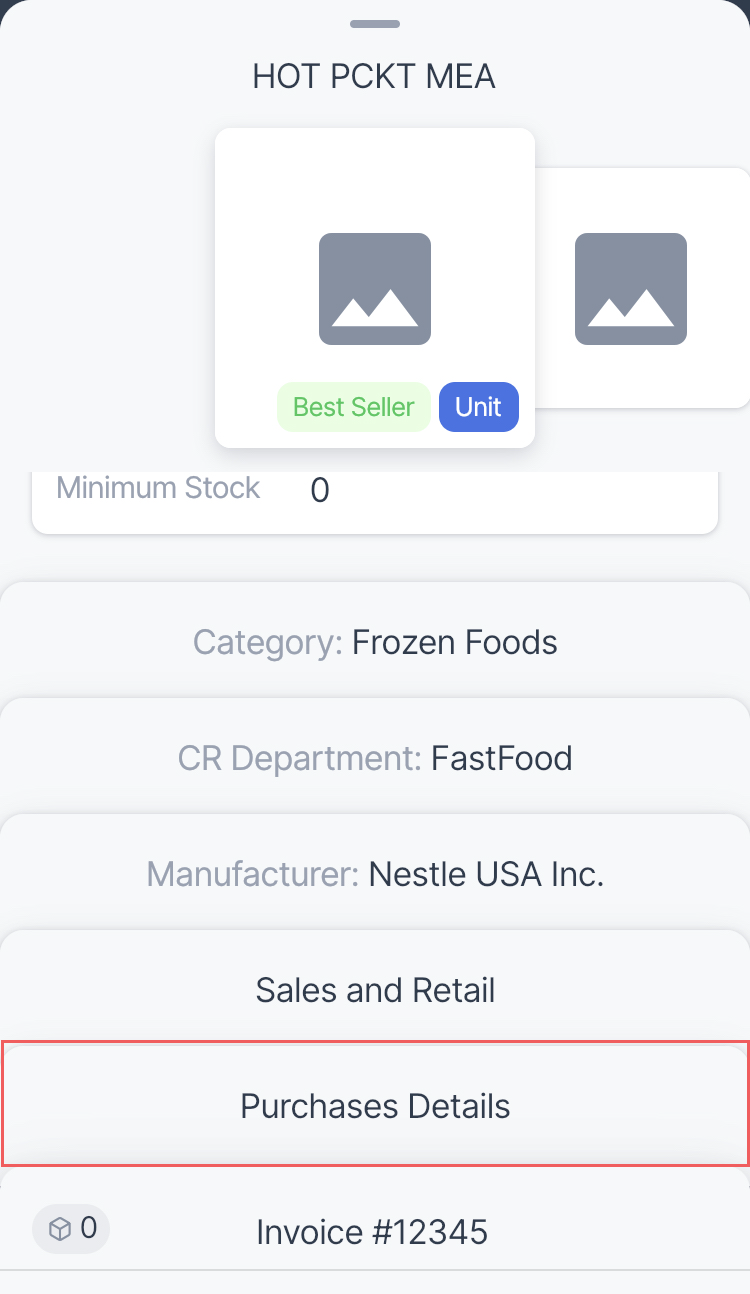
- Tap Done to hide the keyboard, swipe down to scroll to the end of the list and tap Purchase Details.
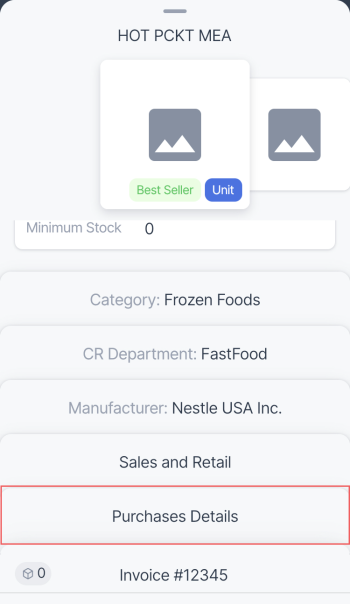
- Tap Add New VIN.
- Enter VIN in the VIN field and the unit cost in the Unit Cost field and swipe up to save the cost and VIN relationship.

- Tap the QUANTITY RECEIVED selector and enter the quantity of units you received, then tap Add to Invoice. After that, go to step 7 to add another item to the invoice or step 10 to finish adding items to the invoice.
As a pack for the first time.
or
As a pack without cost and VIN relationship.
If you receive a pack for the first time or there is no cost and VIN relationship, do the following:
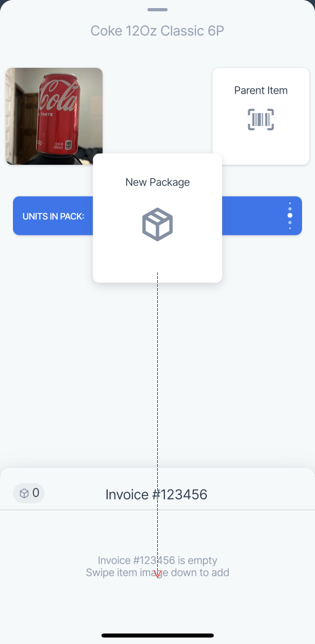
- Swipe left and select the New Package tile.
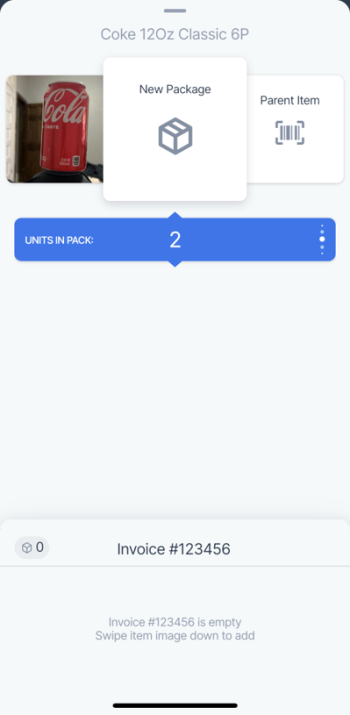
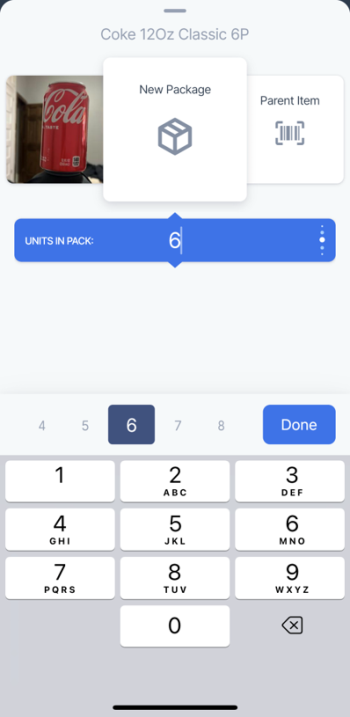
- Tap the UNITS IN PACK selector, enter the number of single units in the package, and tap Done.
- Drag the new package into the invoice box.

- Swipe the bottom curtain up and tap the newly created package.
- Enter cost for the package, quantity of received packs or cases in the QUANTITY RECEIVED selector and tap Update Invoice.
- After that, go to step 7 to add another item to the invoice or step 10 to finish adding items to the invoice.
- Tap Done to hide the keyboard, swipe down to scroll to the end of the list and tap Purchase Details.
- Swipe down to return to the Invoice screen.
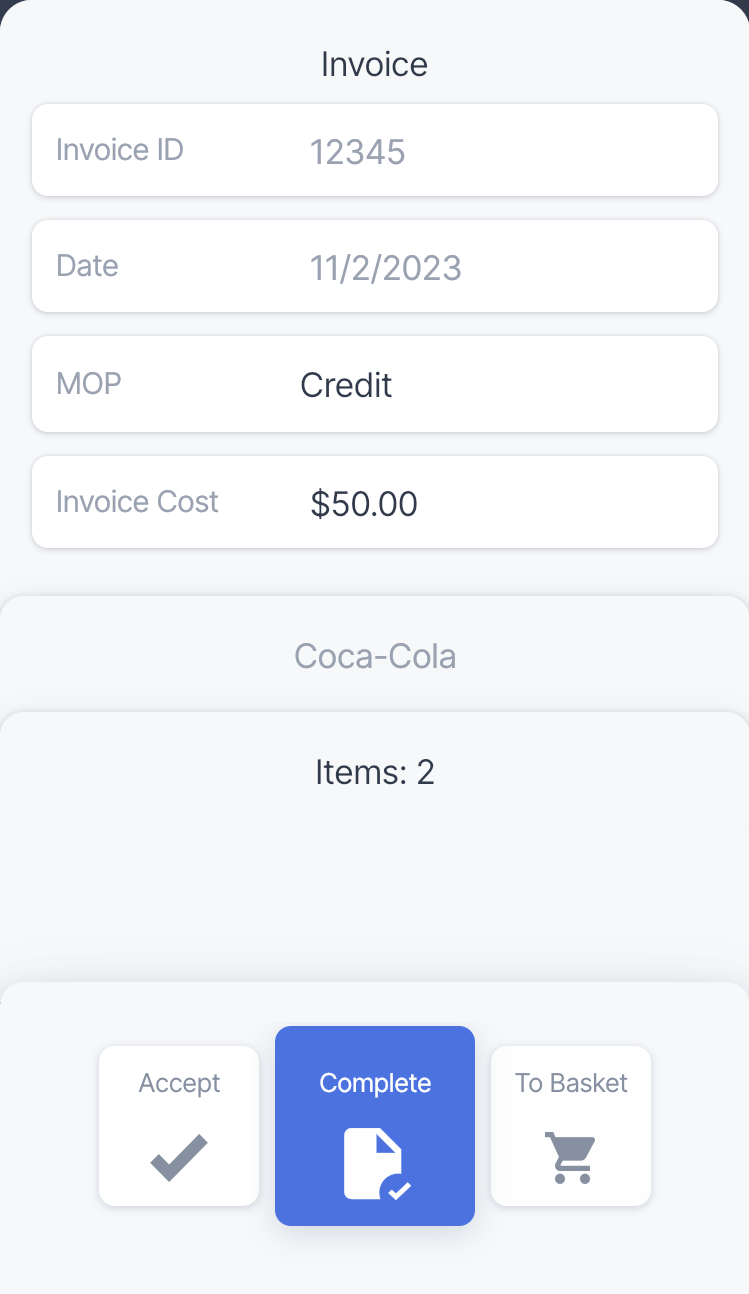
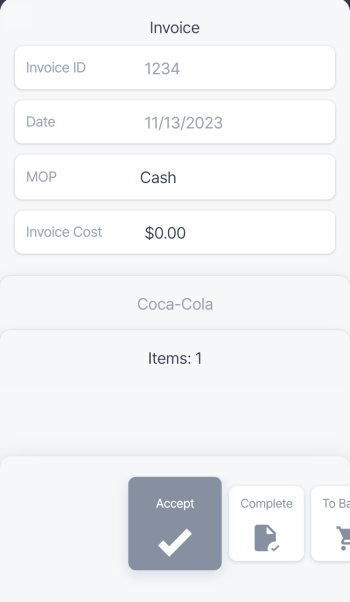
- On the Invoice screen, you can do one of the following.
- To complete this invoice later, swipe down. The invoice appears at the top of the invoices list and you can edit it later, following this procedure.
- To complete this invoice, swipe the lower curtain up, select the Complete tile and swipe up. After completing the invoice, you can accept it. For details, see Accepting a pending invoice.

The invoices created in the Retail360 app can be also accepted in CStoreOffice®, if needed. For more information, see Accepting Pending Invoices.