


After a price is changed, a price change ticket is generated. When you accept item updates, you need to print out the price change ticket.
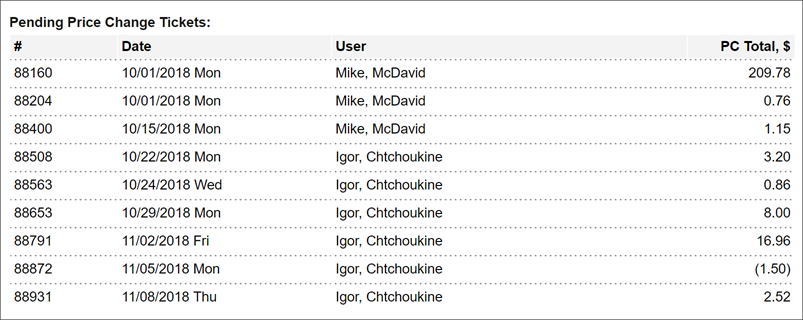
The Price Change Tickets, in case of prices have been changed, are displayed in the Pending Price Change Tickets section after the item changes are accepted in the CR Updates manager.
The Pending Price Change Tickets section displays the following data about each price change ticket:
For processing price change tickets effectively, it is recommended to perform the physical inventory on a regular basis. If you have not performed the physical inventory for a long period of time, it may slow down the load of the Pending Price Change tickets page.
The Pending Price Change Tickets section is permission-based. Before you start working with price change tickets, make sure the following conditions are met and permissions are granted:
- The Price Change Tickets System option must be enabled in CStoreOffice®. For details, see Station Options: MISC.
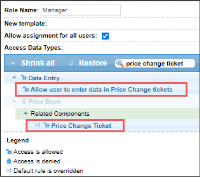
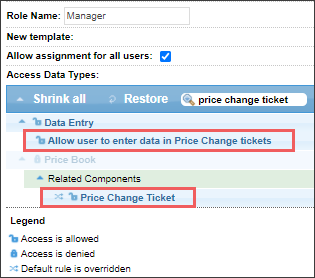
- The following permissions must be granted to your user in CStoreOffice®:
- Allow user to enter data in Price Change tickets
- Price Change Ticket
To be able to delete price change tickets, the user must have the Allow users to remove Pending PC Tickets permission granted. Otherwise, the Delete button is not displayed in the Price Change Tickets form.
For more information on how to manage user permissions, see Granting Role Permissions to Roles and Users.
To check and process price changes in CStoreOffice®:
- Open the Pending Invoices report. For details, see Pending Invoices Report.
- Go out to the floor and count all items that you currently have on hand.
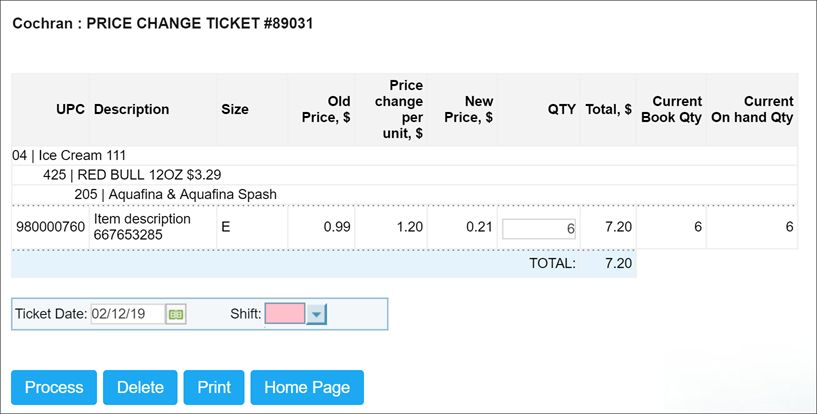
- Check the Price Change Ticket form. The date field is auto-populated based on the price change date.
- In the QTY field, enter the item quantity.
- From the Shift list, select the shift number.
- At the bottom of the form, click Process.

If the shift number is not available, make sure the shift exists for the date selected in the Ticket Date field. To view all accepted shifts, use the Shift Reports Acceptance Log. In case there are no shifts accepted for the selected date, you may add the shift manually. For details, see Entering Shifts Manually.
For more information on how to work with the Price Changes functionality, see Price Changes.


