


You can perform the following operations with the vendors:
- Importing vendors to a station (location) from the following sources:
- Account Price Book
- Location
- Drafts
- File (for more details, see Preparing a File for Data Import)
- (Optional) Monitoring and adjusting the taxonomy settings of the imported items within vendors, if any.
- Managing the account's vendors.
Together with vendors, you can import all their items.
Importing Vendors to Station (Location)
To import vendors to a station (location), follow the steps:
- Import vendors from a source to the draft. Do the following:
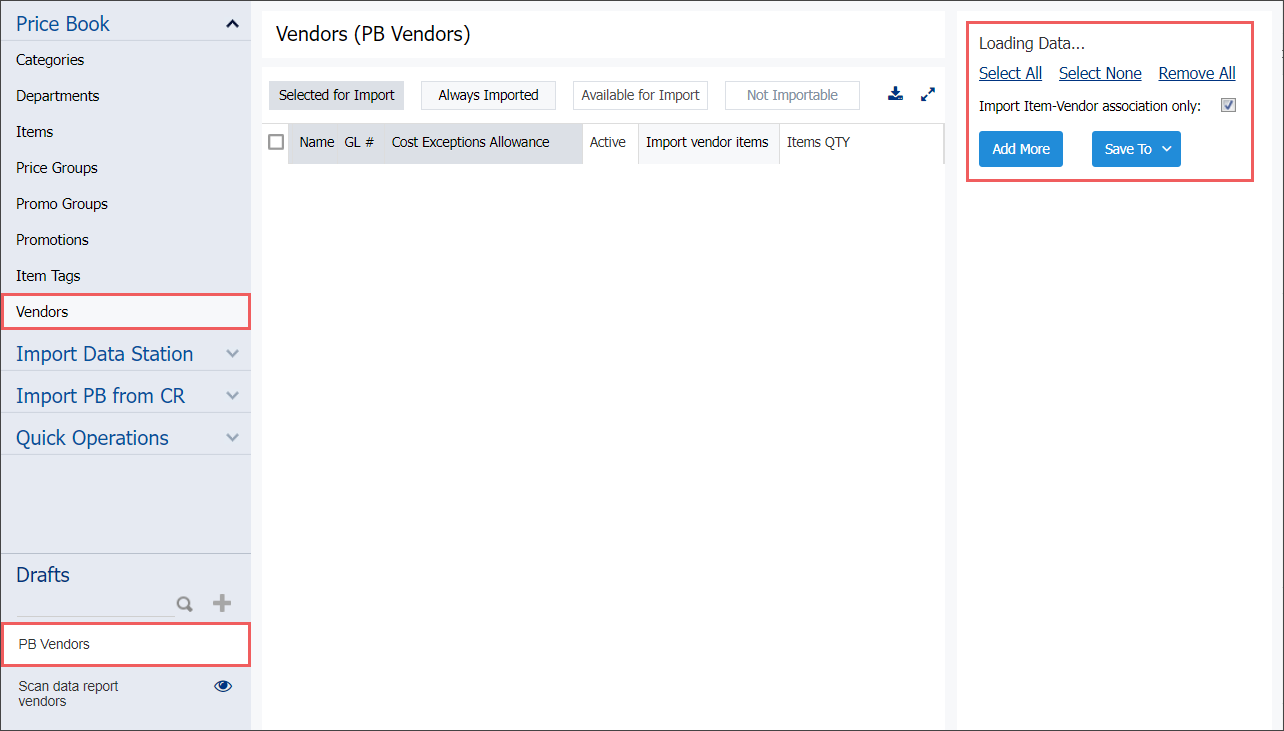
- Go to Operational Menu > Price Book and then click Vendors.
- Go to DRAFTS and create a new draft or select one from the list of existing drafts. For details, see Working with Drafts List.
- In the Data Sources Panel:
- Define the item-vendor association during the import:
- To import vendor-related data only without updating relevant items' settings, leave the Import Item-Vendor association only option selected. In this case only vendor settings are imported, including the VIN and Unit in Case values.
- To import vendor data and update all attributes of related vendor items, such as price groups, promo groups and so on, unselect the Import Item-Vendor association only option. - Click the Add More button.

- Expand any source section.
- Select all criteria for uploading vendors. For details, see Importing Data from Different Sources.
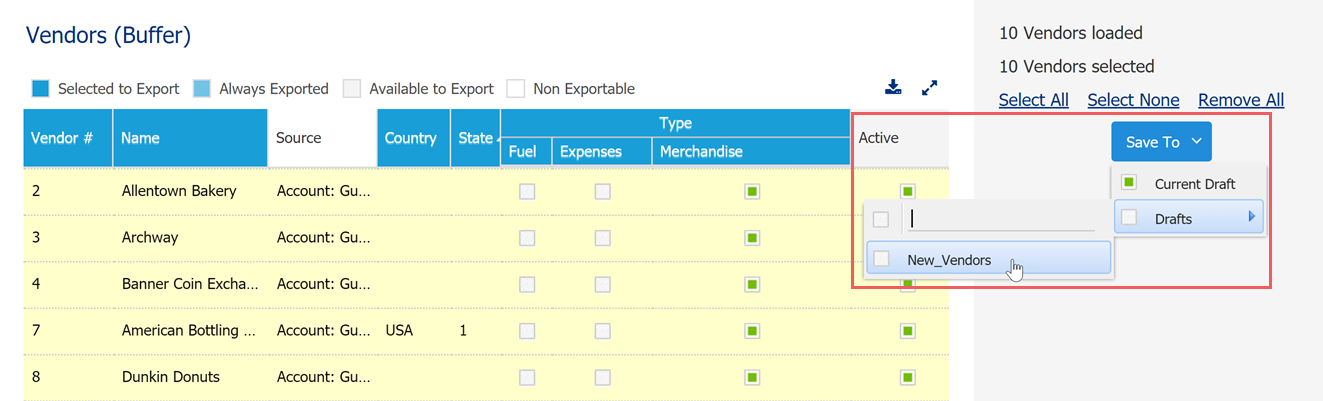
- At the top of the section, click the Load Data Source button.
- Wait until all vendors are uploaded to the Vendors (Buffer) table.
- Select the vendors you want to import. To select all vendors, click Select All.
- Save selected vendors from buffer to your draft. For details, see Saving Data from Buffer to Draft.

- Copy vendors from the saved draft to one or several locations. For details, see Exporting Draft Data.
- Make sure the vendors are copied successfully. Go to Home Page > Vendors > Vendors List.
Monitoring and Adjusting Items Taxonomy when Importing Vendors
If the importing vendors contain items, you can monitor and adjust the following items taxonomy settings during the vendors import:
- Categories
- Departments
Items taxonomy settings can be monitored and adjusted during the vendors import, in case the following conditions are met:
- The vendor has just been added to the draft.
- The vendor contains items with undefined category or/and department.
- The Import vendor items option was selected when importing vendors to the draft.
For details, see Importing Data from Account Price Book or Importing Data from Location > In case the vendors are imported step.
Monitoring Items Taxonomy Settings when Importing Vendors
You can monitor the items taxonomy settings in the mapping table, which appears above the vendors draft, when you are saving vendors from the draft to one or several locations under the above conditions.

Adjusting Items Taxonomy Settings when Importing Vendors
For each element in the Source column, select the corresponding element in the account column from the list of available elements.
Managing Account Vendors
You can manage the account vendors in the draft table. For more information on how to manage vendors in the draft, see Editing Draft Manually.
To apply the changes made with vendors to the whole account, save this draft to any location on this account.
In case you need to update only some attributes, before exporting vendors, make sure the columns of the draft's table with these attributes only are selected. For details, see Editing Draft Manually > Adding or Removing Columns for Exporting.
Preparing a File for Data Import
You can use CSV or XLSX files to import data about vendors and work with them in the Import Tool. In the file, you must provide data for all vendors whose data you want to import. Each line in the file contains data for a separate vendors. Each entry in the line corresponds to a specific vendor field, and each comma indicates where one entry ends and another entry begins.
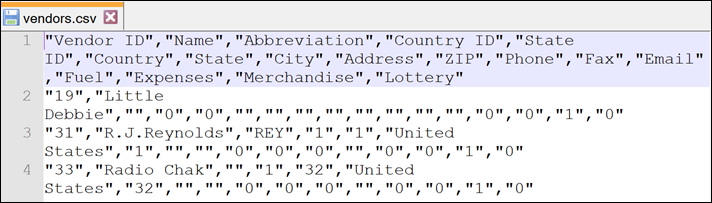
The file that you use for import of vendors data must have the following structure. Non-mandatory fields can be omitted.
| Field Name | Mandatory (Yes/No) | Description |
|---|---|---|
| Vendor ID | Yes | Vendor ID in CStoreOffice®. |
| Name | Yes | Vendor name. |
| Tax ID | No | Vendor tax ID. |
| Abbreviation | No | Abbreviation for the vendor name. |
| Country ID | No | Vendor residence country ID in CStoreOffice®. |
| State ID | No | Vendor residence state ID in CStoreOffice®. |
| Country | No | Vendor residence country name. |
| State | No | Vendor residence state name. |
| City | No | Vendor residence city. |
| Address | No | Vendor residence address. |
| ZIP | No | Vendor ZIP. |
| Phone | No | Vendor phone. |
| Fax | No | Vendor's Fax |
| No | Vendor email. | |
| Contact person | No | Vendor main contact person. |
| Merchandise | No | Determines if
operations of the Merchandise type are available for the
vendor. Possible values: - 1 - Yes (default) - 0 - No |
| Fuel | No | Determines if
operations of the Fuel type are available for the vendor. Possible values: - 1 - Yes - 0 - No (default) |
| Expenses | No | Determines if operations of the Expenses type are available for the
vendor. Possible values: - 1 - Yes - 0 - No (default) |
| GL# | No | General Ledger number that is assigned to the Vendor. |
| Use Fintech | No | Determines if the fintech method of payment can be applied for the vendor. Possible values: - 1 - Yes - 0 - No |
| Use negotiated cost | No | Negotiated
cost regarding the items will be used as a default one when creating purchase
documents in CStoreOffice®. Possible values:
- 1 - Yes - 0 - No (default) |
| Pref. MOP | No | Preferred method of payment. Possible values: - CASH - CHECK - CREDIT |
| Cost Exceptions Allowance | No | This field contains the value of the difference between the item's cost and negotiated cost values. If this field is populated and it is equal or less than the difference between the item's cost and negotiated cost values, the cost exceptions are not created for the item. |
| Active | No | Is
the vendor active. Possible values: - 1 - Yes (default) - 0 - No |
| Items QTY | No | Items quantity. |
File Template
To construct a file for import, you can use a template provided by Petrosoft. To get the template and prepare the file, follow the steps:
- In the Import Tool, on the Data Sources panel, select From file.
- Click the Download example link.

- The downloaded file is provided in the XLSX format:
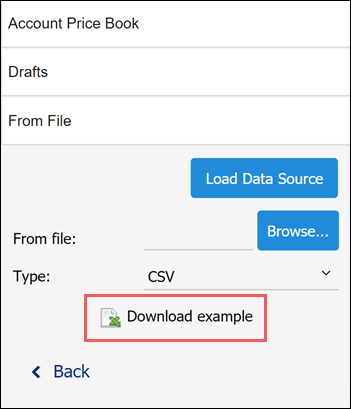
- On the Fields Description tab, get information about every entry that must be filled in the file.
- On the csvVendorsDatasourceTemplate tab, fill data for the vendors that you want to import.
- Once the file is ready, switch to the csvVendorsDatasourceTemplate tab and save the file in the CSV or XLSX format.
Result: You can use the saved file for import.


