


With the Import Tool, you can perform the following operations with the categories:
- Copy the Price Book categories between accounts.
- Import categories to the current account from the following data sources:
- Account Price Book
- GateKeeper (for more details, see Importing Data from GateKeeper)
- Drafts
- File (for more details, see Preparing a File for Data Import)
- Export categories from the current account to a file.
- Manage the account's categories.
Copying Categories between Accounts
To copy the Price Book categories from one account's price book to another account, follow the steps:
- Import categories from the source account to the draft. Do the following:
- In the top right corner of the page, switch to account you want to import categories from.
- Go to Operational Menu > Price Book and then click Categories.
- Go to DRAFTS and create a new draft. For details, see Working with Drafts List.
- Go to Data Sources Panel and then click the Add More button.
- Expand the Account Price Book section.
- At the bottom of the section, click the Load Data Source button.
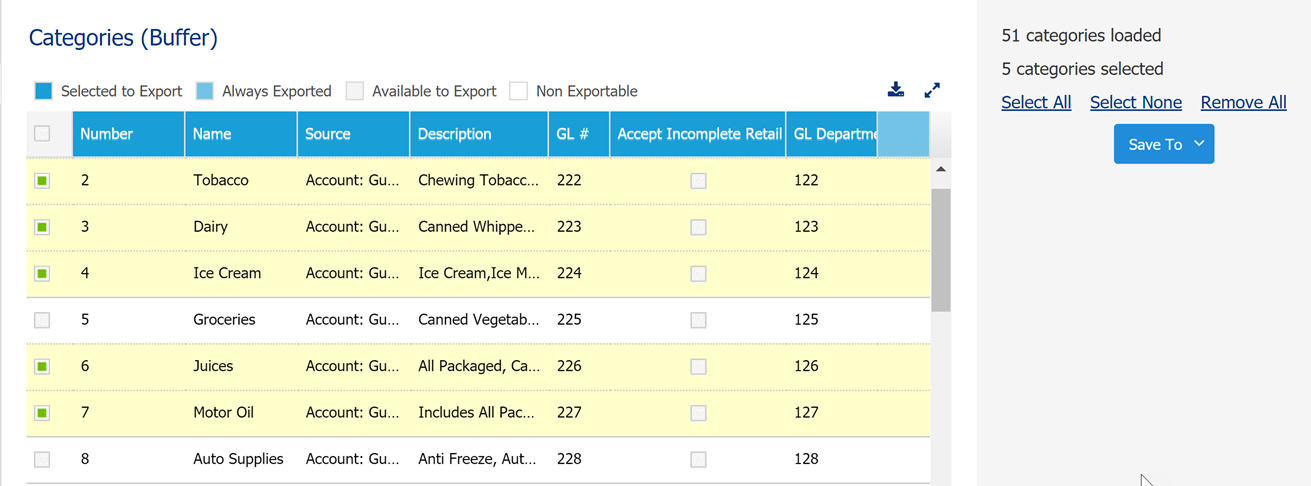
- Wait until all account's categories are uploaded to the Categories (Buffer) table.
- Select the categories you want to import into another account.
To select all categories, click Select All.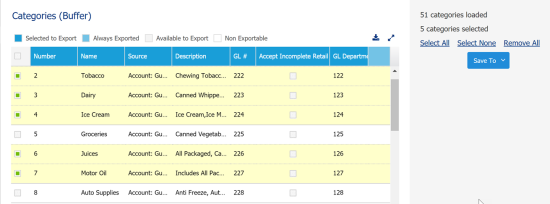
- Save selected categories from the buffer to your draft. For details, see Saving Data from Buffer to Draft.
- Export categories from the saved draft to the destination account. Do the following:
- In the top right corner of the page, switch to account you want to export the categories to.
- Go to DRAFTS and then select the saved draft with the imported categories.
- Make sure the draft's table contains the categories you need.
- Go to Data Sources Panel and then on the right of the Save To button, click the drop down arrow.
- Select any location and then click the Save To button.
- Make sure the categories are copied successfully. Go to CStoreOffice® main menu and then click Price Book > Categories.
Before exporting the draft's table to another account, you can edit the draft's data manually. For example, you can select the columns for exporting. For details, see Editing Draft Manually.
The categories are configured on the account level. So, in case the categories are exported to any location, the categories of the whole account are updated automatically as well.
Importing Categories to Current Account
To import the categories to the current account, follow the steps:
- Go to Operational Menu > Price Book and then click Categories.
- Go to DRAFTS and create a new draft. For details, see Working with Drafts List.
- Import categories to the draft from any of the available data sources:
- Account Price Book
- GateKeeper - for more details, see Importing Data from GateKeeper.
- Drafts
- From File
- Copy the draft's data to any of the current account's locations. For details, see Exporting Draft Data.
- Make sure the categories are copied successfully. Go to CStoreOffice® main menu and then click Price Book > Categories.
For more information on importing data to the draft, see Importing Data to Draft.
For more information on working with the data sources, see Importing Data from Different Sources.
The categories are configured on the account level. So, in case the categories are exported to any location, the categories of the whole account are updated automatically as well.
Import Tool: Saving data from your draft to your account
This video contains the instructions on how to import and save to your account the categories in Import Tool.
Exporting Categories from Current Account to a File
To export the categories from the current account to a file, follow the steps:
- Go to Operational Menu > Price Book and then click Categories.
- Go to DRAFTS and create a new draft. For details, see Working with Drafts List.
- Import categories to the draft from the Account Price Book source.
For details, see Importing Data to Draft, Import Item Tags or Promotions from Account Price Book. - Export the categories from the draft to a file. For details, see Exporting Draft Data.
Managing Account Categories
You can manage the account categories in the draft and then save this draft to any location to apply changes to the whole account.
For more information on how to update categories in the draft, see Editing Draft Manually.
Preparing a File for Data Import
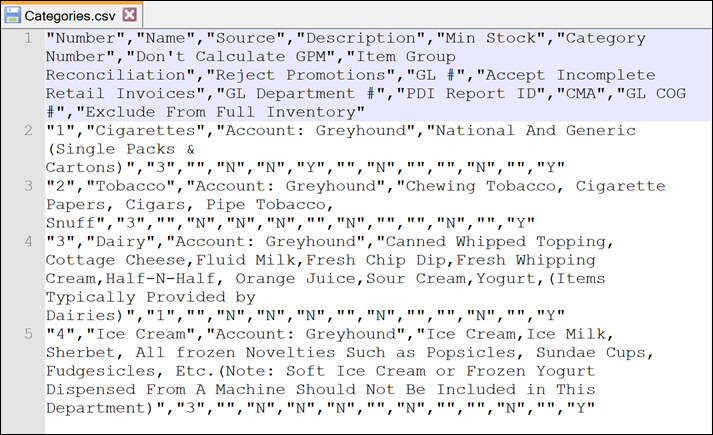
You can use CSV or XLSX files to import data about Price Book categories and work with them in the Import Tool. In the file, you must provide data for all categories whose data you want to import. Each line in the file contains data for a separate Price Book category. Each entry in the line corresponds to a specific category field, and each comma indicates where one entry ends and another entry begins.
The file that you use for import of categories data must have the following structure. Non-mandatory fields can be omitted.
| Field Name | Mandatory (Yes/No) | Description |
|---|---|---|
| Number | Yes | Unique category ID. |
| Name | Yes | Category name that appears on CStoreOffice® forms. |
| Source | No | Source of record, can contain custom text or be left empty. |
| Description | No | Category description. |
| Min Stock | No | Minimum quantity of items in stock. |
| Category Number | No | Custom category number. |
| Don't Calculate GPM | No | Flag
that allows a user to exclude items from store GPM calculation.
Possible values:
- 1 - Yes - 0 - No |
| Item Group Reconciliation | No | ID populated automatically, obtained from the Inventory Item Group Reconciliation form for high risk items due to shortage. |
| Reject Promotions | No | Flag
that allows a user to reject promotions for this category. Possible values:
- 1 - Yes - 0 - No |
| GL # | No | General Ledger number that is assigned to the category. |
| Accept Incomplete Retail Invoices | No | Flag
that allows a user to accept incomplete invoices for items.
Possible values:
- 1 - Yes - 0 - No |
| GL Department # | No | Mapping to the General Ledger department number. |
| PDI Report ID | No | Identifier used for PDI Daily Export. |
| CMA | No | Flag
indicating that the cost method of accounting must be applied to the category. Possible values:
- 1 - Yes - 0 - No |
| GL COG # | No | Mapping to the General Ledger Cost Of Goods number. |
| Exclude From Full Inventory | No | Flag that
allows a user to exclude ingredient items from RMA inventory calculation. Possible values:
- 1 - Yes - 0 - No |
File Template
To construct a file for import, you can use a template provided by Petrosoft. To get the template and prepare the file, follow the steps:
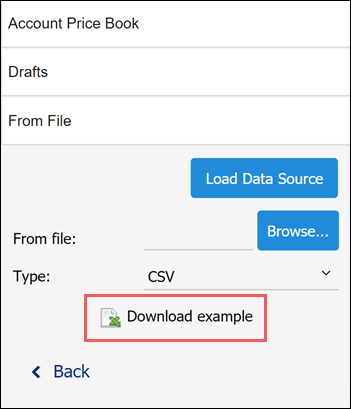
- In the Import Tool, on the Data Sources panel, select From file.
- Click the Download example link.

- The downloaded file is provided in the XLSX format:
- On the Fields Description tab, get information about every entry that must be filled in the file.
- On the csvCategoriesDatasourceTemplate tab, fill data for the categories that you want to import.
- Once the file is ready, switch to the csvCategoriesDatasourceTemplate tab and save the file in the CSV or XLSX format.
Result: You can use the saved file for import.


