


The touchscreen is a major component of SmartPOS. Follow these guidelines while using the touchscreen:
- Use your fingertip or knuckle to touch the screen.
- If you have long fingernails, you probably find that touching the screen with your knuckles works best.
- Do not use sharp objects to touch the screen.
- Do not punch the screen.
Learn the basics
If you have not activated your SmartPOS yet, please activate it following the instructions in Activating SmartPOS.
The log-in screen is where employees from your location clock in and clock out, open and finalize the pay point, check in and check out.

If you turned on SmartPOS for the first time, user System will help you to learn the navigation basics and routine operations for employees in the location where SmartPOS is installed. User System is a default system user with all permissions.
Clock In
To start operating SmartPOS, a user must clock in. The clock-in is intended to record presence of the user in the location. Once a user clocks in, SmartPOS starts tracking time for this user and logging the actions this user performs.
To clock in, follow these steps:
- Tap the user in the left part of the screen to select the user.
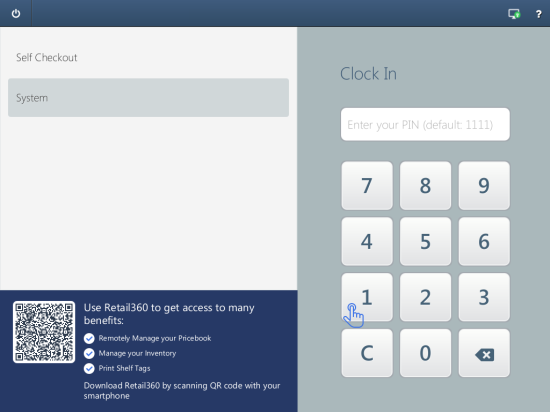
The selected user is highlighted with a gray frame as on the picture above. - Tap 1111 to enter the password in the right part of the screen.
The number pad in the right part of the screen is designed to enter the user password. - The backspace key is right to zero.
- To clear the entered password, tap C.
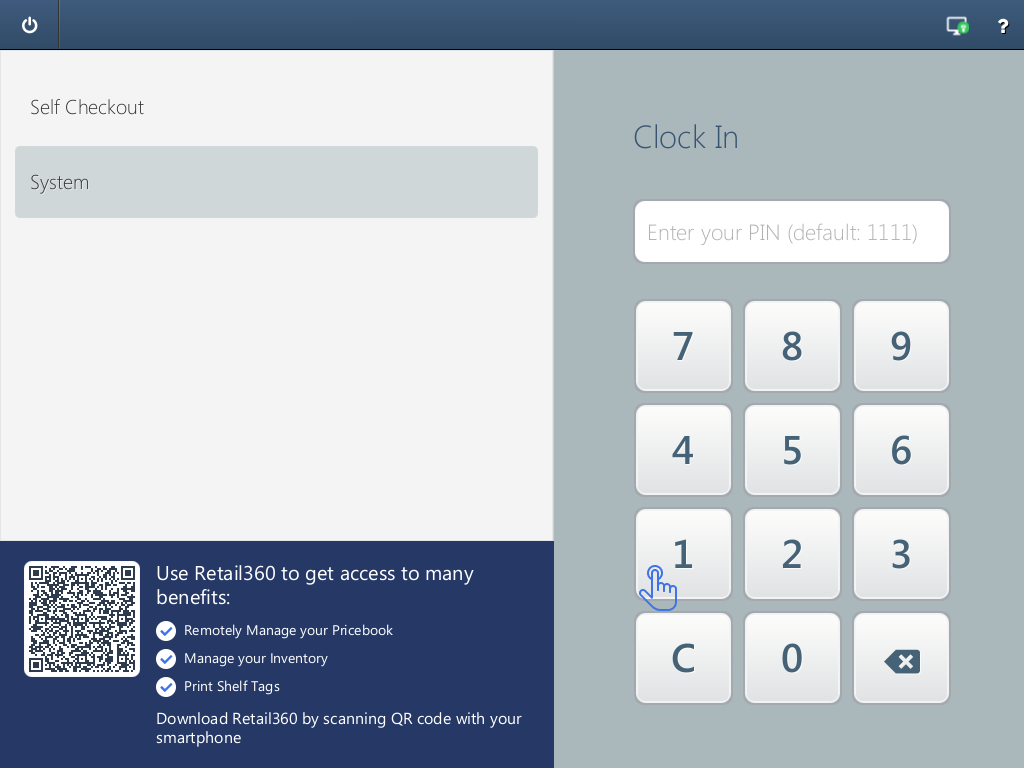
Color of the user name changes to blue once the user clocks in.

Open pay point
To start sales, a clocked-in user must open the pay point. To open the pay point, follow these steps:
- Tap Open Pay Point.

- Enter the password in the right part of the screen.
- Enter either the number of bills and coins or enter the total cash amount.

- Tap Open Pay Point in the lower part of the screen.


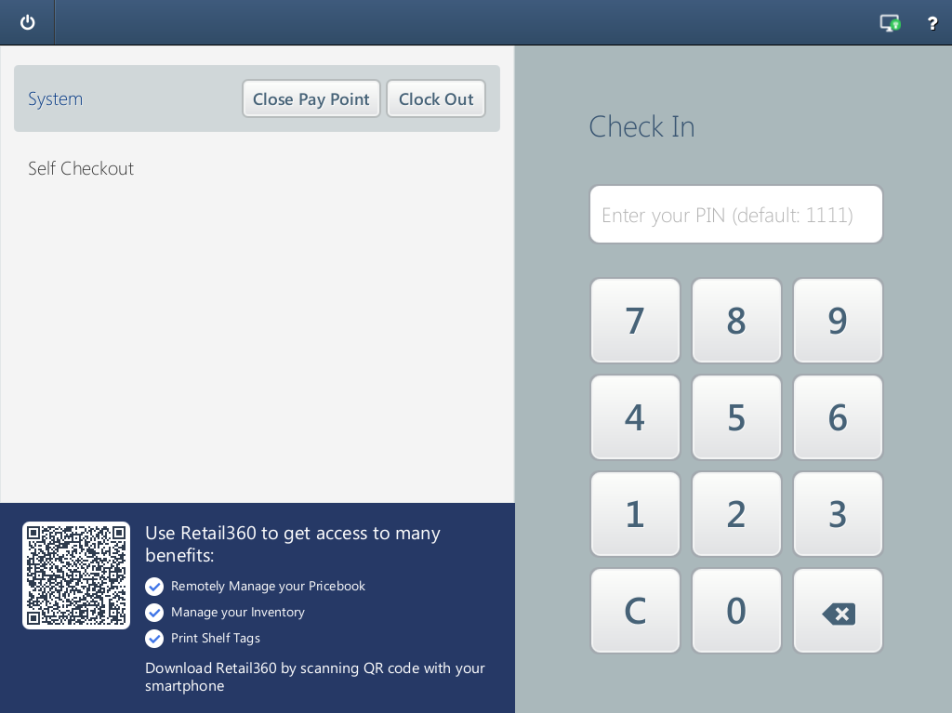
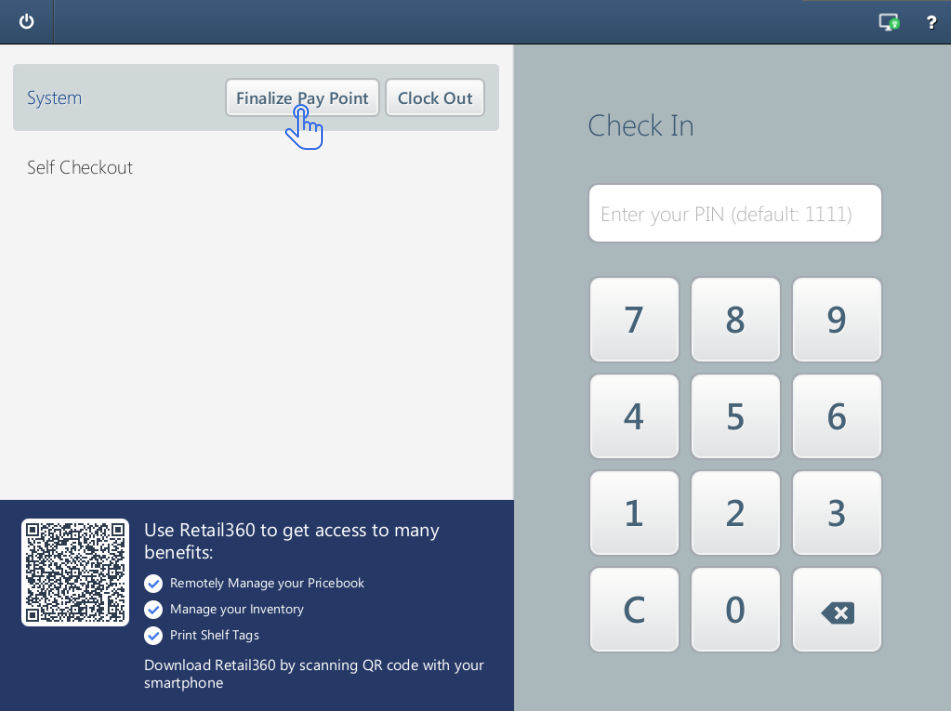
Check In
To enter the system, the clocked-in user must check in. To check in, follow these steps:
- Select the clocked-in user in the left part of the screen.

- Enter the user password in the right part of the screen.
Navigating between screens
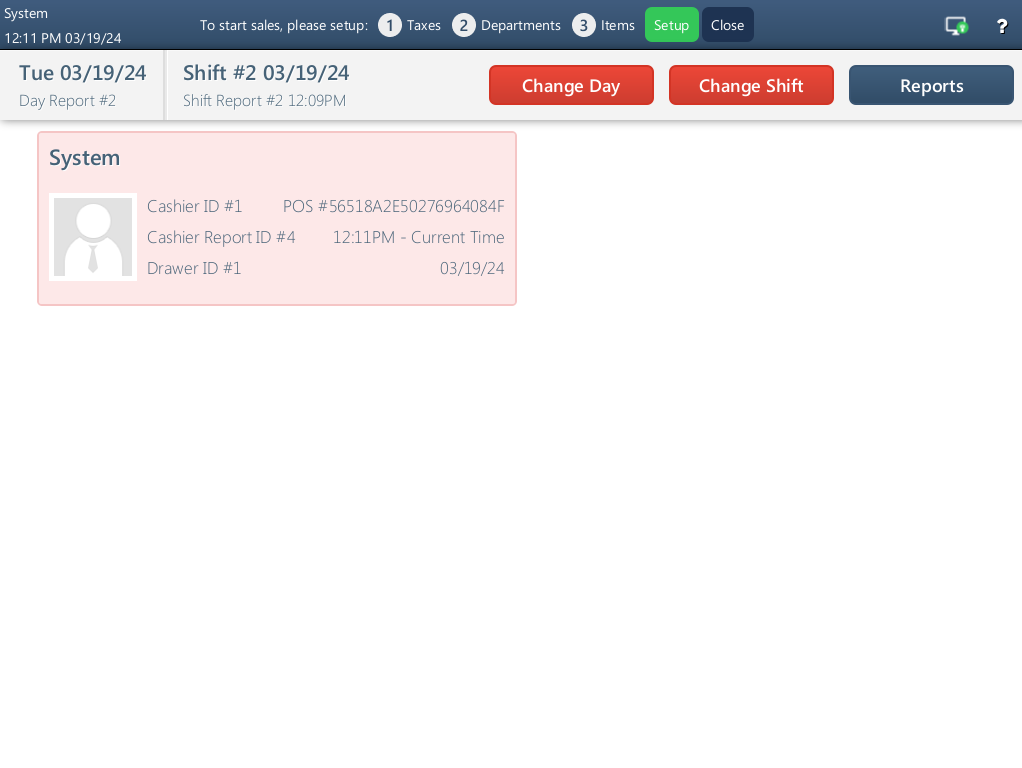
The Cashier screen appears after the checking in, if the user opened the pay point. The Cashier screen is where cashiers perform their working operations.
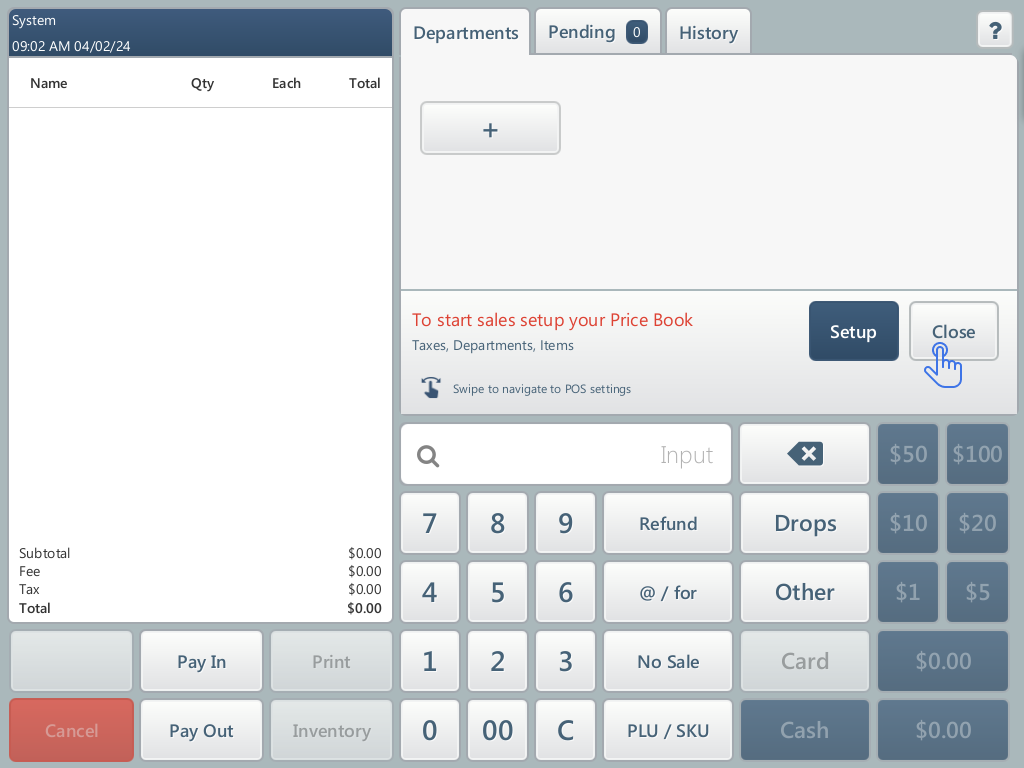
When you first start your SmartPOS cash register, you will be prompted to set up a price book. While this notification is displayed, the cashier screen will be temporarily locked, restricting access to other operations, including checkout. To continue, set up your price book (at least a couple of items) by tapping the Setup button.
You can tap the Close button to dismiss the prompt. Note, that if you have not set up a price book, we will remind you next time.
The Reports screen is the next screen after the Cashier screen. The Reports screen appears if the user checked in without opening the pay point before.
To move to the next screen, swipe from right to left or click the navigation button in the top-right corner of the interface and select a screen name.
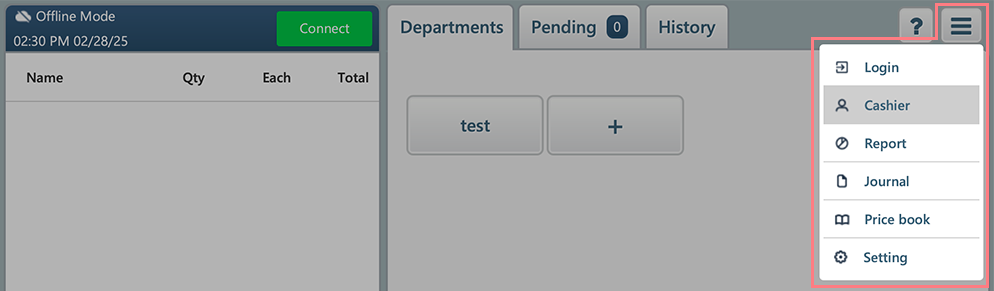
Gesture-based navigation is more intuitive and ideal for operating only a couple of screens (like in a cashier role). On the other hand, menu-based navigation offers greater precision and efficiency when switching between screens that are several steps apart to avoid multiple swipes.
The screens go in the following order:
- Cashier
- Report
- Journal
- Price Book
- Fuel Products
- Settings
To move to the previous screen, swipe from left to right or use the navigation menu.
Check Out
To escape the system, the SmartPOS user checks out. After checking out, the user ends at the log-in screen.
To check out, swipe from left to right from the screen that appeared after checking in.
Close pay point
When the cashier is done for the day, it is necessary to close the pay point, which is calculating the amount of the cash present in the cash drawer at the end of the current shift.
To close the pay point, follow these steps:
- Tap Close Pay Point.

- Enter the user password in the right part of the screen.
- Count the number of payment units (bills, coins, and coupons) in the cash drawer.
- After counting the payment units, proceed to finalizing the pay point.

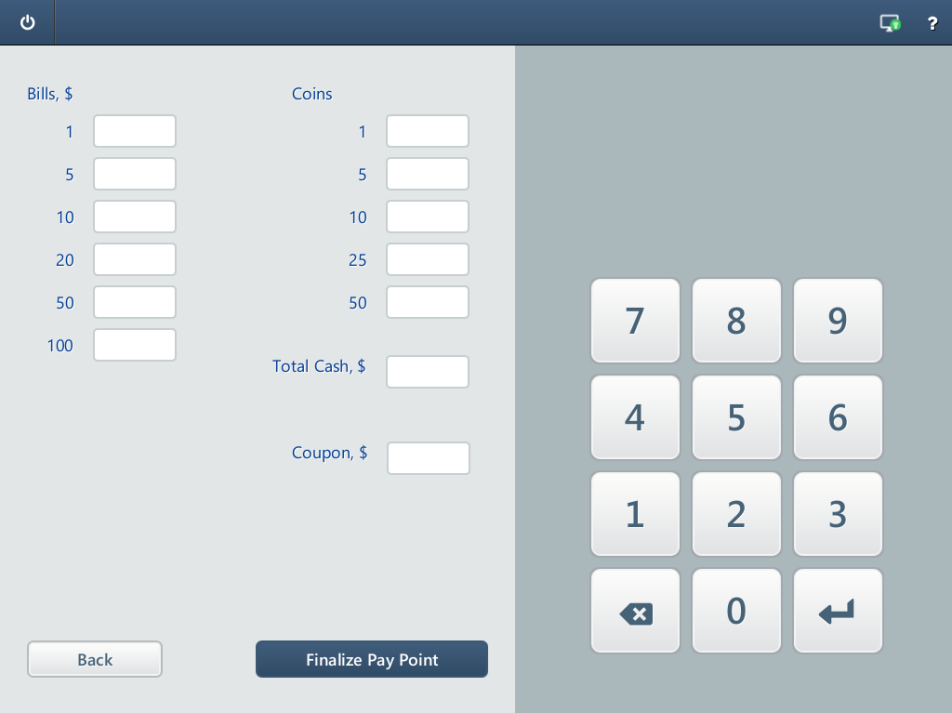
Finalize pay point
To finalize the pay point, follow these steps:
- After closing the pay point and counting the payment units, tap Finalize Pay Point.

- Enter the amount of bills, coins, total cash, coupons, and other available methods of payment.

- Tap Finalize Pay Point in the lower part of the screen.
Change shift
If you have shifts for cashiers in your location, one cashier must close its shift to allow another cashier to start a new shift. At the beginning of the shift, a cashier must open the pay point. At the end of the shift, this cashier must finalize the pay point and change the shift.
Follow these steps to change the shift.
- Finalize the pay point.
- Check in.
- Tap Change Shift and confirm you want to change the shift.

- If you are going to leave the location, clock out.
Change day
At the beginning of a new working day, the cashier must change the day before opening the pay point. To change the day, follow these steps:
- Check in.
- Tap Change Day and confirm you want to change the day.
Clock Out
At the end of a working shift, the user must clock out before leaving the location. Once a user clocks out, SmartPOS stops tracking time for this user and logging actions for this user.
To clock out, follow these steps:
- Select the clocked-in user in the left part of the screen.
- Tap Clock Out.

- Enter the user password in the right part of the screen.

User permissions
The user permissions condition available screens and operations at specific screens for the SmartPOS users. You can authorize certain users to clock in and clock out only. You can authorize the cashiers to open the Cashier screen only. The other screens will be not available to them in this case. You can create users and customize the user permissions later.
Context-sensitive help
The SmartPOS unit features the context-sensitive help. To learn more about the current screen, follow these steps:
- Tap the question mark in the upper right corner of the screen.
- In the appeared menu, tap Help.
What's next?
You can do the following to prepare your SmartPOS for sales:
- To set up the price book, navigate to the Price Book screen.
- To create new users and customize the user permissions, navigate to the Settings screen.
- See the Cashier screen cheat sheet to learn the Cashier screen essentials and available operations on this screen.


