


To enter a new purchase invoice:
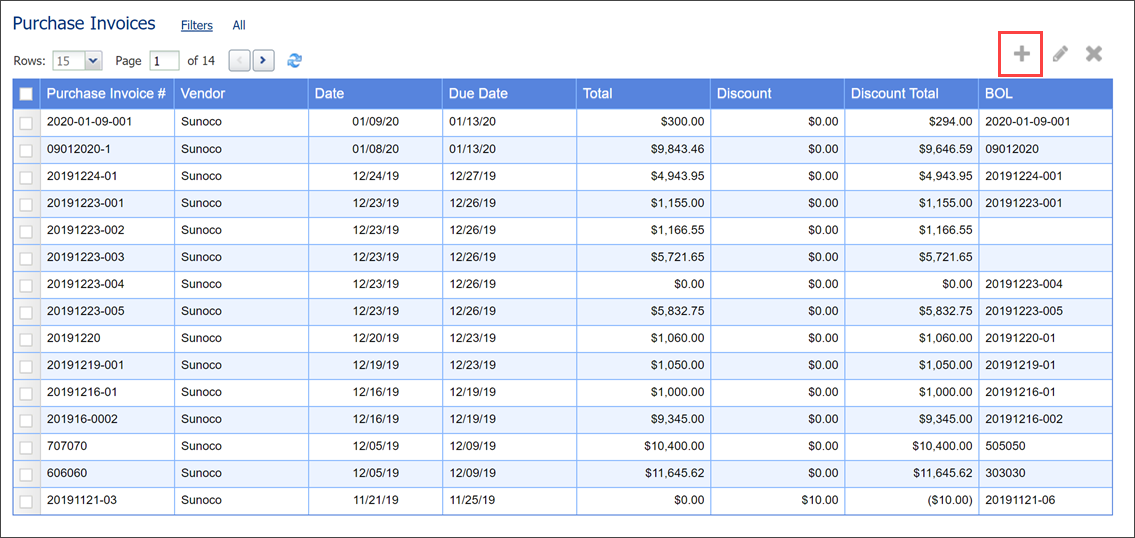
- In Fuel Central, go to Vendors > Purchase Invoices.
- At the top right of the purchase invoices list, click the add icon.

- In the Purchase Invoice form, go to the Destinations section.
- In the BOL # field, start
typing the number of the BOL and then select it from the list. You can also click the List link to the right of the field and select the BOL manually by double-clicking the corresponding row.

Result: Fuel Central automatically populates data in the form according to the selected BOL. Make sure the following data is populated correctly:
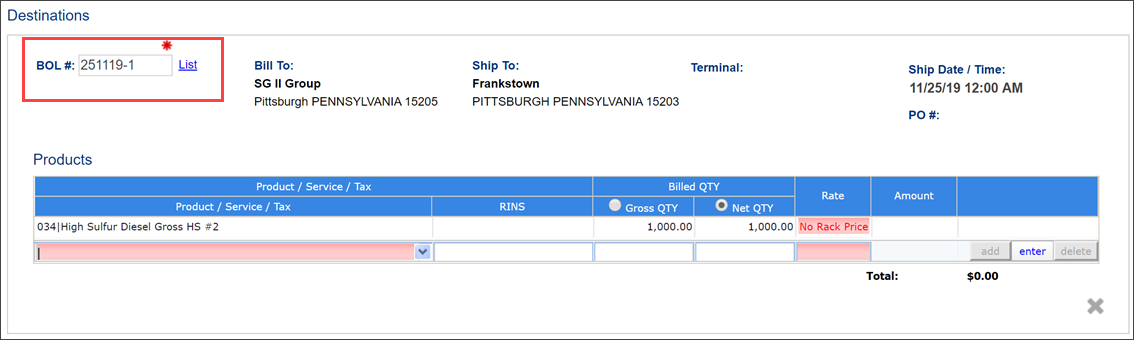
- The company, class and vendor names.
- The Bill to and Ship To details in the Destinations section.
If you are creating a purchase invoice based on the split BOL, for each dealer in the BOL a separate sale invoice will be created. For more information about split BOLs, see Distributor BOLs.
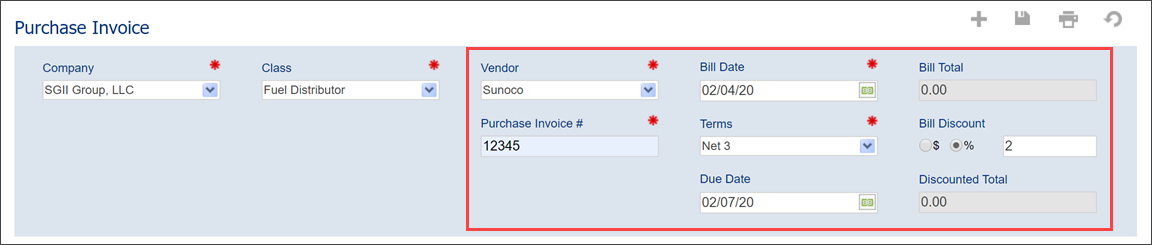
- In the Purchase Invoice # field, enter the purchase invoice number.
- To the right of the Bill Date field, click the calendar icon and select the bill date.
- From the Terms list, select the invoice terms.
Result: The Bill Discount value is automatically populated according to the discount settings specified in the Settings > Company Preferences form.

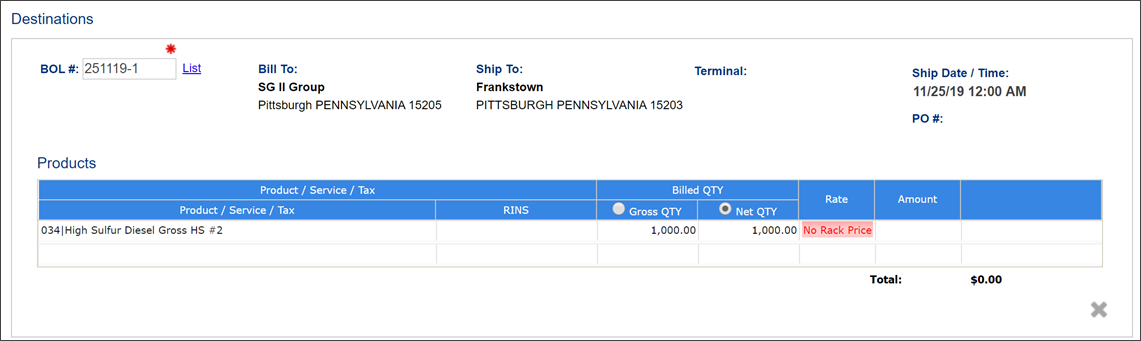
- Populate the details in the Products list of the Destinations section:
- In the Billed QTY column, select whether the invoice uses the gross or net quantity.
- Check the Rate field. In most cases, the Rate value is automatically populated with the Rack Price value set up in the Price Broadcasting record for the corresponding vendor and effective date.
If the appropriate rack price is not set up, the No Rack Price notification is displayed in the cell. In this case, you can enter the rate value manually. - Define and adjust taxes, fees, or surcharges for your products within the Taxes & Service section. Apply multiple taxes or fees to each invoice item and specify the base amount in the QTY field.
- If you enter the rate, the amount is automatically calculated from the base quantity. It is the recommended approach.
- Entering the exact amount may be helpful when automatic rounding based on the tax rate cause slight discrepancies in the calculated amount. The tax rate will be inserted automatically based on your input.

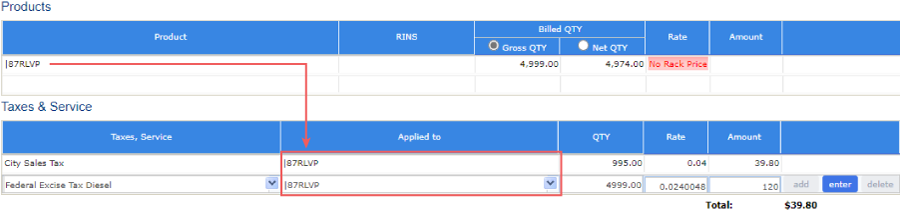
Choose to input either the rate or the fixed amount depending on your calculation preference:
- At the top right of the form, click the save icon to apply the changes.


