


CStoreOffice® allows for building internal supply chain management, where one or more locations (stations) serve as warehouses / wholesalers, supplying goods to other locations within the same account that operate as customers / retail stores.
Wholesaler locations can issue customer invoices that reflect the cost of inventory transfers to retailer locations, ensuring accurate internal billing, record-keeping, and product tracking. These invoices are transmitted via EDI (Electronic Data Interchange), enabling efficient and standardized communication.
Adding a wholesaler
In order to enable the wholesaler invoice flow, you must designate a location within your account as wholesaler vendor:

- Go to Vendors > Vendors List in the main menu.
- Click the Add New button and select Wholesaler from the dropdown menu.
- Specify the wholesaler vendor name for easier navigation.
- Select a location to be designated as a wholesaler from the Warehouse list.
If the location list is too long, you can narrow it down by typing any part of the location name or tag in the Search field. - Enter the global account number for the vendor in the GL Number field.
- Select your account's locations which will operate as customers of the wholesaler in the Locations section. You can either select the locations directly or use location tags.
If the location list is too long, you can narrow it down by typing any part of the location name or tag in the Search field. - Click the Save button to create a wholesaler vendor.
You can create only one wholesaler vendor per location. Assigning multiple vendors to the same location is not permitted.
If no locations appear in the Warehouse list, it means all of your locations have already been assigned as wholesalers.
You can also select locations that have already been configured as wholesaler vendors, including the location selected as a Warehouse.
Read Configuring Ship to and Bill to for locations to find out how customer locations are set up.
Configuring Ship to and Bill to for locations
Once the wholesaler vendor is created (after clicking the Save button), the system automatically creates the corresponding Bill to and Ship to entries for customer location:
- The Bill to entry will be named after your company and will use your company’s address for billing.
- A Ship to entry for each selected customer location:
- The name will match the location name.
- The shipping address will match the location address.
- Billing information will be populated with the Bill to entry described earlier.
If a Bill to entry with this name already exists, it will be used as is, without any modifications.
If a Ship to entry with this name already exists, it will be used as is, without any modifications.
You can manually modify the billing and shipping entries for customer locations at any time, even if they were created automatically. However, ensure that you do not change the names, as the Bill to name must match the company name and the Ship to name must match the location name.
For example, if you want to use a custom billing for the location The Green Man, previously configured as a wholesaler's customer:
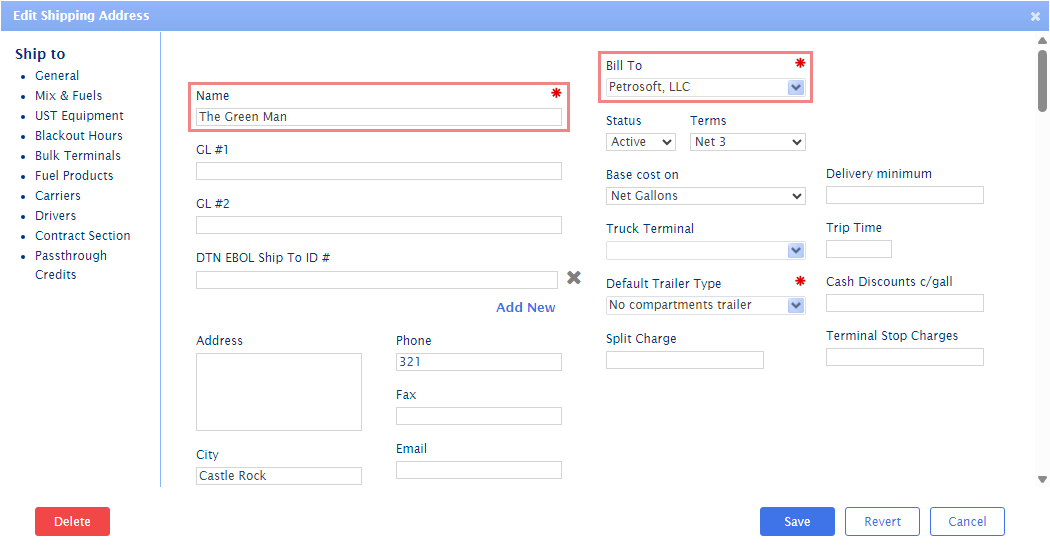
- Create a new Bill to entry with the required parameters, if you do not already have one.
- Open the Ship to entry with the name The Green Man. It should have been automatically created when you selected the location as the wholesaler's customer.
- Select the required billing entry from the Bill to field.
- Click the Save button.
Do not change the name field!
The changes you make will be remembered and applied in the future, even if you re-configure the wholesaler vendor.
Advanced details
To change the optional parameters of a wholesaler vendor, expand Advanced details section by clicking its header. You can only provide some of the fields; filling in all the values is not required.
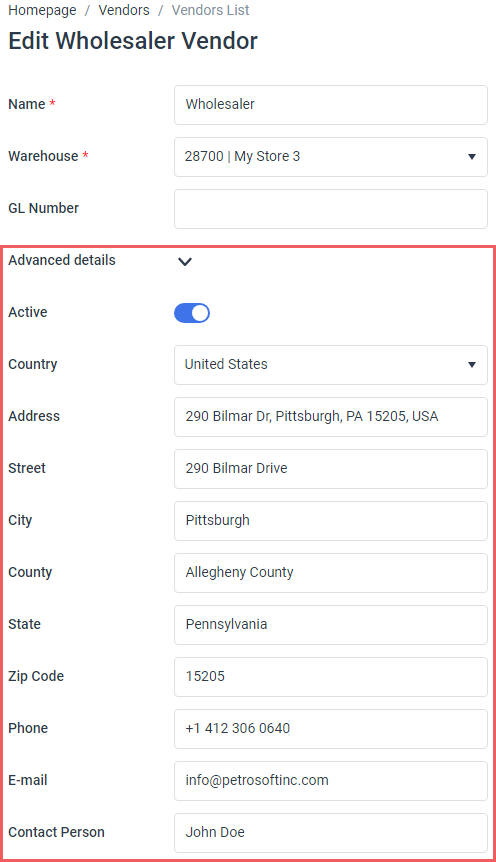
- To temporary disable the wholesaler without deleting it, turn on the Active switch.
- By default, the vendor's address is taken from the location settings. To override this, select a country and fill in the details in the corresponding fields.
- Provide the contact phone of a wholesaler in the Phone field.
- Provide the primary email address of a wholesaler in the E-mail field.
- Enter the full name of a contact person on the wholesaler side in the Contact Person field.
Simply start typing any part of the address in the Address field, and the system will attempt to identify the geolocation and auto-fill the other fields (street, city, state, and so on) for you.
Managing wholesalers
All wholesalers are added to the list of vendors.
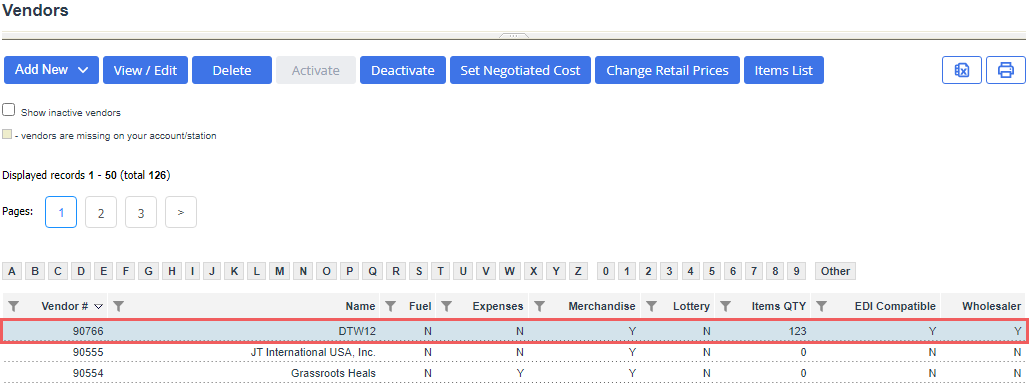
Each wholesaler is an EDI-compatible vendor, meaning invoices are transmitted via Electronic Data Interchange. The invoice routing process is entirely internal, bypassing external EDI providers to ensure optimal performance. It is not possible to disable EDI for wholesalers.
The wholesaler invoice flow only supports data exchange between locations within the same account. Wholesale invoices cannot be sent to locations associated with other accounts.
- To change the wholesaler settings, select the vendor in the list by clicking it and click the View / Edit button.
- To temporary disable the wholesaler without deleting it, see Activating and deactivating the vendor.
- To remove a wholesaler, select the vendor in the list by clicking it and click the Delete button.


