


In the Store Level Mode section, you can specify in which mode your business unit must operate:
- Single Terminal Mode: Select this option if you use one SmartPOS terminal in the business unit.
- Multi Terminal Mode: Select this option if you use several SmartPOS terminals in the business unit and want them to operate as a single system.
To let SmartPOS terminals operate as a single system, you must enable the multi-terminal mode for them and add them to the same network.
Prerequisites
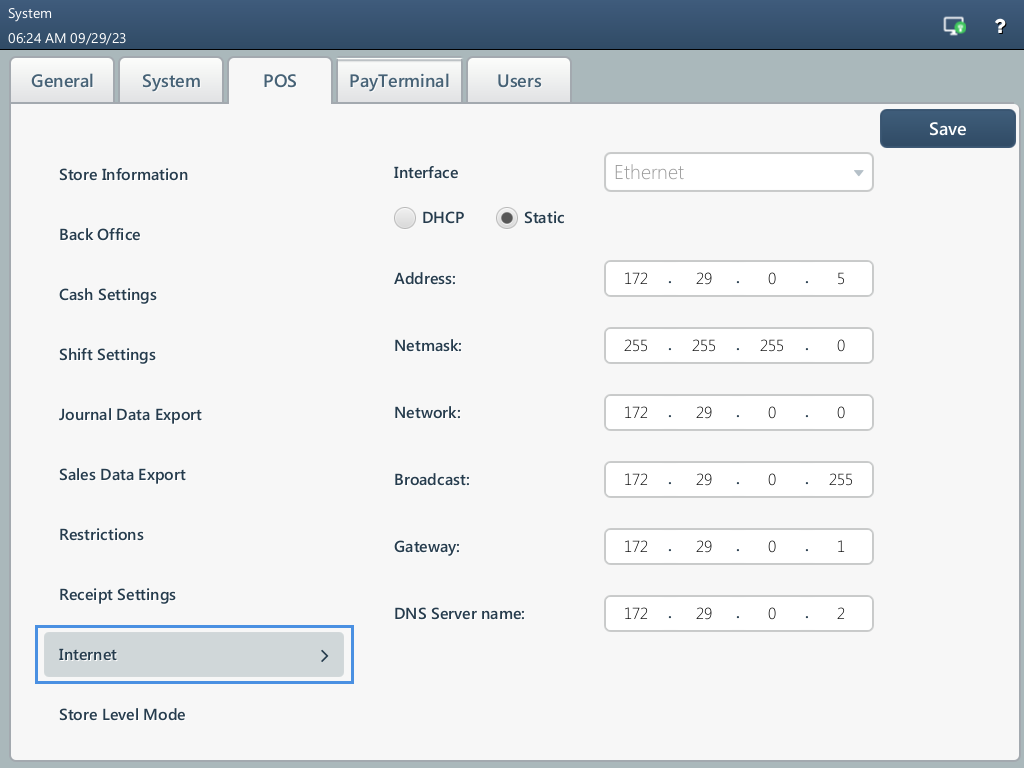
Before you enable the multi-terminal mode for a terminal and add it to the business unit, make sure the static IP address is assigned to this terminal. To check the IP address settings, go to Settings > POS > Internet. For details, see Internet.
Adding Terminals to Business Unit
To add the first SmartPOS terminal in the business unit to the network:
- In SmartPOS at the terminal, go to the Store Level Mode section and select Multi Terminal Mode.
- In the Terminal ID field, specify the terminal ID. The ID must be unique within the network. This ID is used as the terminal identifier for association with the terminal cash drawers, Pay Points and so on.
- Select Initiate creation of new Network and press Save.
Result: A new network is created. The terminal ID is displayed in the Master Terminal ID field. The terminal data is displayed in the Networking terminals table.
To add other SmartPOS terminals in the business unit to the network:
- In SmartPOS at the terminal, go to the Store Level Mode section and select Multi Terminal Mode.
- In the Terminal ID field, specify the terminal ID. The ID must be unique within the network. This ID will be used as the terminal identifier for association with the terminal cash drawers, Pay Points and so on.
- Select Connect terminal to exiting Network.
- In the Terminal ID of Master Workstation within Network field, specify the ID of the terminal already added to the network. This terminal will be used as the Master terminal in the network. For more details, see Add and Remove Terminals from Network.
- In the IP Address of Master Workstation within Network field, specify the IP address of the Master terminal.
- Press Save. In the confirmation message, press Yes.
Result: The terminal is added to the existing network. The list of terminals available in the network is displayed in the Networking terminals table.
When you add a terminal to an existing network, previously generated data, such as information about shifts and reports, is deleted at this terminal. This data is replicated to the added terminal from the Master terminal.
For more information, see Multi-Terminal Mode.


