With CStoreOffice®, you can set up tags and assign them to your locations. Tags allow you to group locations by specific criteria in different dimensions. For example, you can create Type and Price Zone tags and categorize your locations by assigning these tags to them. CStoreOffice® supports a hierarchical tree of tags, which provides a great flexibility for locations categorization.
The configured hierarchy of tags can be used for work with different CStoreOffice® objects. For example, you can run reports for a group of locations filtered by a certain tag to retrieve the necessary data.
You can perform the following actions with the location tags:
- Rename a tag
- View how the tags are assigned between the stations of your account
- Add a new tag on the same hierarchy level
- Add a new tag inside existing tag
- Remove a tag
- Assign a tag to the account's locations
- Assign a primary tag
Renaming Location Tag
To rename a location tag, follow the steps:
- At the top right of the CStoreOffice® home page, click your user name.
- Go to Tags > Location.
Result: The list of your account's location tags opens. - Right-click the tag you want to rename.
Result: The Tags Context Menu window opens. - In the Tags Context Menu window, click Rename.

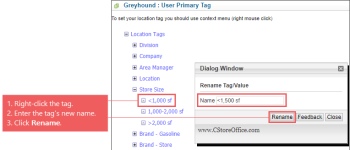
- In the opened Dialog Window do the following:
- In the Name field, enter the tag's new name.
- Click Rename.
- Make sure the tag is renamed.


Viewing Tags Assignment Between Stations
To view how any group of tags is assigned between the stations of your account, follow the steps:
- At the top right of the CStoreOffice® home page, click your user name.
- Go to Tags > Location.
Result: The list of your account's location tags opens. - Right-click the root tag for the group of tags you want to view.
Result: The Tags Context Menu window opens. - In the Tags Context Menu window, click Viewing info.
Result: The table displaying the selected tags assignment between your account's stations opens.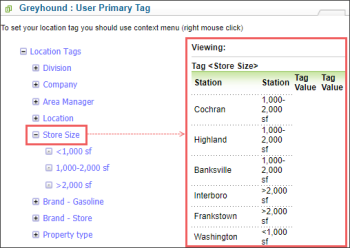

Adding New Tag at the Same Hierarchy Level
To add a new tag at the same hierarchy level of the selected tag:
- At the top right of the CStoreOffice® home page, click your user name.
- Go to Tags > Location.
Result: The list of your account's location tags opens. - Right-click the tag to which you want to add one more tag at the same hierarchy level.
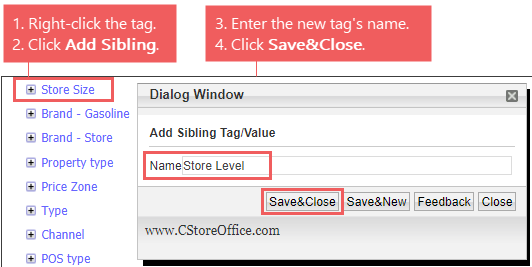
Result: The Tags Context Menu window opens. - In the Tags Context Menu window, click Add Sibling.
- In the opened Dialog Window, do the following:
- In the Name field, enter the new tag's name.
- Click the Save&Close button.

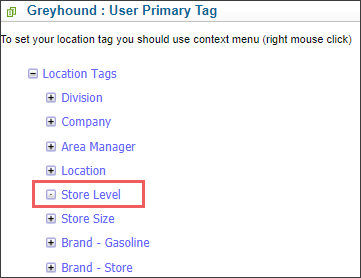
- Make sure the added tag appears in the tags tree at the same hierarchy level.
Adding New Tag inside Existing Tag
To add a new tag inside the existing tag:
- At the top right of the CStoreOffice® home page, click your user name.
- Go to Tags > Location.
Result: The list of your account's location tags opens. - Right-click the tag, inside which you want to add a new tag.
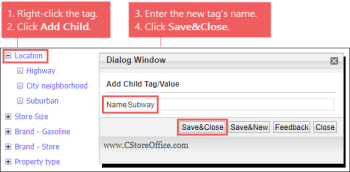
Result: The Tags Context Menu window opens. - In the Tags Context Menu window, click Add Child.
- In the opened Dialog Window, do the following:
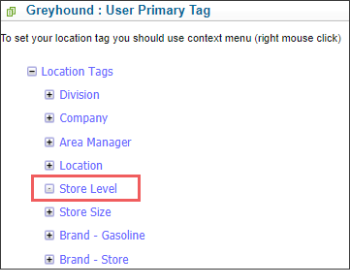
- In the Name field, enter the new tag's name.
- Click the Save&Close button.
- Make sure the added tag appears inside the selected tag.

Removing Tags
You can remove a location tag from the tags tree, for example, if you no longer want to use this tag for locations categorization.
A user can remove a location tag only if the Allow user to remove location tag permission is granted to the user account in CStoreOffice®. In the opposite case, when the user opens the hierarchy of tags and attempts to remove a location tag, the Remove command will not be available to the user.
To check if the permission is granted to a user, follow the steps:
- At the top right of the CStoreOffice® home page, click your user name and then select General > Employees.
- In the Employees list report form, select the necessary employee record and then click Edit.
- In the left menu, select Login & Password and then click the Advanced link on the right of the Role list.
- Expand the Data Entry section and make sure that the Allow user to remove location tag is granted to the user.


Alternatively, you can enable this permission for specific user roles in CStoreOffice®. For more details, see Managing Roles.
Once the necessary permission is granted, you can proceed to removing location tags.
To remove an existing tag:
- At the top right of the CStoreOffice® home page, click your user name.
- Go to Tags > Location.
Result: The list of your account's location tags opens. - Right-click the tag, which you want to remove.
Result: The Tags Context Menu window opens. - In the Tags Context Menu, click Remove.
- Make sure the tag is removed from the list of tags.
Assigning Tag to Stations
To assign a tag to your account's stations:
- At the top right of the CStoreOffice® home page, click your user name.
- Go to Tags > Location.
Result: The list of your account's location tags opens. - Right-click the tag, which you want to assign to the stations.
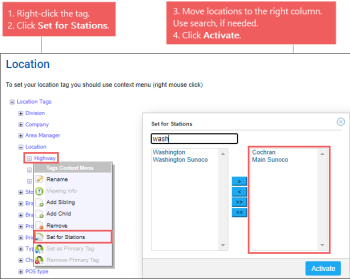
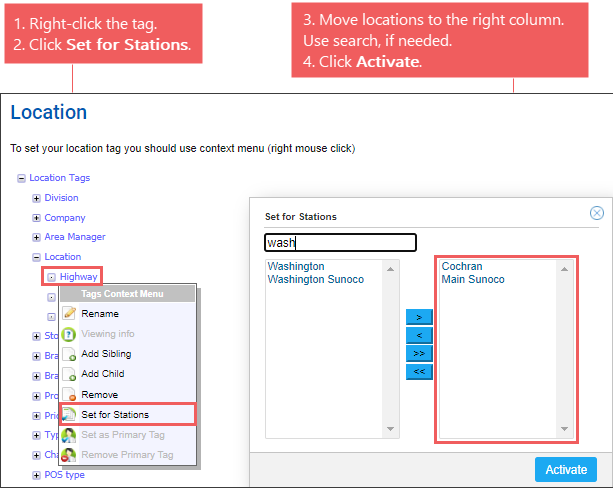
Result: The Tags Context Menu window opens. - In the Tags Context Menu, click Set for Stations.
- In the opened Dialog Window, do the following:
- Move the stations, to which you want to assign this tag, from the left column to the right column. Use search, if needed.
- Click Activate.
- Make sure the tag is assigned to the selected stations.
You can view the tag assignment by right-clicking this tag ans selecting Viewing info. For details, see Viewing Tags Assignment Between Stations.
Assigning Primary Tag
You can set one of the top-level or root tags as the primary tag. The primary tag is used to group invoices and orders on the extended view of CStoreOffice® home page.
For more information on how to switch to the extended view of CStoreOffice® home page, see Switching Between Home Page Views.
To set a top-level or root tag as the primary tag:
- At the top right of the CStoreOffice® home page, click your user name.
- Go to Tags > Location.
Result: The list of your account's location tags opens. - Right-click the top-level or root tag, which you want to make the primary tag.
Result: The Tags Context Menu window opens. - In the Tags Context Menu, click Set as Primary Tag.
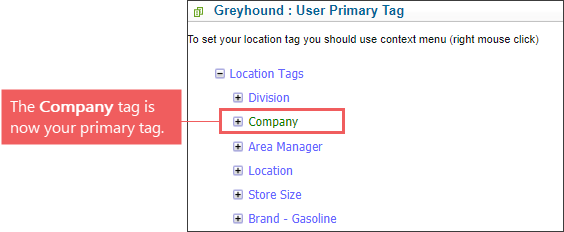
- Wait until the selected tag is set as the primary tag.
You can have only one primary tag among the top-level or root tags in your tags tree.
The primary root or top-level tag is displayed in green color.