


Reports
Petrosoft provides a huge number of analytical reports that allows you to monitor your sales data across all business activities.
All reports in CStoreOffice® can be conventionally divided into the following two groups:
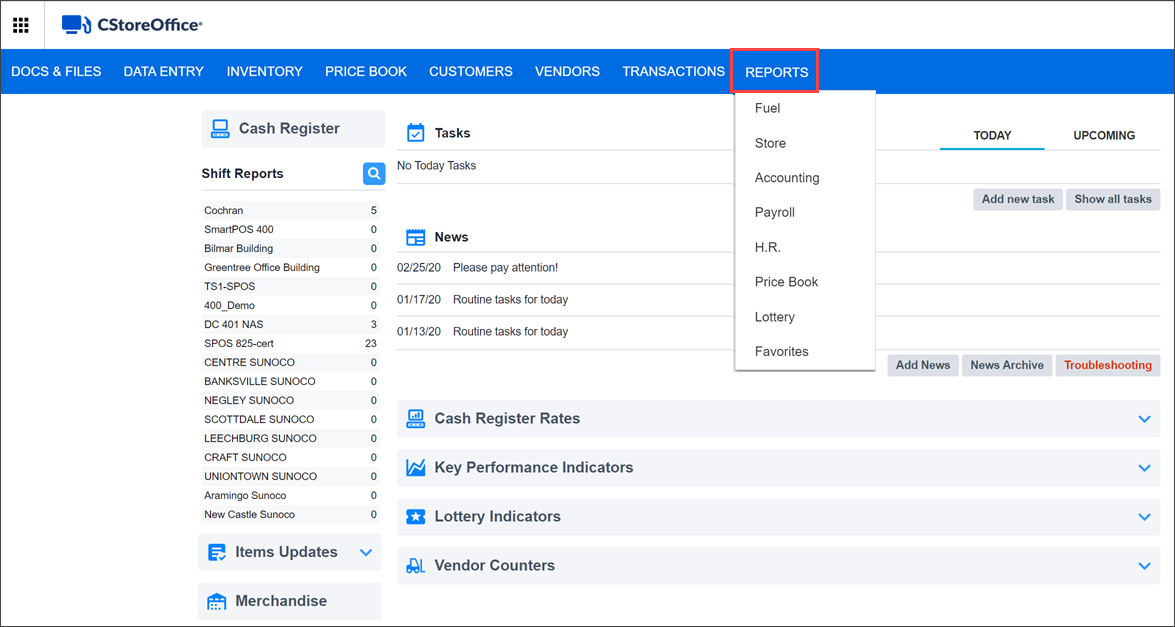
- General reports which are grouped in the Reports menu by the following areas:
- Fuel
- Store
- Accounting
- Payroll
- H.R.
- Price Book
- Lottery
- Loyalty
- Shift Reports
- Additional reports which are available from other CStoreOffice® menus and forms. For more information about additional reports, see Other Reports, Shift Reports.
An access to this group of reports is level-based. For more information about report levels, see Viewing Reports. To check the levels on which each report is available, click the corresponding report group listed above.
To learn how to generate a report and interpret its data, click this report name in the relevant help section.
To get the information about general operations you can perform with all reports, see Working with Reports.
If you have not found the information you need, have any issues with the reports, or the report you need to learn about is not described yet, contact Petrosoft Support team.
Working with Reports
You can perform the following operations with general CStoreOffice® reports:
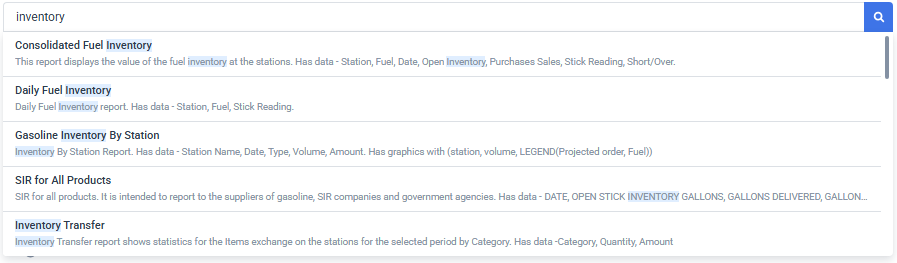
Instead of browsing the list, you can search for a specific report. Simply start typing any part of the report name or description in the field above the report list, and select the desired report from the dropdown menu.
When you open a report with mandatory parameters from the search results, the system automatically selects a default object. Usually it is the first object of the applicable type (station, company and so on). You can change this selection using the report filters.
To view the reports list, open the Reports menu and then click the group of reports you are interested in. When the report list is already opened, you can switch between different groups by clicking the tiles located above the report list.

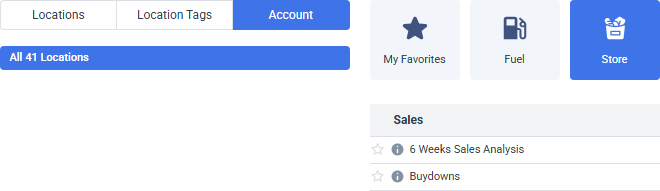
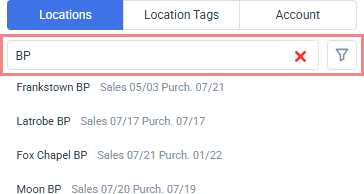
Reports are designed for specific hierarchy levels within your account structure. To change the report level, navigate to the corresponding tab in the left pane and select the desired scope.
- Account: Shows the reports for the whole account (aggregated data from all locations).
- Location Tags: Shows the reports for the division or company you select from the list.

- Locations: Shows the reports for the location (station) you select from the list.

In case the divisions are not set up for you account, the Division level is not available for the reports. For more information on managing divisions in CStoreOffice®, see Divisions.

If the number of items in the scope is large, you can filter the items by typing any part of the item name in the search box at the top.
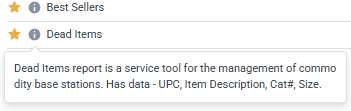
To view a description of a report, hover the information icon located next to the report name. A tooltip will appear, providing a brief overview of the report's purpose and content, helping you quickly understand its relevance before opening it.
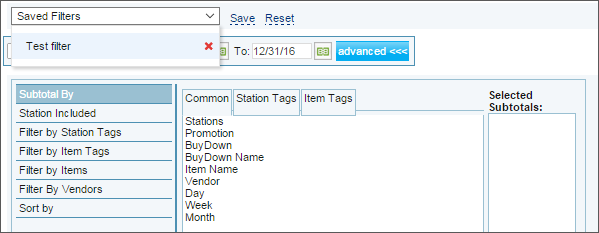
With this feature you can save your time and effort by saving the filters you usually apply to the specific report to have a quick access to them afterwards.
| To... | Action... |
|---|---|
|
To create a new filter, |
select the filtering options and click Refresh > click Save > enter the filter name > click the icon for saving . To cancel saving, click the corresponding icon.
|
|
To delete a filter, |
from the Saved Filters list, select the filter and click the delete icon for it.
|
|
To apply a filter to the report, |
select the filter from the Saved Filters list. |
|
To clear the filtering settings and exit the filtering mode, |
click Reset. |

| To... | Action... |
|---|---|
|
To reload the form, |
click Refresh. |
|
To print the report, |
click Print Version. |
|
To have the report emailed to you, |
click Send to Email. |
|
To view the report in the PDF version, |
click PDF. |
|
To view the report in the Excel version, |
click Convert to Excel. |
|
To open the Petrosoft University Portal, |
click Help. |
|
To expand all the report data, |
click Expand All. |
|
To hide the expanded report data, |
click Collapse All. |
|
To create a ticket, |
click Feedback. |
|
To save the report to favorites, |
click the favorites icon next to the reports name. For more details, see Favorite reports. |
You can also use the Custom View C-Store Office function so that to be able to generate a custom-based report template comprising essential information. To do so, follow these steps.
Step 1. Click on Customize View button.
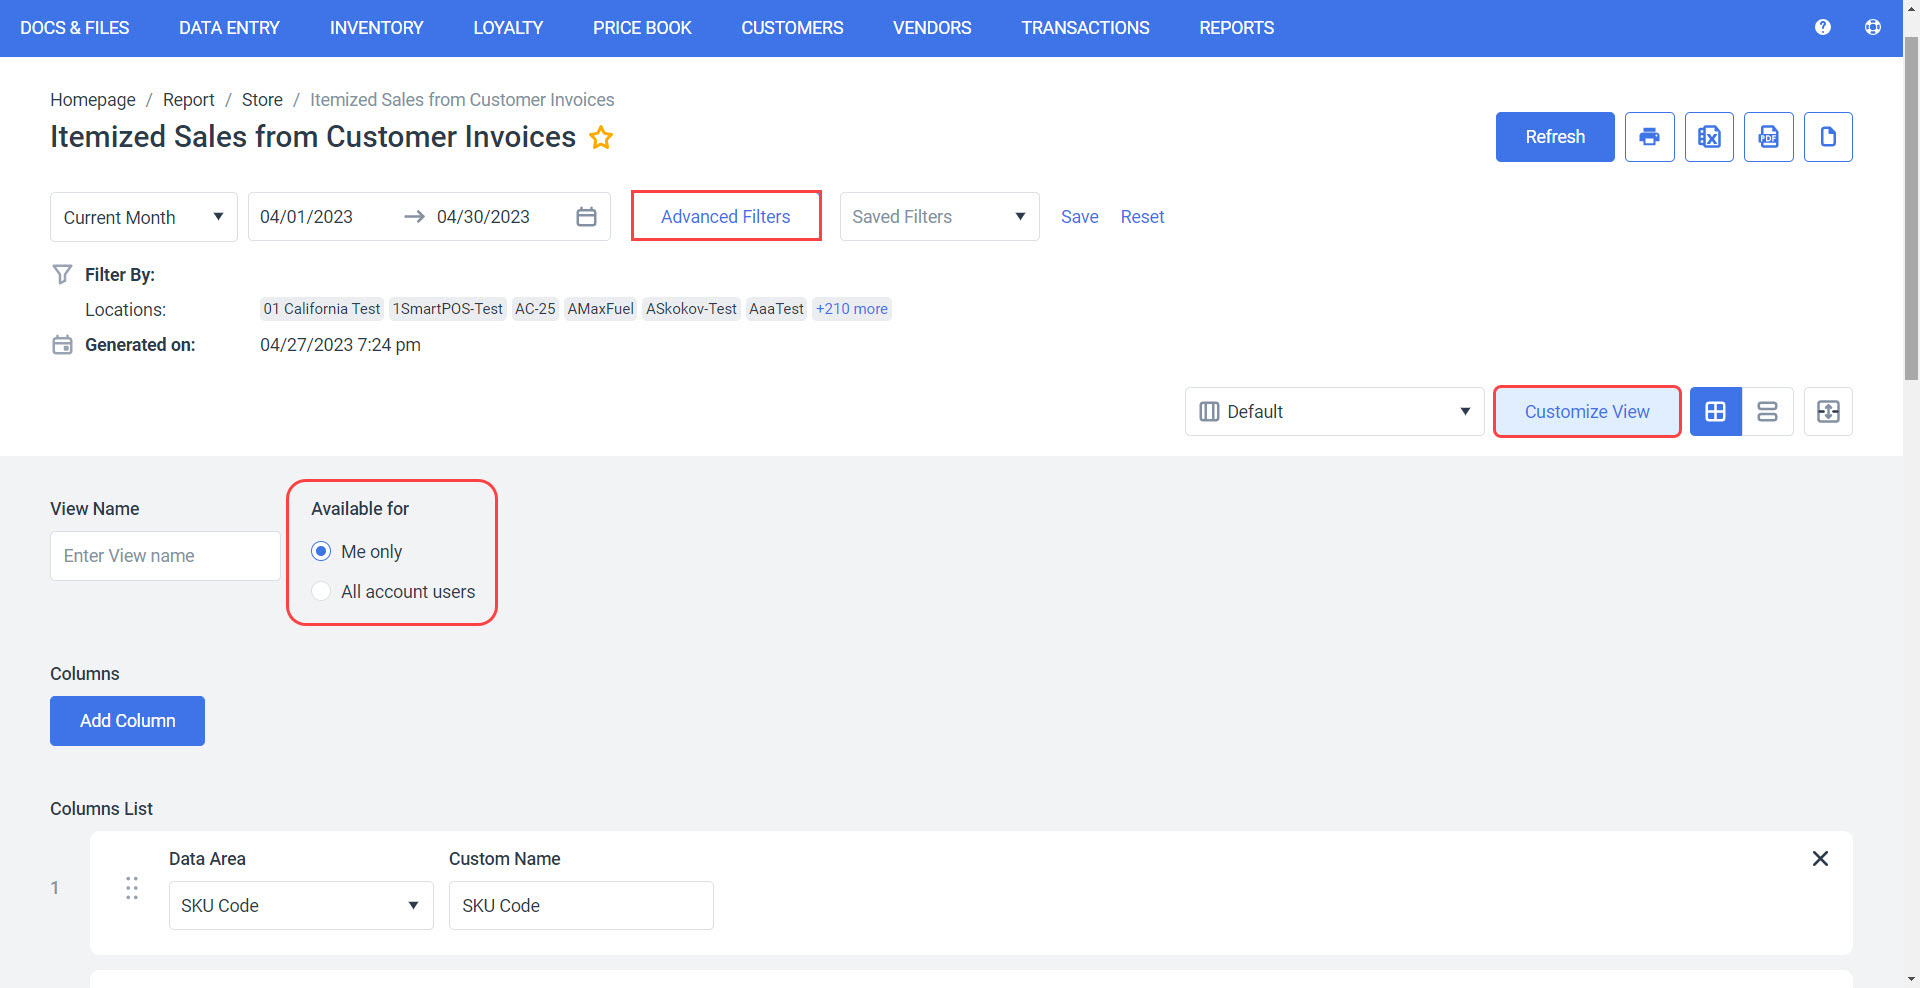
Step 2. Click on Add Column button to see the columns available.
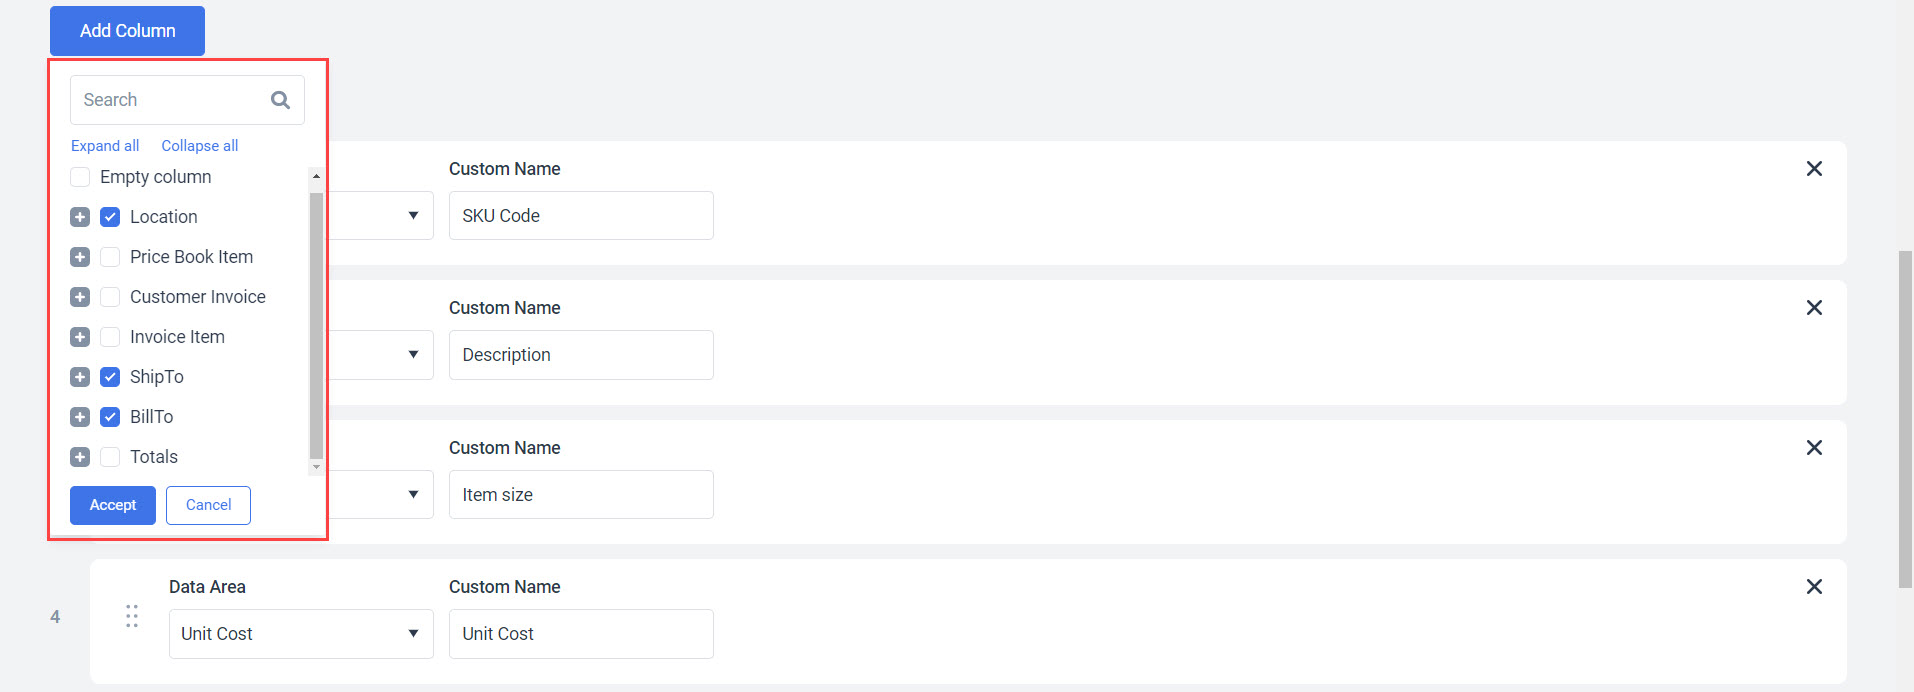
Step 3. Tick a few columns and their attributes, if necessary, to add them into a custom-based report template and click on Accept button.
Step 4. Type in a name of the custom-based report template in View Name text field
Step 5. Set up availability of the custom-based report template in Available for section using a radio button:
- Me Only – a custom-based report template should be only available to the current user account.
- All Account Users – a custom-based report template should be available to all C-Store Office user accounts.
Step 6. Scroll the web page to the bottom and click on Save As button.
As a result, a new custom-based report template has been added into the system.
To view a more detailed information on certain reports, click and watch the following videos:
Key performance indicators
This video presents the information on the Key Performance Indicators report.
Cost exception report and setup
This video presents the information on the Cost Exception report and setup.
Price book-item sales by tag
This video presents the information on Price Book-Item Sales by Tag report.


