


This section describes the specifics of accessing and interpreting the Items Log report. To learn more about the actions you can perform with the report, use the following subsections:
- Open the report.
- View the report data.
- Analyze the item changes data.
- Filtering the report data.
- Perform additional actions with the report.
Opening the Report
You can open the report in the following ways:
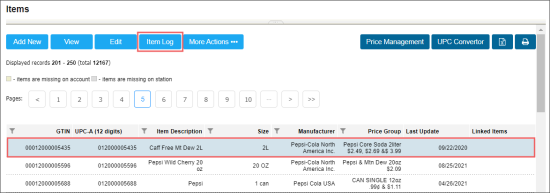
- From the Items list:
- From the main CStoreOffice® page, go to Price Book > Items.
- Find the item for which you need to open the report and select it.
- At the top of the Items list, click the Item Log button.

- From the Item Setup form:
- From the CStoreOffice® home page, go to Price Book > Items.
- Select the item for which you need to get the log, and then at the top of the list, click View.
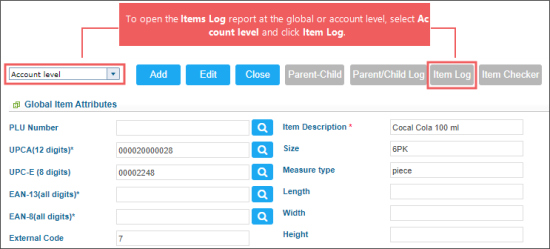
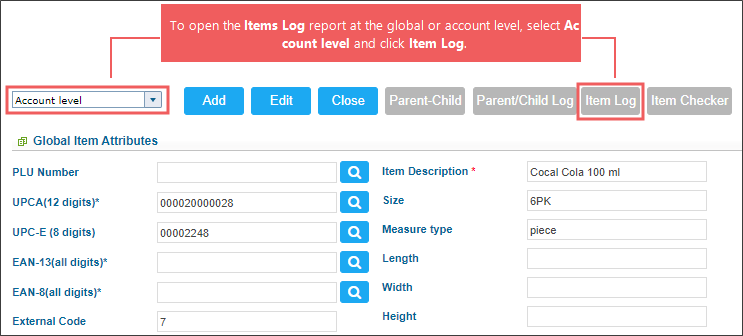
- At the top left of the item setup form, select the level at which the item log report will be displayed:
- Account level: Select this option, to open the Items Log report at the global or account level.
- Station: Select the station from the list of available stations, to open the Items Log report at the station level.
- Click the Item Log button.
Viewing the Report Data
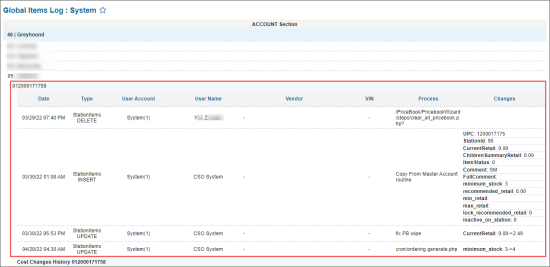
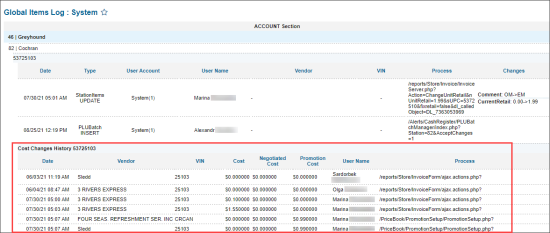
The Items Log report displays the item changes history at the selected level.
The report consists of the following two sections:
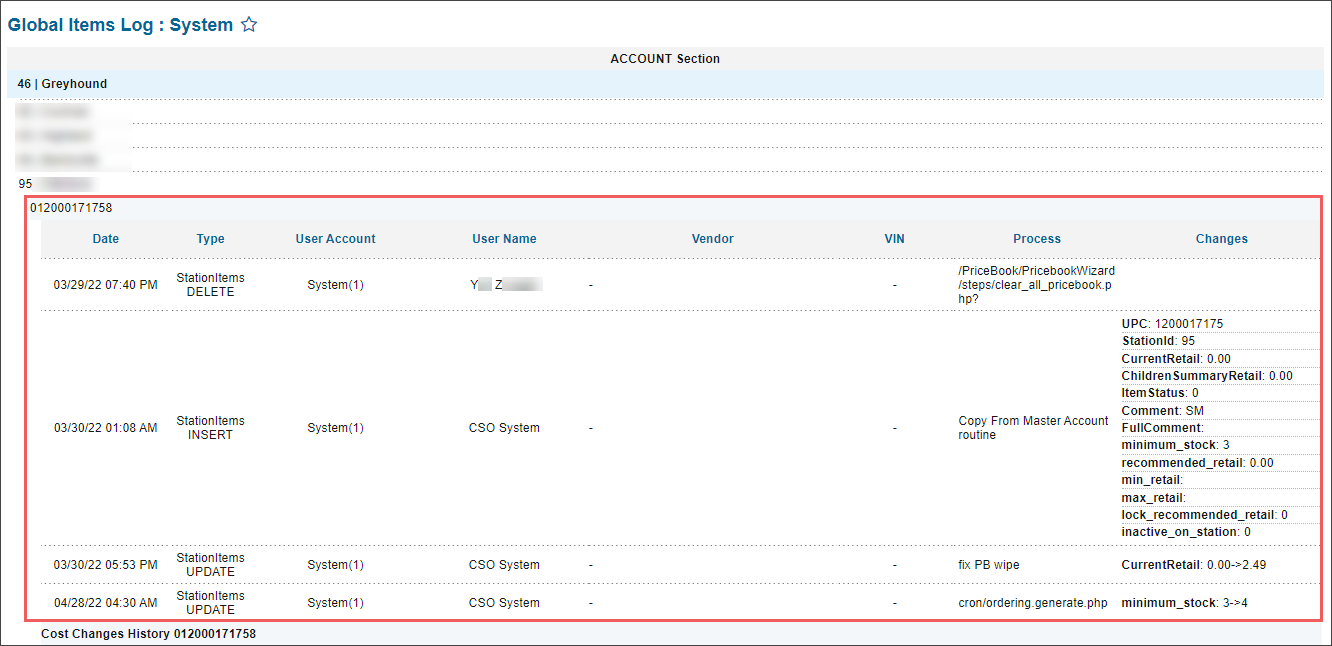
- The general item changes section which is displayed for each station if the report is opened at the global or account level. It includes the following data:
- Date: The system date and time when the changes have been applied to the item. In the change events list, the change events are sorted by date in the ascending order.
- Type: The type of the system operation triggered the changes to the item:
- INSERT
- UPDATE
- DELETE
- User Account: The CStoreOffice® account from which the changes have been made.
- User Name: The name of the user in CStoreOffice® who made the changes.
- Vendor: The item vendor, if any.
- VIN: Vendor Item Number, if any. This is an item number in the items catalog of the vendor.
- Process: The name of the process triggered the changes or the CStoreOffice® form where the changes have been made.
- Changes: The changes details, including old and new item values.
For more detailed information about the item changes displayed in the report, see Analyzing the Item Changes Data.
- Cost Changes History: In this section, the changes in the cost or vendor data of the item, if any, are displayed:
- Date
- Vendor
- VIN
- Cost
- Negotiated Cost
- Promotion Cost
- User Name: The name of the user in CStoreOffice® who made the changes.
- Process: The name of the process triggered the changes or the CStoreOffice® form where the changes have been made.

Analyzing the Item Changes Data
To interpret the changes made to the item and displayed in the report, use the detailed information described below.
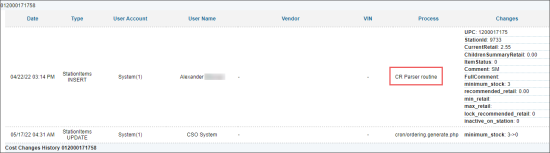
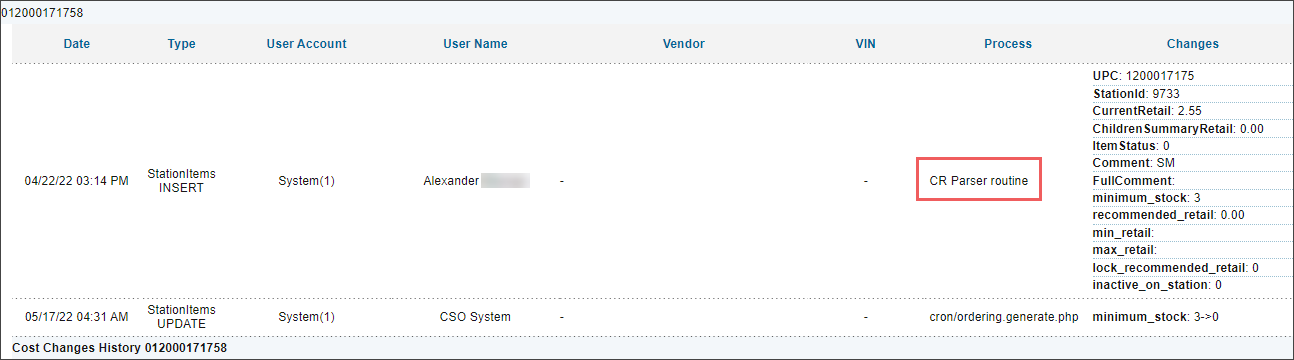
- CR Parser routine: If the CR Parser routine value is displayed in the Process field, it means that the item was added to the system during shifts parsing. As a result, the following effects can take place:
- Not all mandatory item settings might be configured. In the Changes column, make sure all mandatory price book settings are correct. If not, adjust them in the Item Setup form. For more information, see Setting Up Item Attributes.
- Some missing price book settings might be adjusted by the parser automatically. It may occur if the handheld scanner is used and the Allow to change existing Items option is selected in the Mobile Assistant Settings section in the cash register settings.
Filtering the Report Data
You can filter the report by the period. At the top of the report:
- Specify the period you are interested in manually using the calendar,
or - Use one of the available filtering options in the Custom Date list:
- Yesterday
- Current Month
- Current Quarter
- Current Year
- Last Month
- Last Quarter
- Last Year
- Last 12 Months
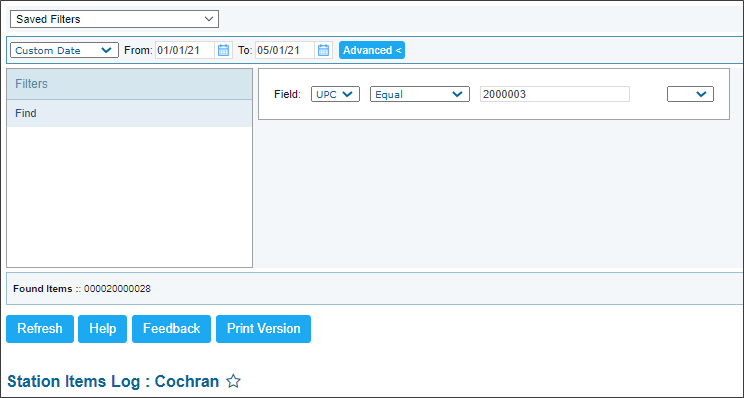
Additional Actions
To generate the report for another item:
- At the top of the report click Advanced.
- Go to the Find section.
- Enter the UPC of the item you want to find.
- Click Refresh.

For more information on additional report features, see Reports.


