


This section describes the specifics of accessing and interpreting the QB Synchronization Manager.
Opening the Report
You can find the report at Accounting > Export Data > QB Synchronization Manager.
- Account
- Company
- Division
- Location (Station)
For more information, see Viewing Reports.
Working with the Report
With the QB Synchronization Manager report, you can perform the following actions:
- Review the recently accepted data prepared for the synchronization with QuickBooks.
- Accept the changes to be sent to QuickBooks.
For more information about the QuickBooks synchronization process, see Synchronizing with QuickBooks.
Reviewing the QuickBooks Synchronization Data
The QB Synchronization Manager consists of the following sections:
- Changes with the following subsections:
- New Entries
- Updates

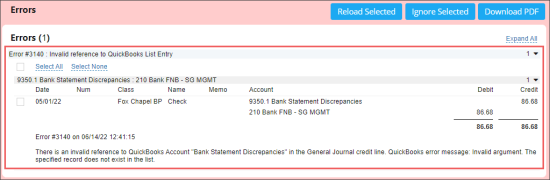
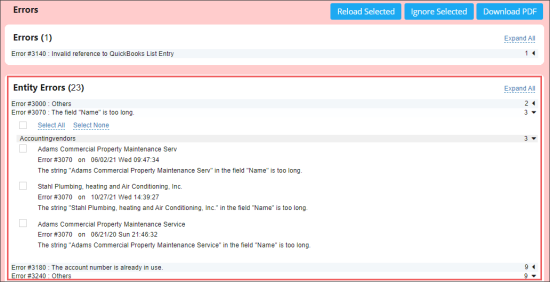
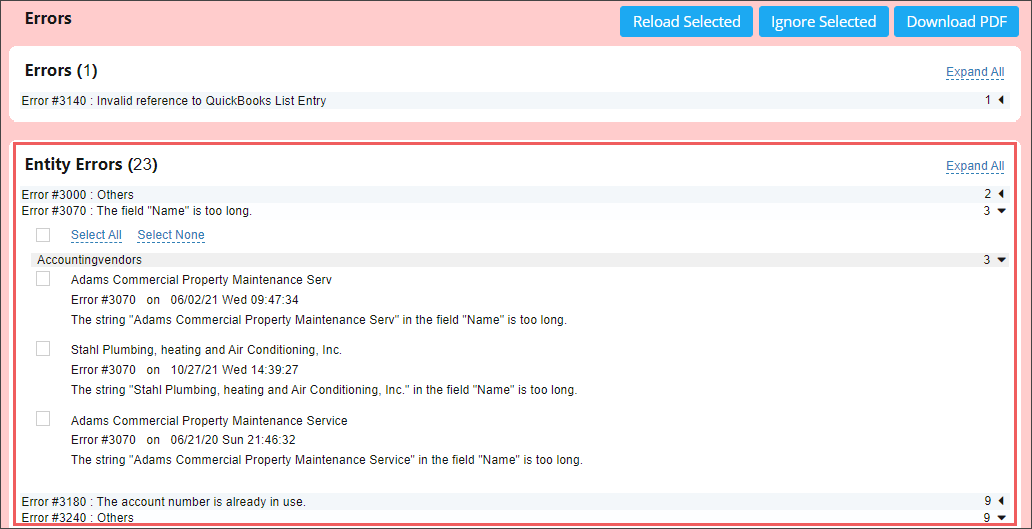
- Errors with the following subsections:
- Errors: The errors from QuickBooks. Click the error name, to get the list of all transactions that were not synchronized with QuickBooks. Click each transaction name, to get more details about the reason of synchronization failure.
- Entity Errors
You can perform the following actions in the Errors section:
- Reload Selected: Select the transaction and click the Reload Selected button, to send this transaction once again.
- Audit Periods: In this section, you can review all audit periods closed by an auditor. In case the period is not synchronized with QuickBooks, you can do it by selecting the period and clicking the Sent to QB Synchronization Manager button.

You can perform the following actions in the Audit Periods section:
- Rollback: Select the audit period and click the Rollback button, if you need to rollback the selected audit period from QuickBooks to make it possible to send it once again.
- Sent to QB Synchronization Manager: Select the audit period and click the Sent to QB Synchronization Manager button, if you need to synchronize the audit period with QuickBooks.
- View: Select the audit period and click the View button, to view more detailed information about this period in a separate Audit Period Setup form.
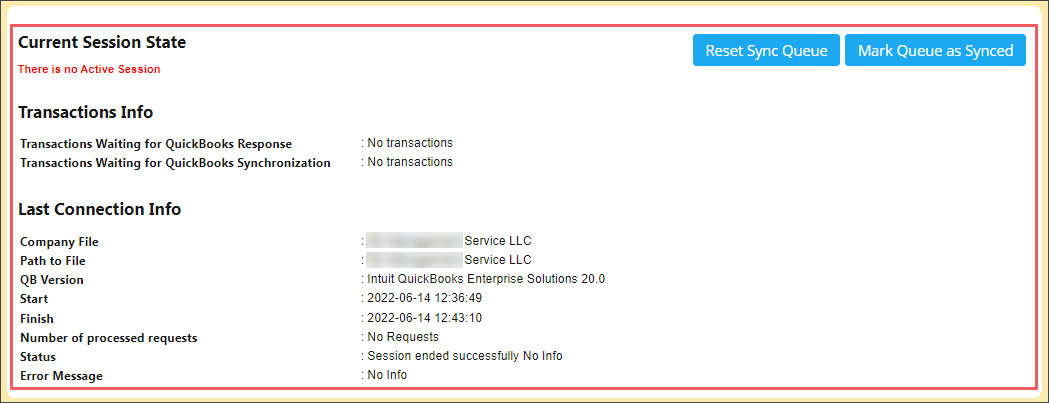
- Current Session State: In this section, you can view the detailed information about the synchronization process which is currently in progress. You can view the following detailed information about the files with synchronization data sent to QuickBooks:
- The amount of already sent files.
- The amount of files in the queue awaiting for sending.
- The progress of synchronization in percents.
- Transactions Info: In this section, the following information is displayed:
- Transactions Waiting for QuickBooks Response: The amount of transactions already sent to QuickBooks and awaiting the response from it. The response from QuickBooks indicates the result of synchronization, whether it was successful or not.
- Transactions Waiting for QuickBooks Synchronization: The amount of transactions awaiting the synchronization from QuickBooks.
- Last Connection Info: In this section, you can view the information about the last QuickBooks synchronization which was performed for the selected company with the following detailed information:
- Company File
- Path to File
- QB Version
- Start
- Finish
- Number of processed requests
- Error Message
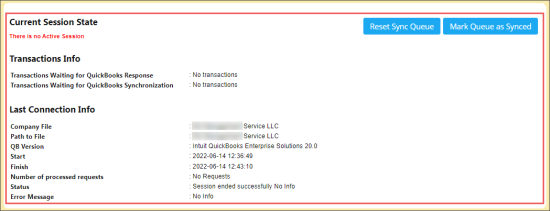
You can perform the following actions in the Current Session State section:
- Reset Sync Queue: Click this button, to stop the synchronization process and cancel all operations in the synchronization queue.
- Mark Queue as Synced: Click this button, to mark the queue and all operations in it as synchronized. Such operations will not be sent to synchronization anymore. It might be needed in case of insignificant errors which you do not want to correct.
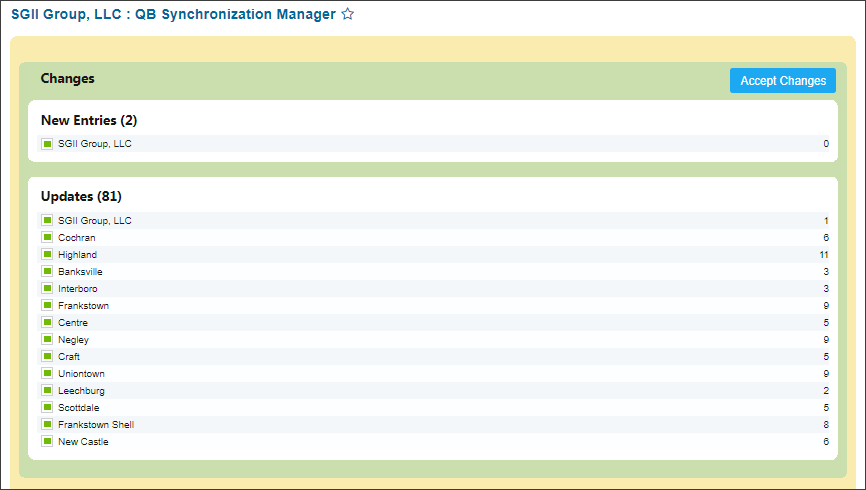


Accepting QuickBooks Data Changes
To accept the changes prepared to be sent to QuickBooks and launch the synchronization process, in the Changes section, click Accept Changes.


