Synchronizing with QB is the final step in transferring your data from CStoreOffice® to QB.
To synchronize with QB from CStoreOffice®, follow the steps:
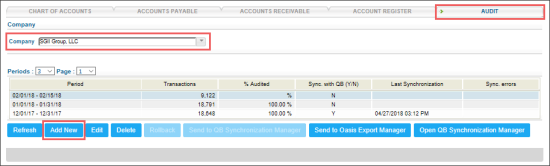
- In the CStoreOffice® main menu, go to Transactions > Audit.
- In the Company list, select your company.
All employees of the selected company will be synchronized as well.
Result: The audit periods for the selected company load.
- Close your new period. Do the following:
- At the left bottom of the form, click Add New.
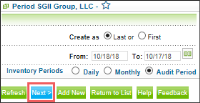
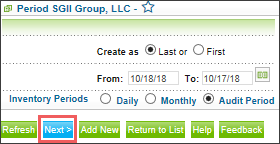
Result: The Audit Period Setup window opens. - In the Audit Period Setup window, do the following:

- In the Create as section, select Last or First to choose the required period.
- In the From and To fields, specify the period range, if needed.
- In the Inventory Periods section, select the audit type.
- Click Next.
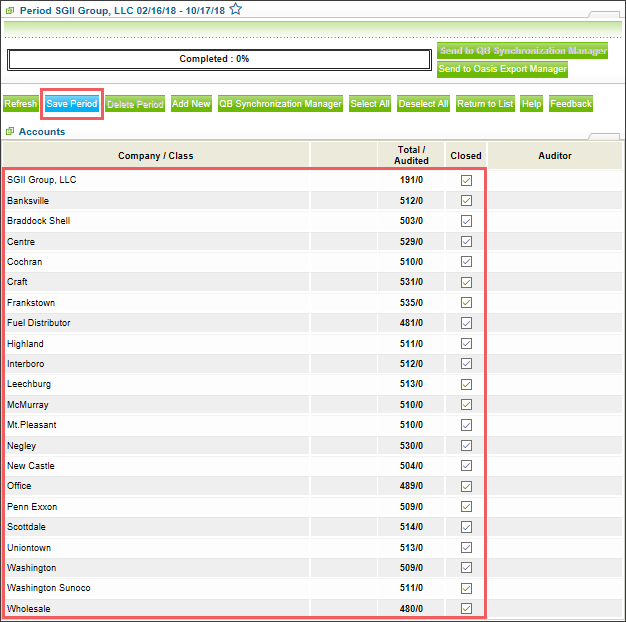
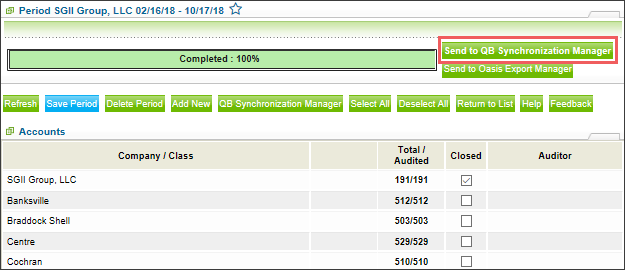
- Select the stores for which you want to close periods and then click Save Period.
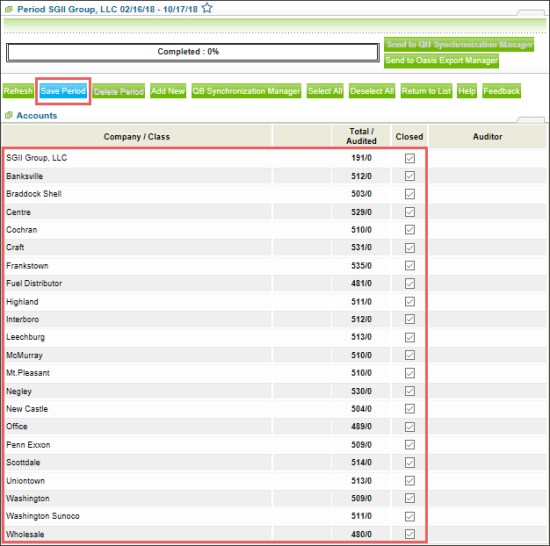
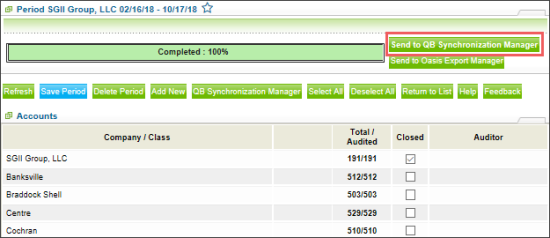
- When the period is saved, click Send to QB Synchronization Manager.
Result: The Data Integrity Checking Report opens. - In the Data Integrity Checking Report, review the errors, if any. You can view the following types of errors:
- Errors in the SIR column—there are periods out of compliance.
- Errors in the Pending Invoices column—there are unaccepted invoices.
- Errors in the Pending Shifts column—there are unaccepted shifts.

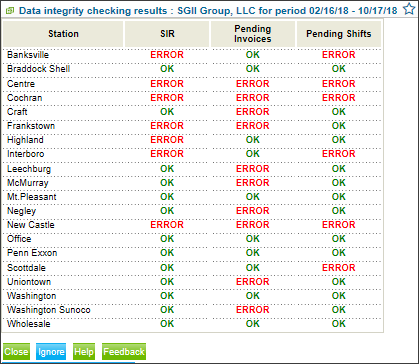
- After you reviewed all errors, do one of the following:
- In case the report displays the errors you need to correct, click Close, re-open the period and correct the errors before saving again.
- In case the report displays no errors or you don't need to correct the revealed errors and want to continue, click Ignore.
- In the QB Synchronization Manager, accept the changes for the period.
If the QB Synchronization Manager window is not opened automatically, go back to the Audit section and at the right bottom of this section, click the Open QB Synchronization Manager button.
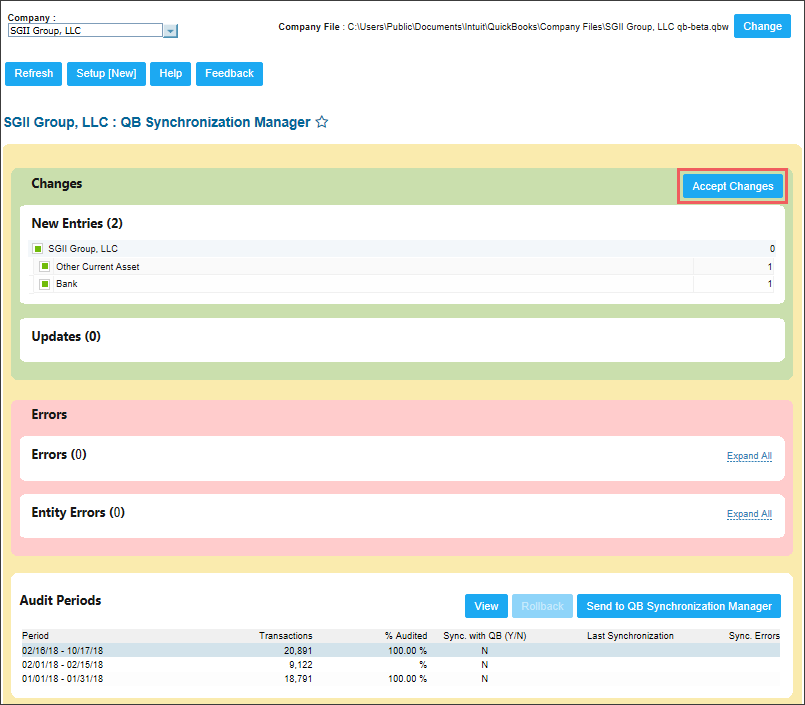
- Wait until the changes are accepted.
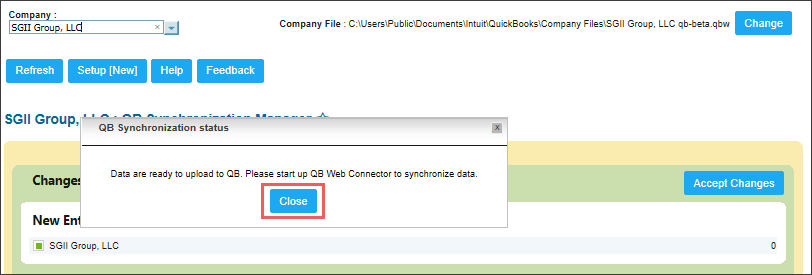
- In the QB Synchronization status window, click Close.

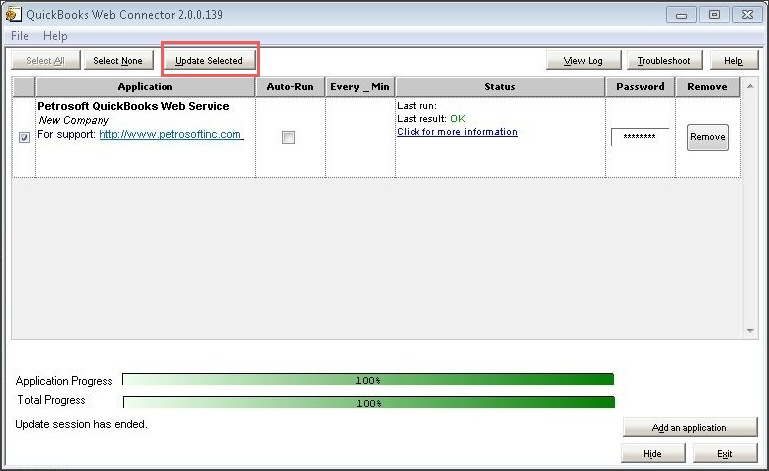
- Open the QuickBooks Web Connector and then do the following:
- Select the Petrosoft QuickBooks Web Service check box and then click Update Selected.
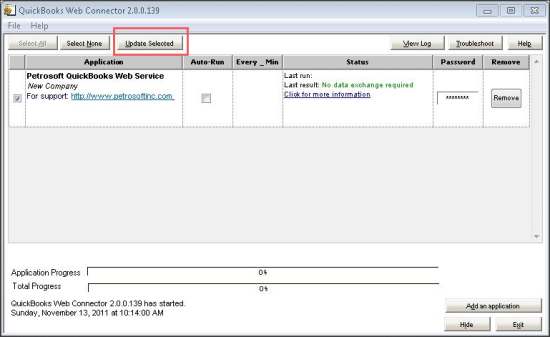
- Wait until the updates are completed.
- Click Update Selected again. This action will launch the data transferring process.

You can track the result of data transfer in the QB Profit & Loss Detail report. In case of successful data transfer, you will see the balance changes.
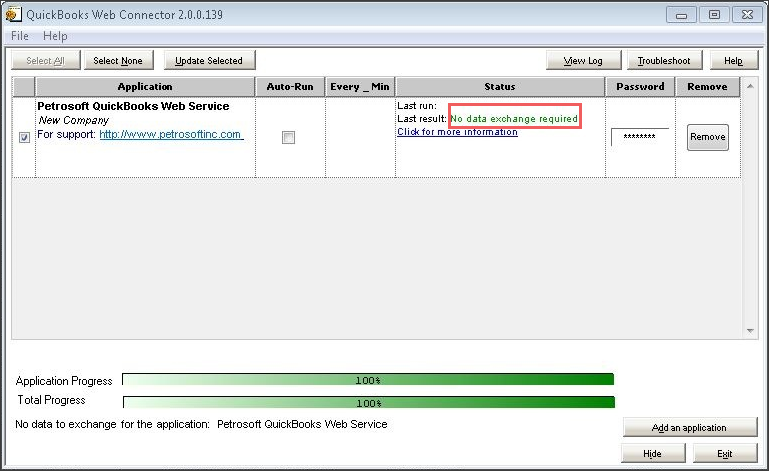
- To complete the process, click Update Selected for the third time.
Result: The No data exchange required message appears in the Status column. It confirms that all data has been exchanged successfully.

This first update will open communication between CStoreOffice® and Quick Books. No data will be transferred at this time.
You can track the progress at the bottom of the QuickBooks Web Connector window using the Application Progress bar.