


To process QwickServe Curbside orders:
- Monitor new orders. Do not start preparing the order until it is paid!
For more information, see Monitoring New Orders. - Once the order is paid, start preparing it.
For more information, see Preparing the Order. - Complete the order. Remember about notifying the customer about age-restricted items, if any, and about the readiness time.
For more information see Completing the Order. - Deliver the order to the customer. Remember about asking the customer to show ID if the order contains the age-restricted items.
For more information, see Passing the Order to the Customer. - Close the shift. At the end of the working shift, you need to close it in order to provide all the data accurately for reconciliation.
For more information, see Closing the Shift.
To know how to process fuel orders, see Processing QwickServe Curbside Fuel Orders.
If you do not have a cash register at your site, omit all CR-related steps in this instruction.
After the order is paid, the customer may ask to refund it at any moment. To get more information about making a refund at QwickServe Curbside, see How to make a refund.
Monitoring New Orders
When a new order appears in the QwickServe Order Manager App screen, it has the Pending status.

Do not process this order. Wait until it indicates Pending + PAID status.
Preparing the Order
To prepare the order in the QwickServe Order Manager App:
- Make sure the order is paid. Check its status. It should display Pending and PAID:
- Detailed order view: PAID order.
PAID status is displayed: (a) In the Pending list, to the right of the order basic status and (b) At the bottom left of the screen, instead of the red PAID button.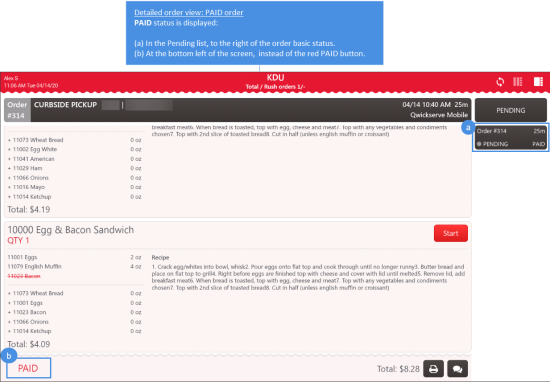
- Multiple orders view: PAID order.
PAID status is displayed: (a) In the Pending list, to the right of the order basic status and (b) In the order header, at the bottom right corner.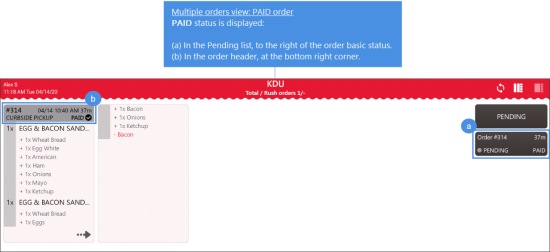


- Print the kitchen ticket. For details, see How to print a kitchen ticket.
- Check, if the order contains age-restricted items.
Does the order include age-restricted items?
- NO: Skip this step.
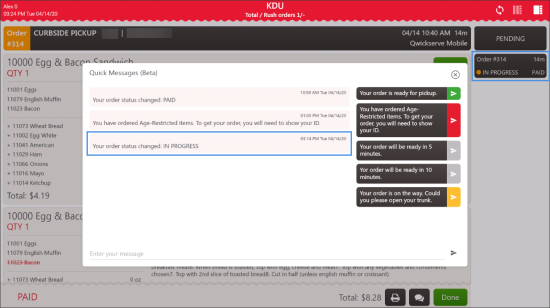
- YES: Send a message to the customer: Please bring your ID, to pick up your age-restricted items. For details, see How to send a quick message. - At the bottom right of the order, tap the Start button.
If the Start button is not displayed at the bottom right of the order, you may tap Start on every order item.
To be able to manage the statuses of all order items at once, ask your manager for assistance or see How to manage the status of the whole order.Result: The order status is changed to In Progress. The customer receives the notification with the updated order status.
- Go to the store, if needed, and prepare the customer order.
- At the cash register:
- Scan each item.
- Complete a sales transaction using the Curbside MOP.

Do NOT add any additional items to the order!
Completing the Order
To complete the QwickServe Curbside order:
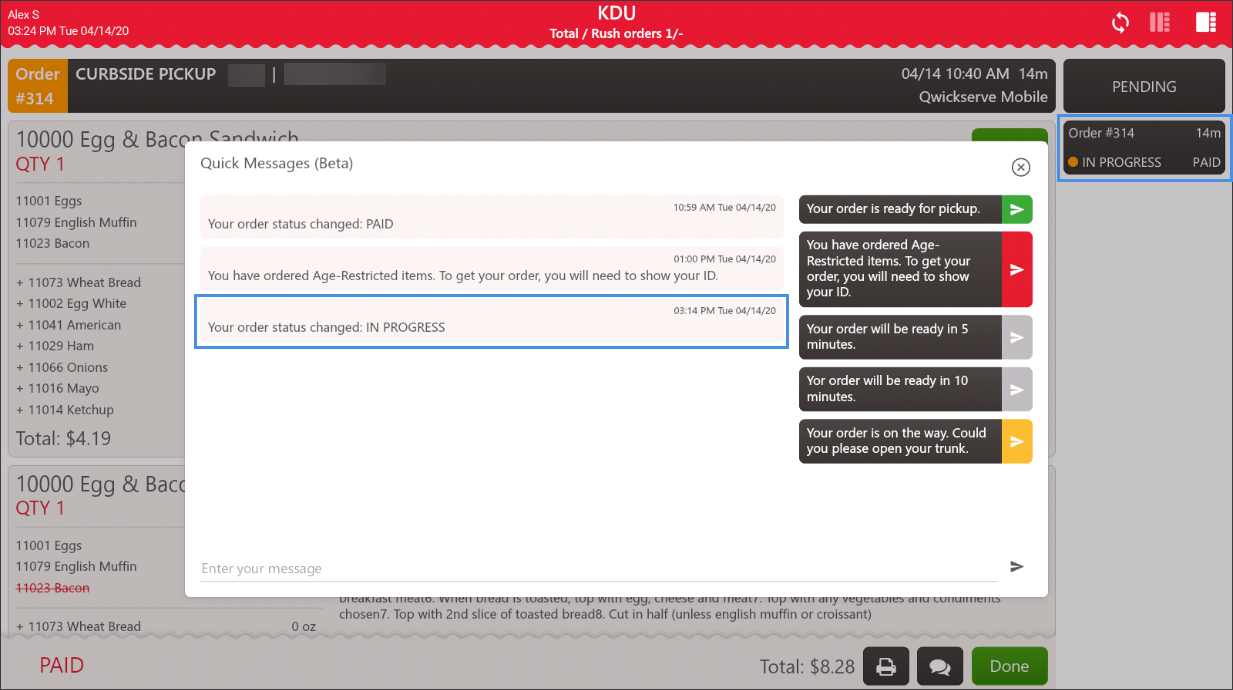
- 10 or 5 minutes before completing the customer order, send a message to the customer with the readiness time.
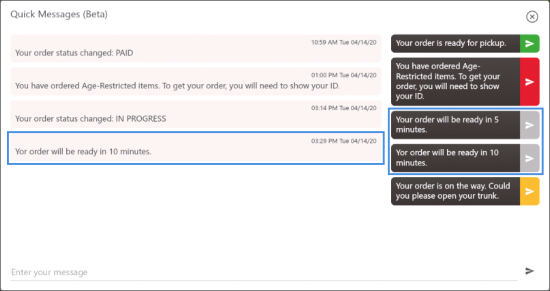
For details, see How to send a quick message.
- Pack the customer order and attach the Kitchen Ticket to it.
- At the cash register, print the Register Receipt.
- At QwickServe Order Manager, print the Customer Receipt. For details, see How to print a customer receipt.
- Put together the Register Receipt and the Customer Receipt and add them to the cash register.
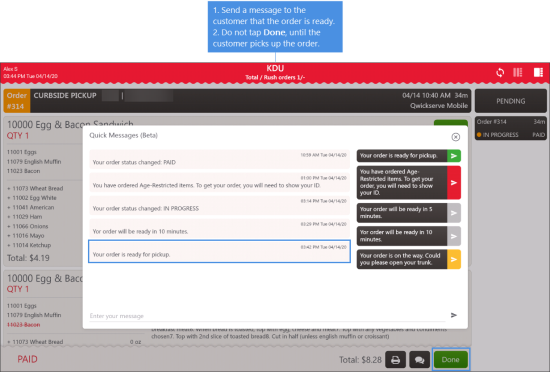
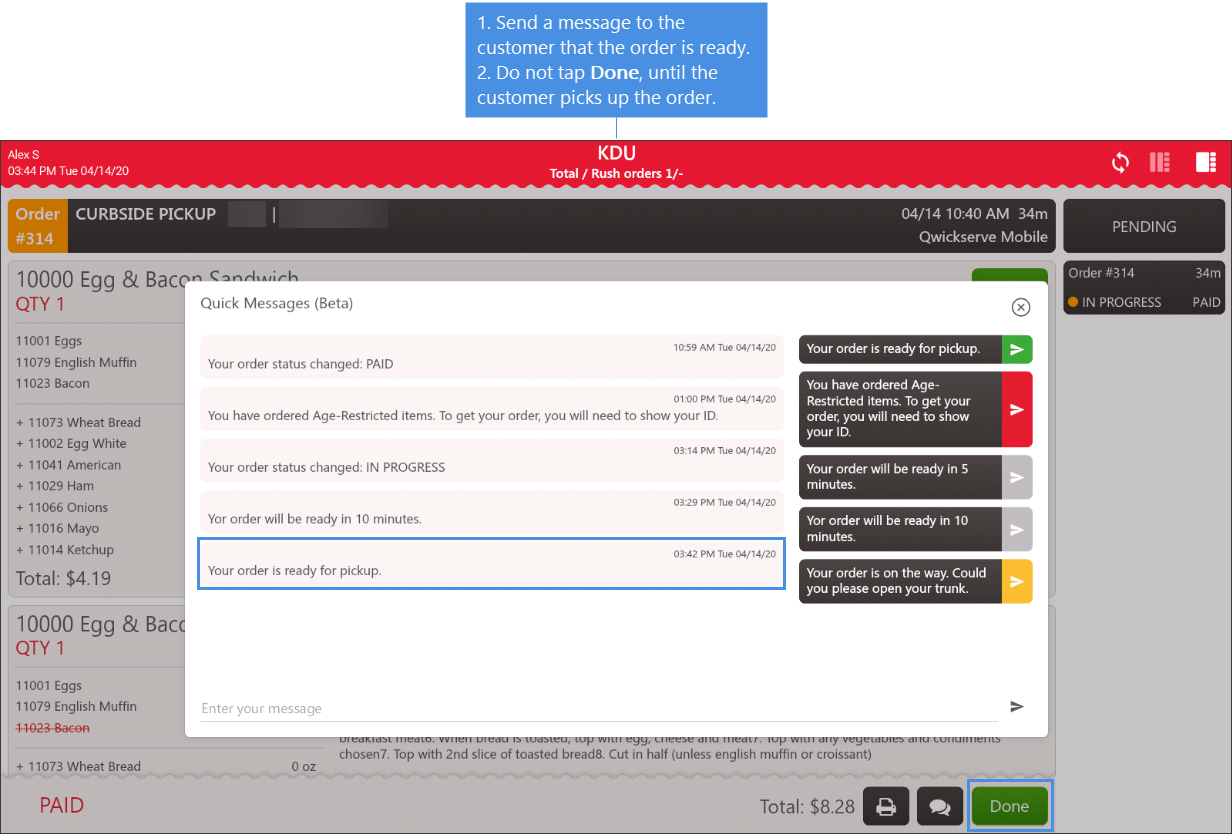
- Send a message to the customer: Your order is ready for pickup. For details, see How to send a quick message.

Passing the Order to the Customer
After you have notified the customer that the order is ready for pickup, do the following:
- Wait until the customer lets you know that he/she arrives. The customer may notify you about their arrival in two following ways:
- To make a call to the store.
- To tap Check In from the QwickServe Mobile.
Once the customer tapped Check In, the green Checked In status is displayed for the order.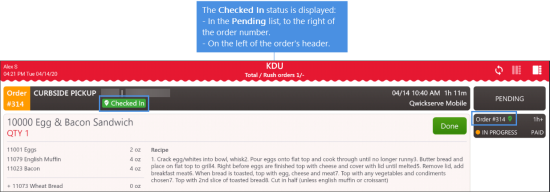
- Once the customer arrives and notifies you about it, send a quick message to notify the customer about the following:
- That the order is on the way.
- That the customer should open the trunk.
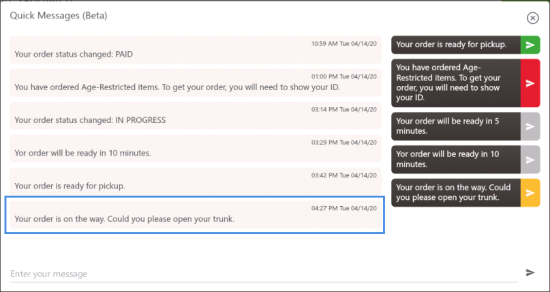
For details, see How to send a quick message.
- Take the customer order and come out from the store.
- Put the order in the back of customer's car.
- Come back to the working place and at QwickServe Order Manager, complete the order:
- In the Pending list, find the order and tap it.
- At the bottom right of the order, tap Done.
Result: The order status is changed to Completed. The order is moved from the Pending to the History list.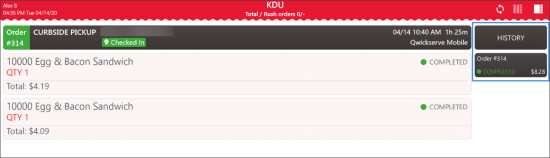
If the order contains the age-restricted items, ask the customer to show the ID.
If there is no ID, you must perform the Refund operation. For details, see How to make a refund.

Closing the Shift
At the end of the working shift, you need to do the following:
- Close the working shift at both cash register and QwickServe Order Manager.
- Provide all receipts collected during the shift to your manager for reconciliation.
For more information on closing the working shift at QwickServe Order Manager, see How to close the shift at QwickServe Order Manager.


