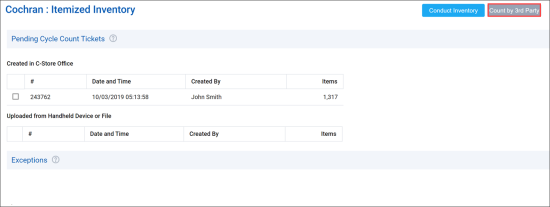
- In CStoreOffice®, go to Inventory > Counts.
- In the left menu, select Itemized Inventory.
- At the top right of the form, click Count by 3rd Party.
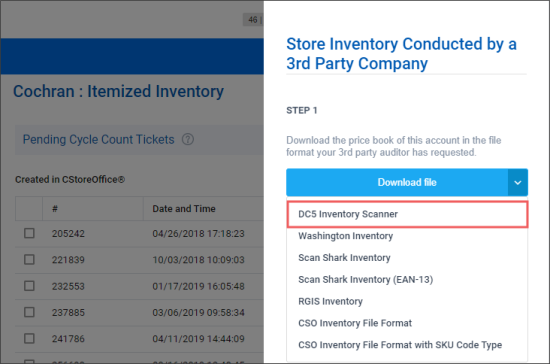
- In the right pane, click Download file and select the necessary HHD model.
- DC5 Iventory Scanner
- Washington Inventory
- Scan Shark Inventory
- Scan Shark Inventory (EAN-13)
- RGIS Inventory
- CSO Inventory File Format
- CSO Inventory File Format with SKU Code Type
To see the structure of the file for your handheld model, go to HHD Files Structure.
If you have issues with downloading the inventory file or with data format in the downloaded file, go to FAQs: Inventory for further instructions.
- Send the file to the inventory company so it can be downloaded to the device.
- Print the list of items with system UPCs and barcodes. These items do not have UPCs printed on them so barcodes from the list will be scanned.
- Do a shift change at the cash register right before the inventory starts.
- Count items with the HHD.
- Upon completing inventory, do a shift change again.
- Download the file from the HHD.
- In CStoreOffice®, go to Inventory > Counts.
- In the left menu, select Itemized Inventory.
- At the top right of the form, click Count by 3rd Party.
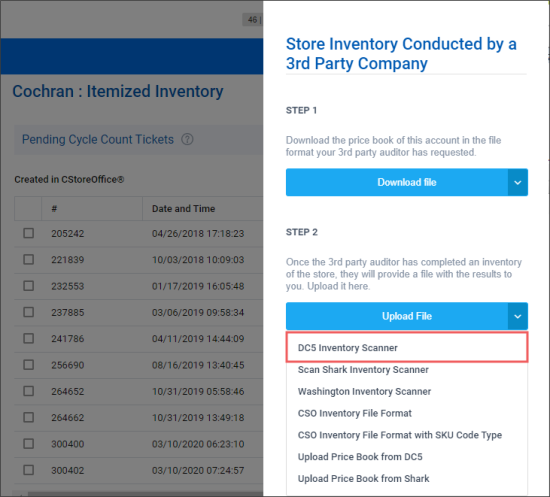
- In the right pane, click Upload file and select the necessary HHD model. Then browse to the file from the HHD.
To see the structure of the file for your handheld model, go to HHD Files Structure.
- Click Browse and browse to the location of the file with Report 19. In a similar manner, browse to the file with Report 3.
-
Click Upload file and wait for the message: File processing is done.
Result: The processed file is displayed in the Uploaded from Handheld Device or File section.
-
In the Uploaded from Handheld Device or File section, click the necessary inventory file.
Result: A cycle count ticket is opened in a new window.
Files must be processed in the same sequence in which they were created.
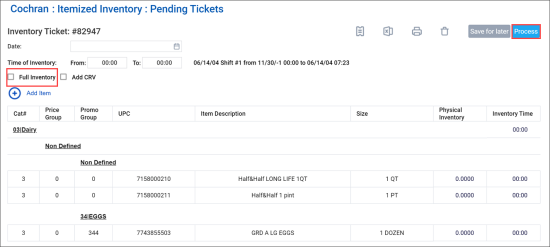
- At the top left of the form, select or clear the Full check box to identify the inventory as full or partial.
- At the top right of the form, click Process.
The date and time in the pending tickets are displayed based on the time zone configured for the station (location). For more information on how to configure it, see General Station Options.


