In some cases, you may encounter problems with Go Loyalty.
Use the list of Possible Go Loyalty Issues below, to find your issue and learn how to fix it.
Possible Go Loyalty Issues
Click the problem title, to view its description and the troubleshooting steps.
To find out the possible reason, perform the following troubleshooting steps:
- Perform the loyalty transaction once again:
- Possible reason: DC Box has just been rebooted.
- Troubleshooting steps: Perform the loyalty transaction once again as the first transaction after the DC Box reboot is considered to be a test transaction.
To avoid this issue in the future, each time after the DC Box reboot, perform any test CR transaction, such as Balance Check.
- Check product codes in CStoreOffice® and CR:
- Possible reason: Merchandise items were configured at the cash register as the Fuel Products.
- Troubleshooting steps: Compare values of the product codes for the loyalty items in CStoreOffice® and in the cash register.
- Perform a test CR Loyalty Balance check-up in CStoreOffice® by following these easy steps:
A. Tap Loyalty Balance on the touch-screen

B. Type in a 10-digit loyalty card number and tap OK
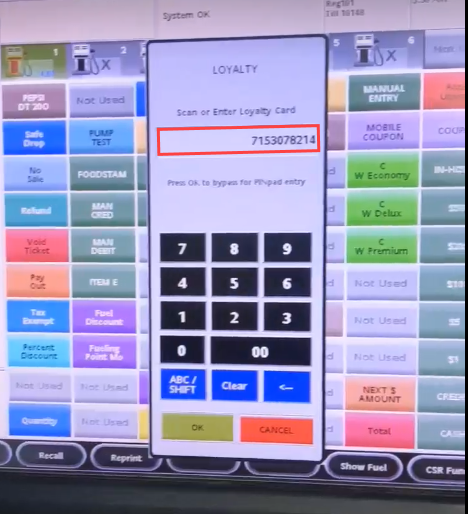
C. Make sure a loyalty balance receipt has been printed out

In case of any technical related issues, you will see an error message of the touch-screen, as follows
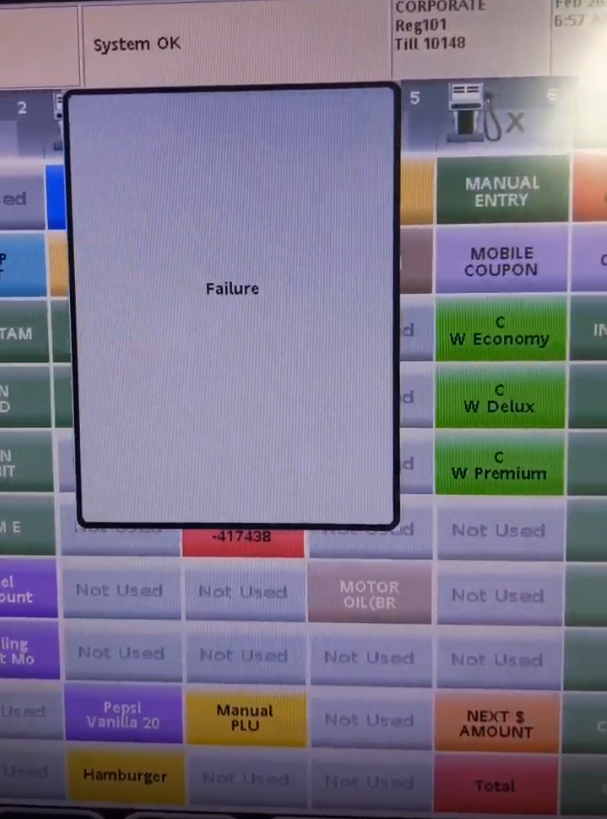
- Possible reason: Merchandise items were configured at the cash register as the Fuel Products.
- Troubleshooting steps: Compare values of the product codes for the loyalty items in CStoreOffice® and in the cash register.
- Check up EPS configuration settings in CStoreOffice® by following these easy steps:
A. At the cash register on site, open the Verifone Ruby2 console and log in.
Note. Go to this web page to read about the steps on how to log in the Verifone Ruby2 console.
B. Choose Payment Controller ► EPS Configuration ► PCATS01 Loyalty Configuration in the main Verifone Ruby2 console menu.
A window form PCATS01 Loyalty Configuration like on the figure below will pop up.
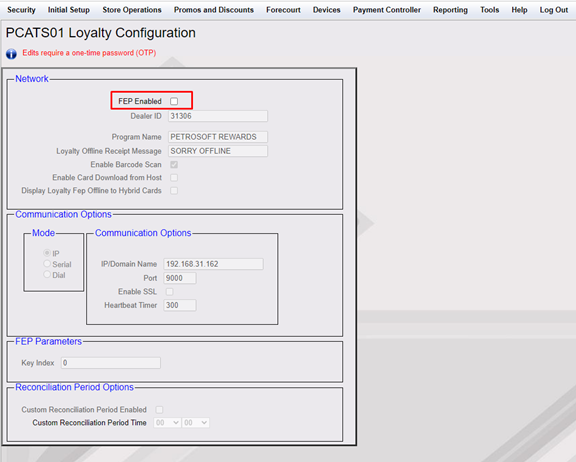
C. Check out if FEP Enabled is NOT disabled, otherwise, please tick on the option.
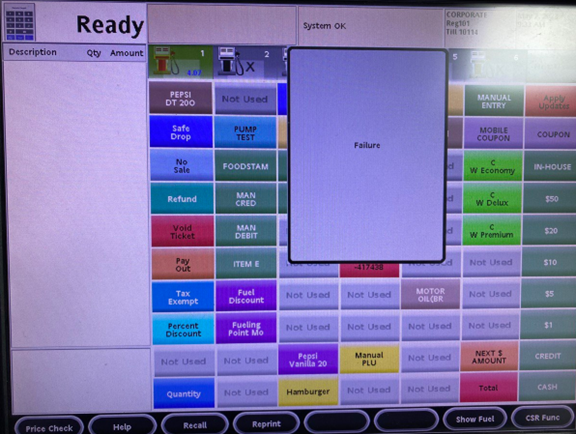
D. Check up the result on the Verifone UI, it should look, as follows on the figures D.1 - D.2.
Figure D.1. Verifone User Interface (UI)
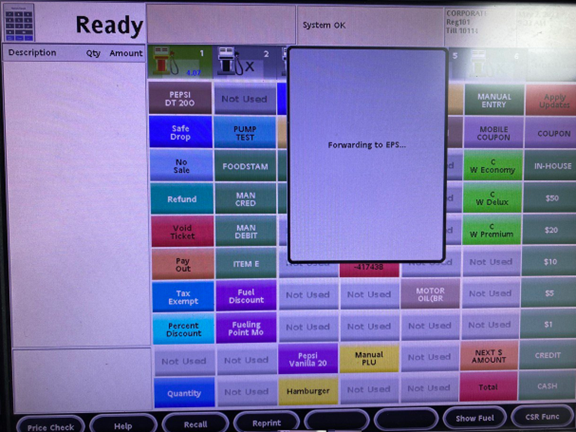
Figure D.2. Verifone User Interface (UI)
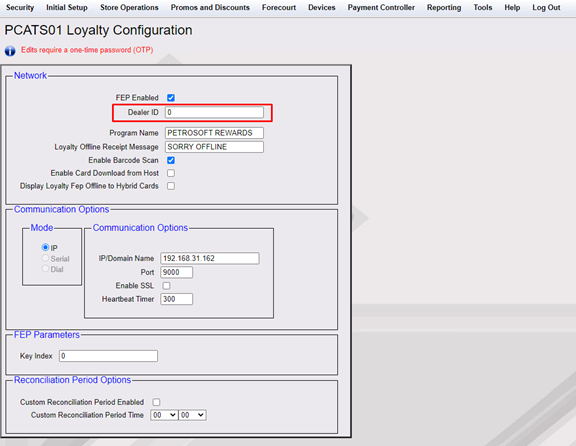
E. Check it out if the Dealer ID has a correct value (not '0' (zero) value, either), otherwise type in a correct value.
Note. If you have forgotten or have no idea what a Dealer ID is, and how you can find it, go to this web page for further instructions.
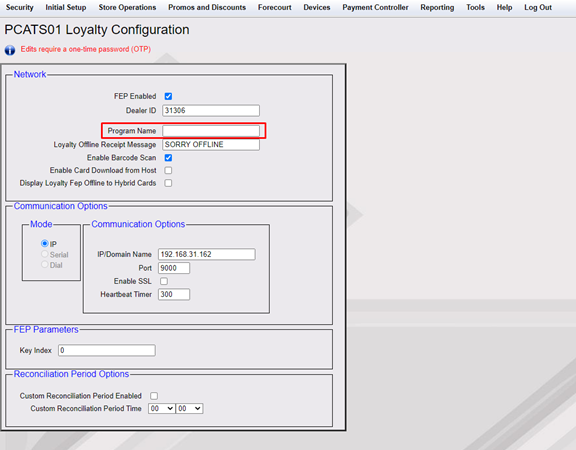
F. Check it out if Program Name is not empty, otherwise type in a random name of the loyalty program applicable.
G. Check it out if IP/Domain Name is correct, otherwise type in a correct value of the IP address of your DC-400 series.
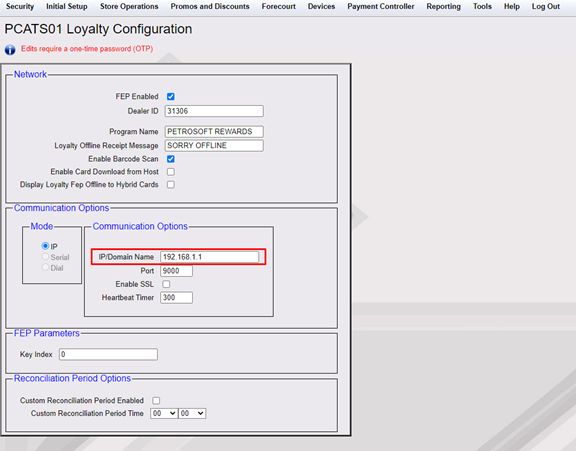
H. Check it out if Port has '9000' value, otherwise type in '9000' in the Port text field.
Note. You should keep it in mind the Port value shall be always '9000'.
I. Check it out if Enable SSL check box is NOT ticked on, otherwise tick off the check box to enable a loyalty program.
J. Choose Payment Controller ► EPS Configuration ► EPS Global Configuration in the main Verifone Ruby2 console menu.
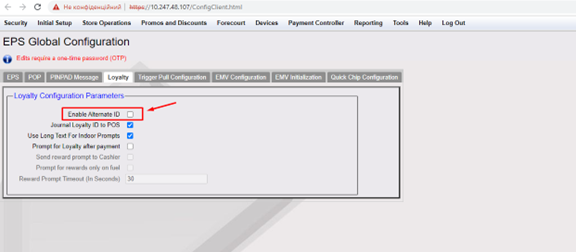
A window form EPS Global Configuration like on the figure below will pop up.
K. Check it out if Enable Alternate ID check box is NOT ticked on, otherwise tick it off.
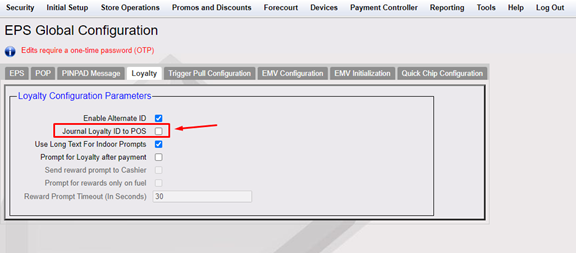
L. Check it out if Journal Loyalty ID to POS check box is NOT ticked on, otherwise tick it off.
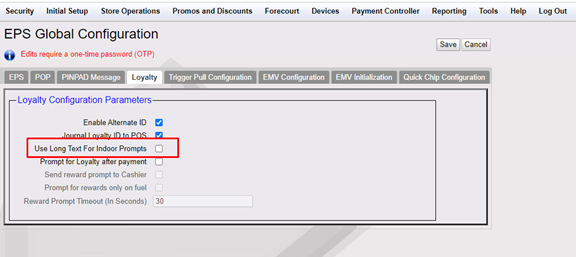
M. Check it out if Use Long Text For Indoor Prompts check box is NOT ticked on, otherwise tick it off.
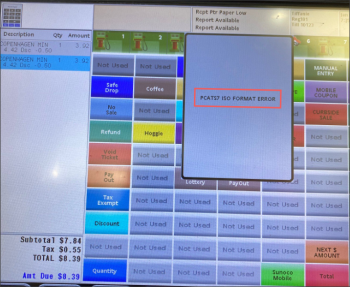
Description: The PCATS7 ISO FORMAT ERROR message is displayed on the cash register.
Troubleshooting: Make sure the loyalty route is configured properly.
For more information on how to configure the loyalty route, see the Step 6 in the Configuring Verifone for Scan Data Loyalty Promotions procedure.
