


The procedure for configuring the Verifone cash register for Scan Data Loyalty promotions implies connecting the Verifone cash register to the Petrosoft Loyalty host with the DC-400 series device installed.
Before you begin configuring the Verifone CR for Scan Data promotions, make sure the following conditions are met:
- The Verifone Ruby2 cash register has Commander Software Base 49 or higher. If your software version is older, please contact Verifone to upgrade your software.
- The cash register and DC-400 series device are installed properly and physically connected.
For more information about how to install the cash register and DC-400 series device, refer to the following documentation:
- CR manufacturer's official documentation.
- The DC-400 series section in Petrosoft University Portal.
The Verifone Ruby2 cash register is configured via the Verifone Ruby2 console. To log into the Verifone Ruby2 console, you will need to use the manager's credentials. Make sure you have the manager's credentials prepared, before you start configuring the cash register.
To configure the Verifone Ruby2 cash register for the Scan Data Loyalty promotions:
- At the cash register on the site, open the Verifone Ruby2 console and log into it:
- At the bottom right of the main commander register screen, select CRS Functions.
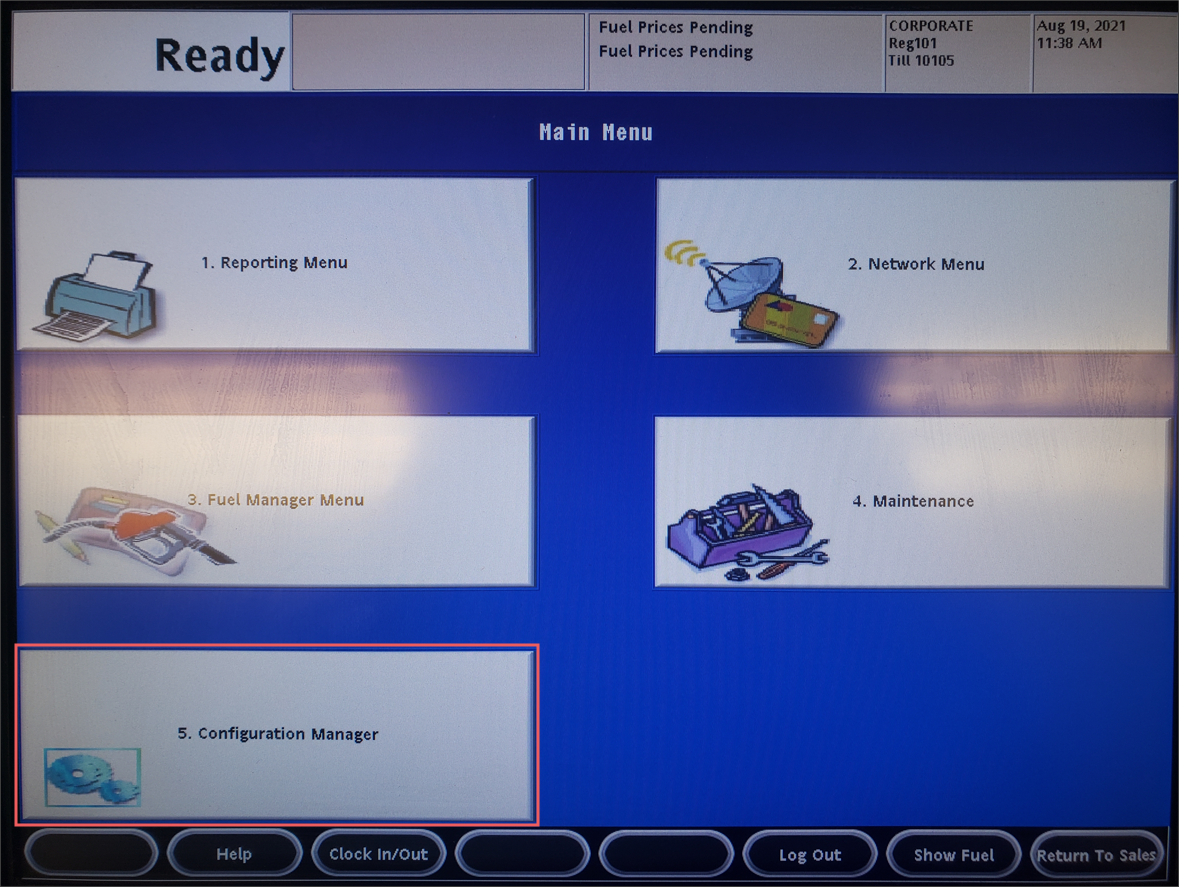
Result: A new screen with several new options opens. - In the new screen, select 5. Configuration Manager.

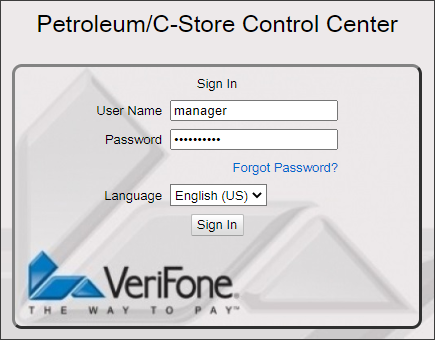
Result: The Sign In screen is displayed. - In the Sign In screen, type the user name and password and then tap Sign In.
- Configure POS settings.
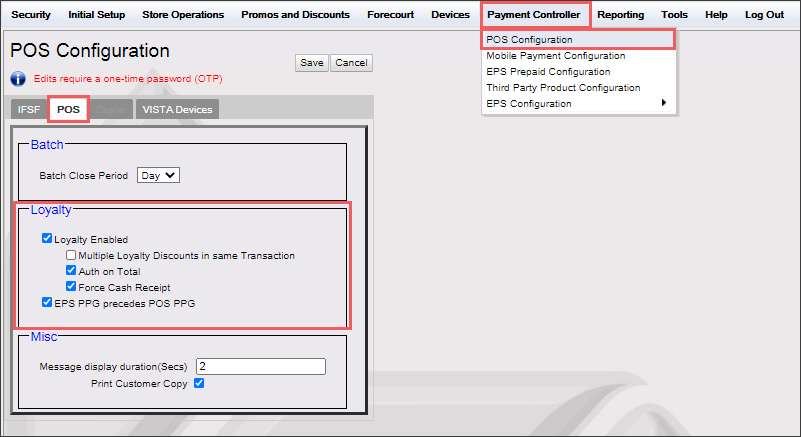
- Click Payment Controller > POS Configuration.
- In the POS Configuration form, click the POS tab.
- In the Loyalty section, select the Loyalty Enabled option, to activate loyalty on the cash register.
- Specify other loyalty parameters, if needed:

- Multiple Loyalty Discounts in Same Transaction: Unselect this option.
- Auth on Total: Select this option. If it is selected, a cashier needs to authorize loyalty promotion each time the Total button is pressed. If the Auth on Total is unselected, the loyalty promotion is authorized only during the sale completion at the cash register.
- EPS PPG Precedes POS PPG: Select this option, if you need to apply EPS (Electronic Payment System) PPG (Pay per Gallon) settings before POS PPG settings.
- At the top right of the POS Configuration form, click Save.

- Configure EPS module settings:
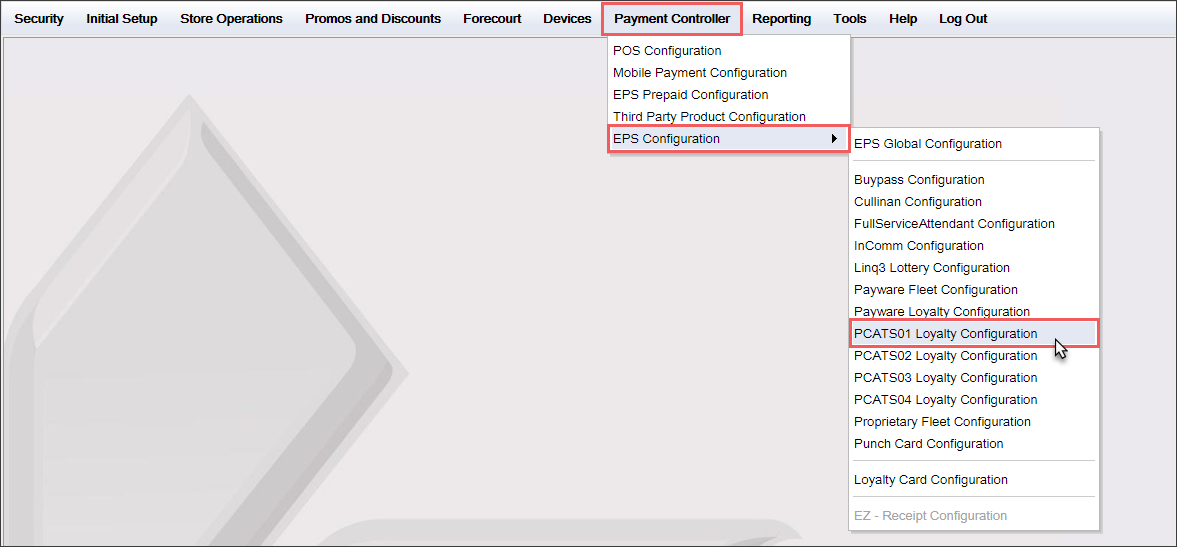
- In the main console menu, click Payment Controller > EPS Configuration.
- In the EPS Configuration sub menu, select a free PCATS Loyalty Configuration, which will be used for configuring loyalty settings, from any of the following available hosts:
- PCATS01 Loyalty Configuration
- PCATS02 Loyalty Configuration
- PCATS03 Loyalty Configuration
- PCATS04 Loyalty Configuration

Result: The PCATS Loyalty Configuration form for the selected loyalty host opens.
Please note that the PCATS Loyalty Configuration you selected must be free and available for setup. Otherwise, you may erase other loyalty settings and accidentally deactivate other loyalty program.
 How to make sure that the PCATS Loyalty Configuration is available for setup
To check if the PCATS Loyalty Configuration is free and available for setup:
- In the main console menu, click Payment Controller > EPS Configuration.
- In the EPS Configuration sub menu, select the PCATS Loyalty Configuration you need:
- The selected PCATS Loyalty Configuration is free and available for setup: If it has no other loyalty settings configured as it is displayed in the image below.
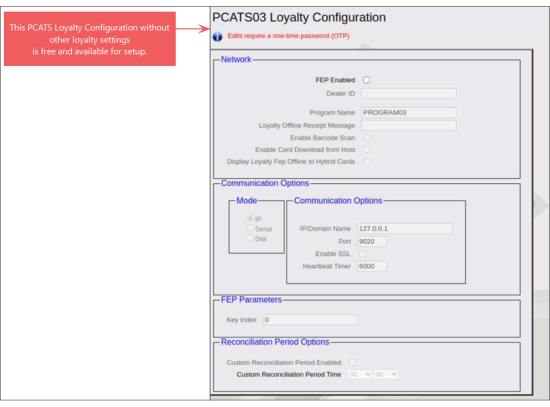
- The selected PCATS Loyalty Configuration is not free and must not be used for setup: If it already has other loyalty settings configured.

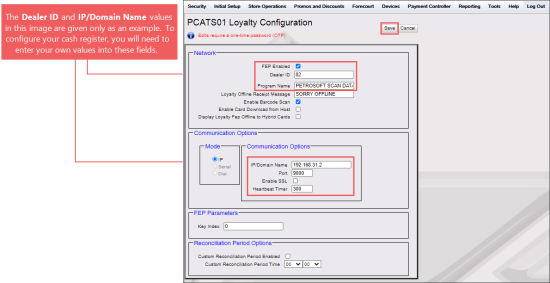
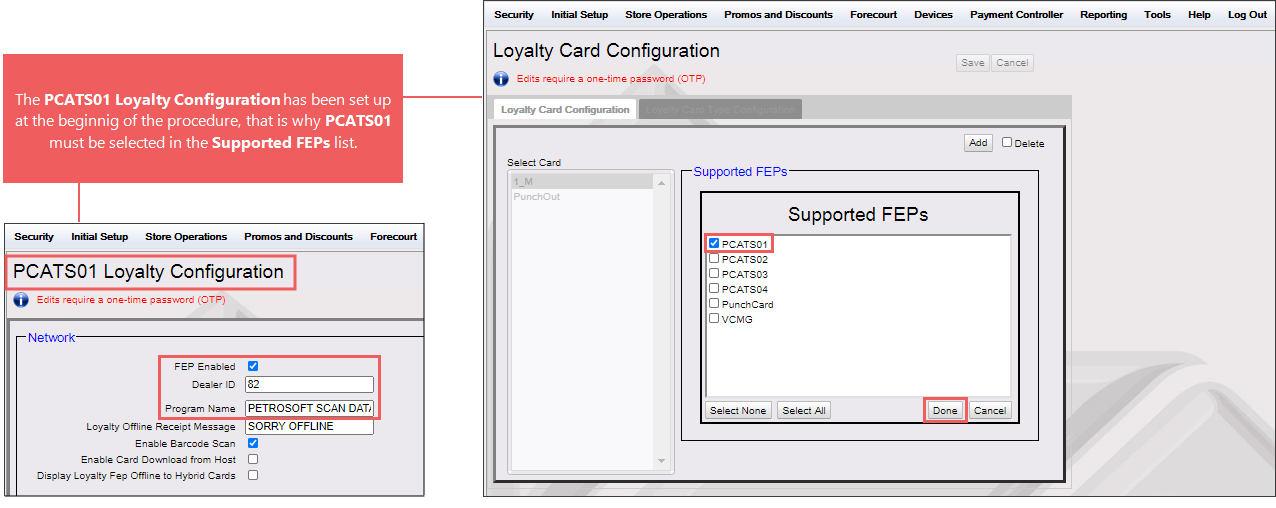
- In the PCATS Loyalty Configuration form > Network section, configure the following mandatory settings:
- FEP Enabled: Select this option.
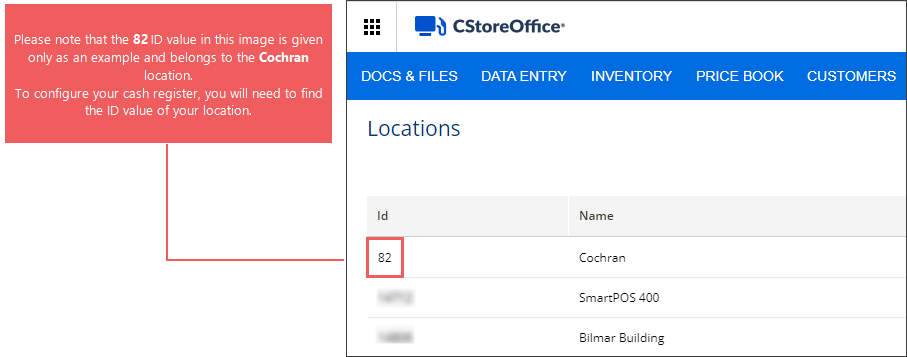
- Dealer ID: Enter the location (or Business Unit) ID from CStoreOffice®. You can find your location ID in the Locations list.
- Program Name: Enter the loyalty program name. For example, Petrosoft Scan Data.
For more information on how to open the locations list to find your location ID, see Setting Up Locations.
For example, for the Cochran location, its ID value is equal to 82 as it is displayed in the image below.
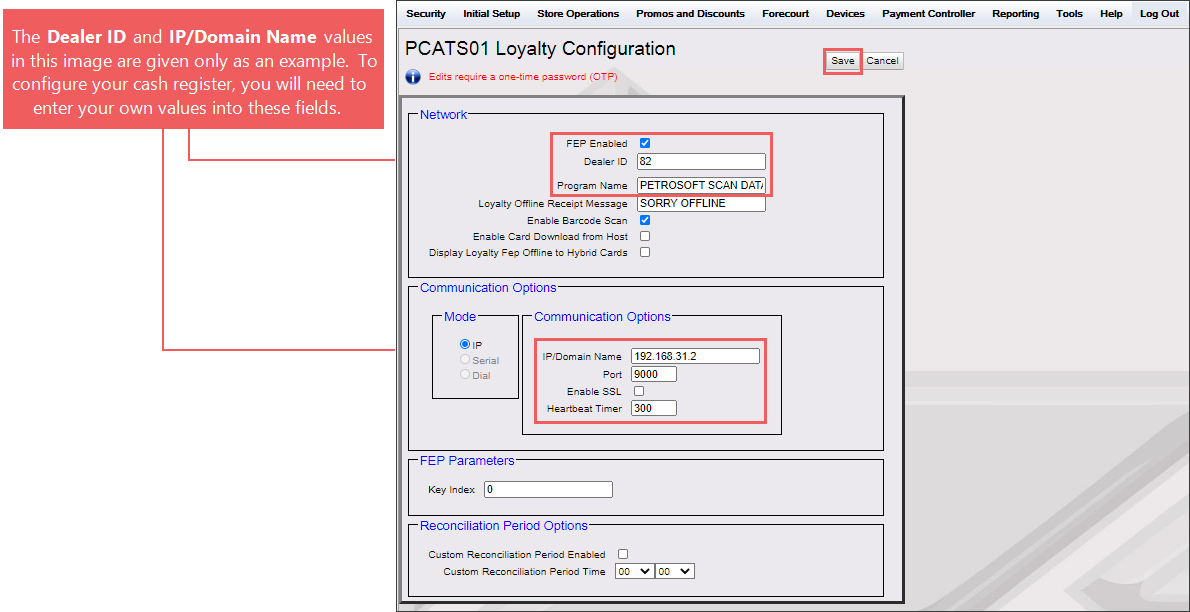
- In the PCATS Loyalty Configuration form > Communication Options section, configure the following mandatory settings:
- IP/Domain Name: In this field, enter the IP address of the DC Box. Depending on the brand of your location, enter the following address:
- For any brand but BP, enter the IP address of your DC Box. To find the IP address of your DC Box, follow the instructions in How to Find DC Box IP Address.
- If the brand is BP, enter 192.168.13.12.
- Port: Enter 9000. You should always use this port value.
- Enable SSL: Leave this option unselected.
- Heartbeat Timer: Enter the number of seconds, to specify the frequency of sending the requests to loyalty host to check its availability. The recommended value is 300.
In the image below, you can see the example of the IP/Domain Name value for the DC Box installed on the Cochran location. You will need to enter here the IP address of your DC Box installed on your location.
- At the top right of the PCATS Loyalty Configuration form, click Save.
- Add the loyalty card and configure its settings:
- In the main console menu, click Payment Controller > EPS Configuration > Loyalty Card Configuration.

- In the Loyalty Card Configuration form > Loyalty Card Configuration tab, click the Add button.
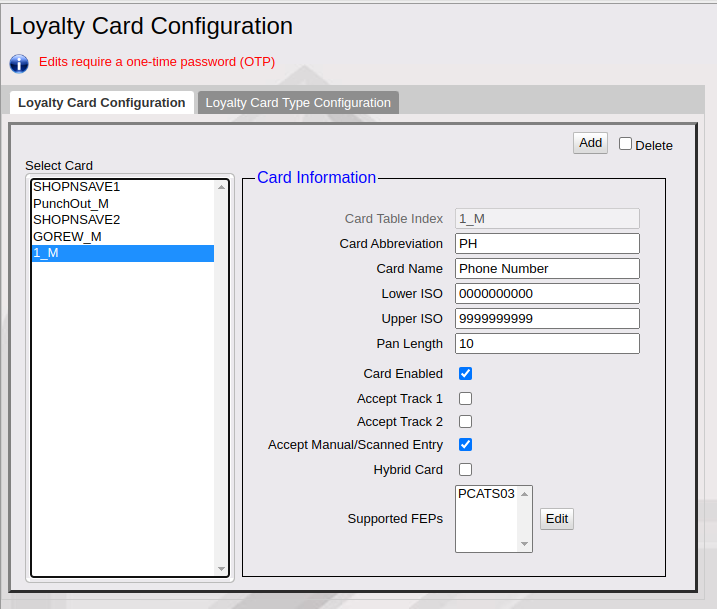
- In the Card Information form, configure the following loyalty card settings:
All settings in the step 4 are mandatory.

- Card Table Index
- Card Abbreviation
- Card Name
- Lower ISO: Enter the beginning point of the card/phone number range.
- Upper ISO: Enter the ending point of the card/phone number range.
- Pan Length: Enter the maximum length value for the customer's card/phone number.
- Select the Card Enabled option.
- Select the Accept Manual/Scanned Entry option.

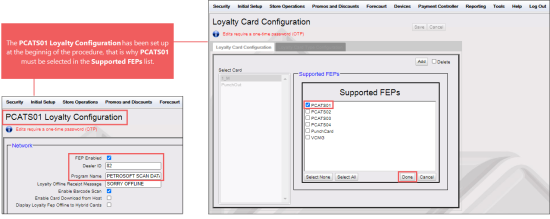
- In the Supported FEPs option, click Edit and in the Supported FEPs list, select the same PCATS Loyalty Configuration you have just configured at the beginning of the procedure (see the example in the image below). Click Done.
Ten-digit phone number range is required.
- At the top right of the Loyalty Card Configuration form, click Save
- Configure loyalty settings:
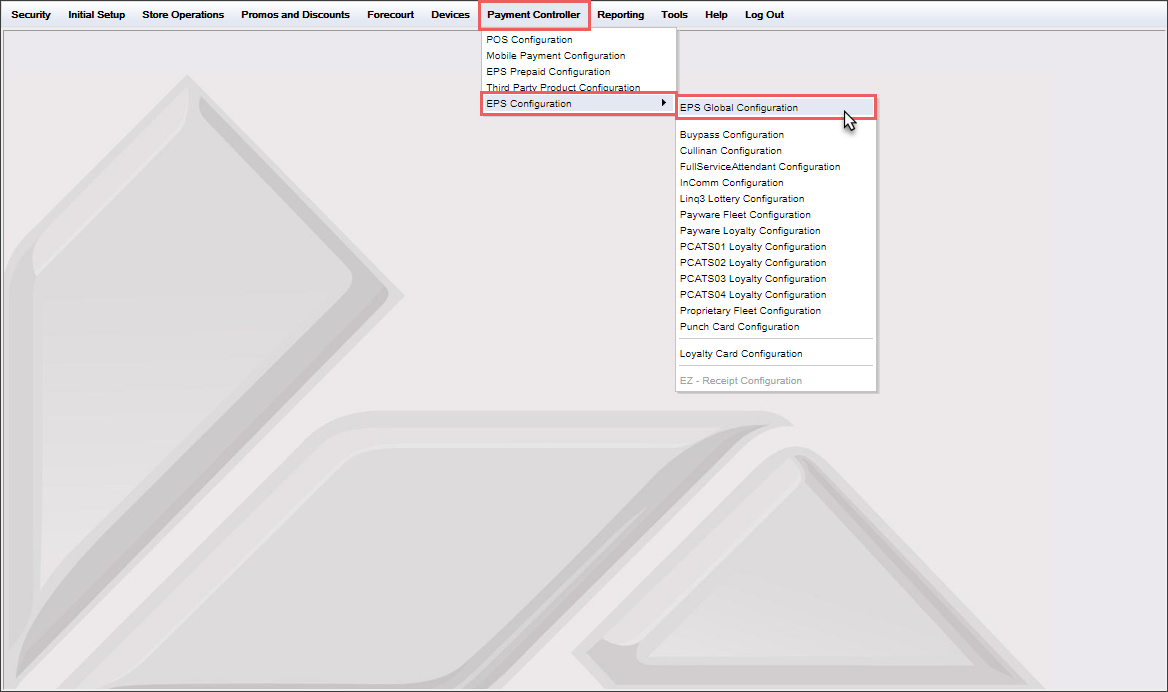
- In the main console menu, click Payment Controller > EPS Configuration > EPS Global Configuration.

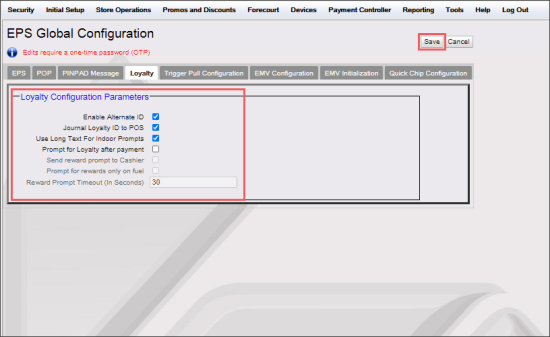
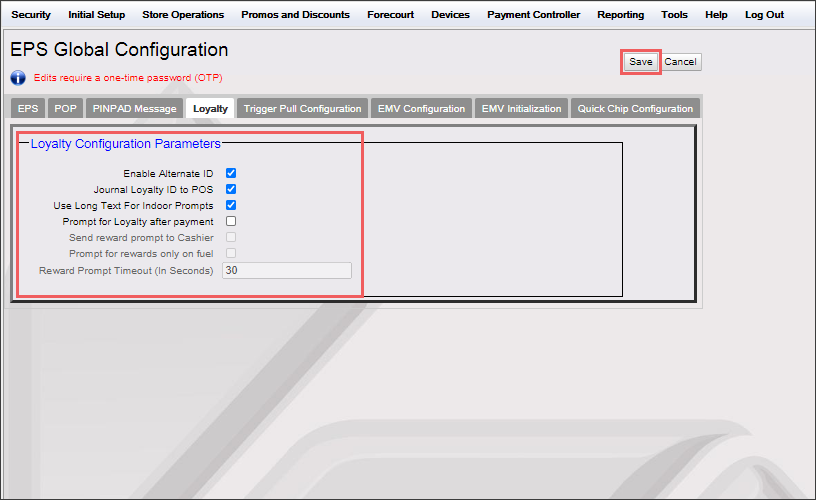
Result: The EPS Global Configuration form opens. - In the EPS Global Configuration form, click the Loyalty section.
- In the Loyalty section:
- Select the Enable Alternate ID option.
- Select the Use Long Texts For Indoor Prompts option.
- Configure additional loyalty settings, if needed.
- At the top right of the EPS Global Configuration form, click Save.
For more information about additional loyalty settings, refer to the manufacturer's official documentation
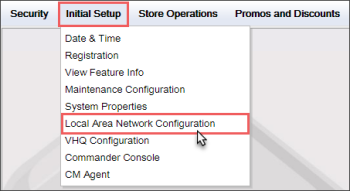
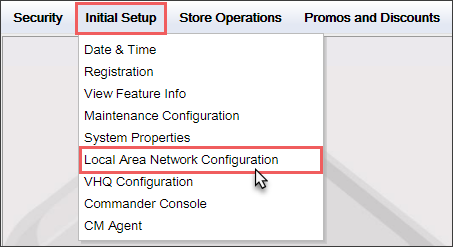
- Configure the loyalty route:
- In the main menu, go to Initial Setup > Local Area Network Configuration.
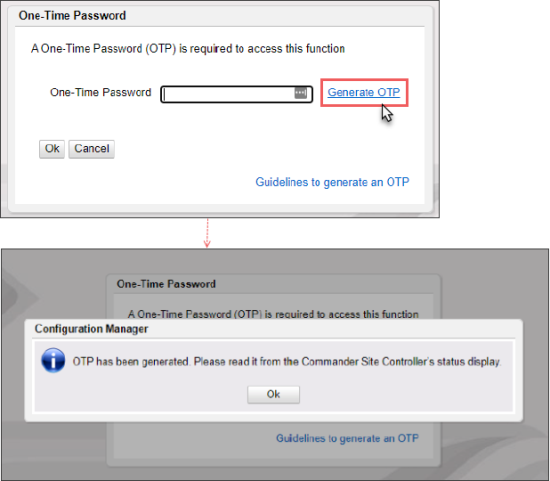
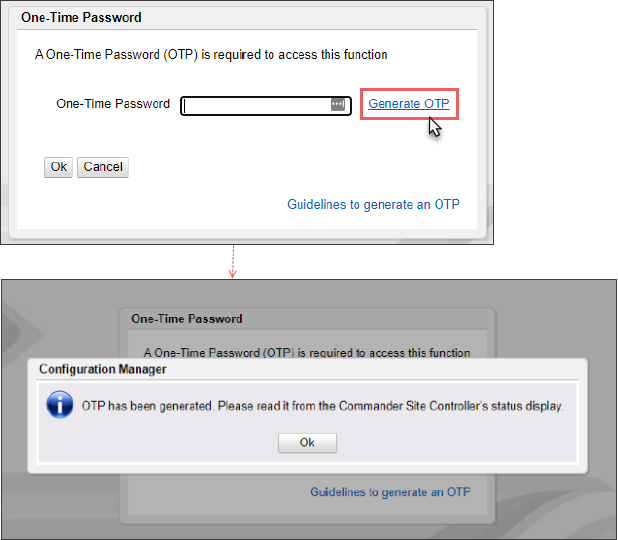
- In the One-Time Password window, generate a One-Time Password (OTP) on your commander and enter it into the field.
- For Full Commander, the code will be displayed on the front LCD panel.
- For Ruby CI, the code will be displayed on the bottom right LCD panel in two sets of 2. The first set will be separated by a period.
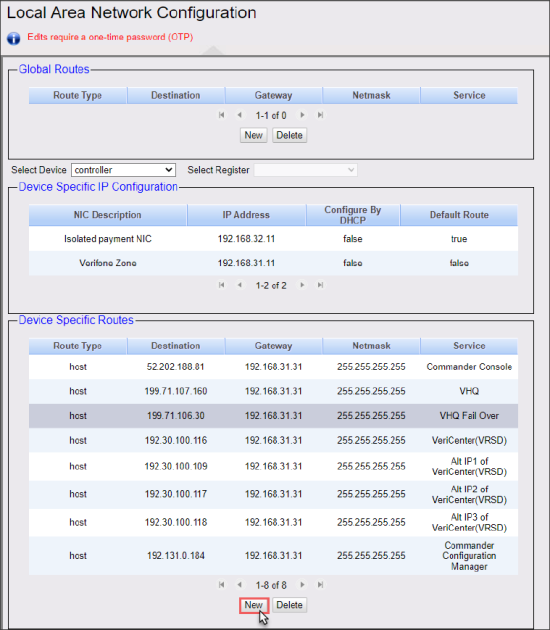
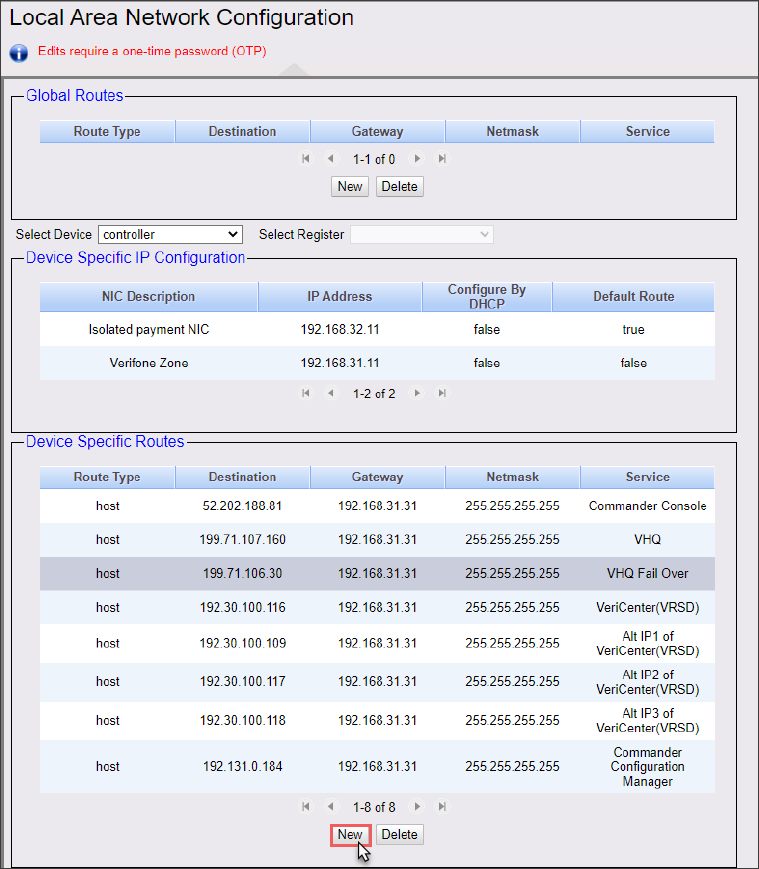
Result: After the One-Time Password is generated and entered in the One-Time Password window, the Local Area Network Configuration form opens.
- In the Local Area Network Configuration form, go to the bottom and click New.
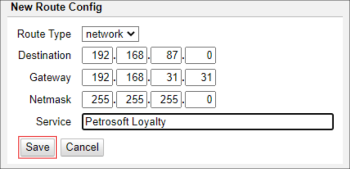
Result: The New Route Config window opens. - In the New Route Config window, enter the following data:
- In the Route Type list, select Network.
- In the Destination field, enter one of the following depending on the brand of your location:
- For any brand but BP, enter 192.168.87.0.
- If the brand is BP, enter 192.168.13.0.
- In the Gateway field, enter 192.168.31.31.
- In the Netmask field, enter 255.255.255.0.
- In the Service field, enter Petrosoft Loyalty.

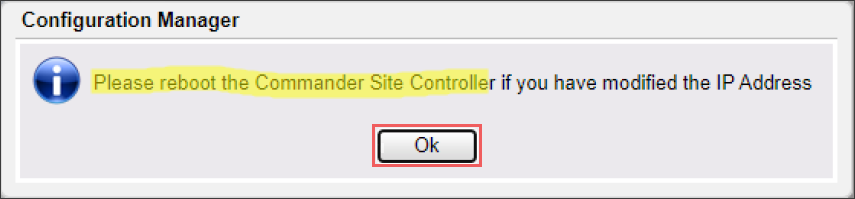
- To apply the changes, reboot the site Controller: Commander or RubyCI.

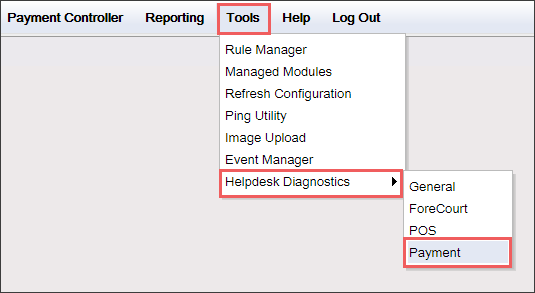
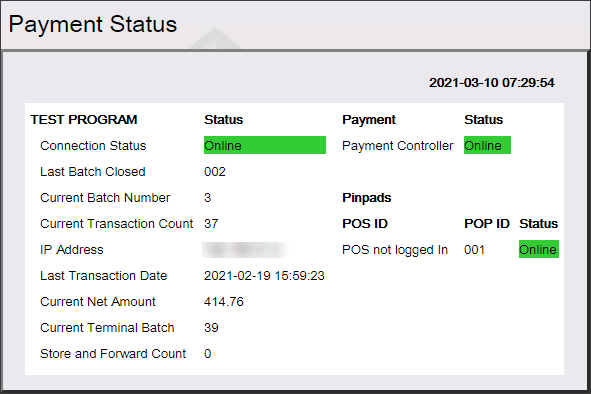
- Check the connection status. From the main menu, go to Tools > Helpdesk Diagnostics > Payment.
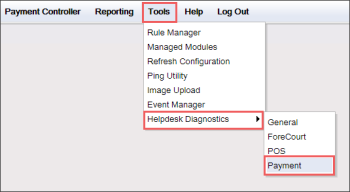
Result: The Payment Status form opens.
Saving Sensitive Data in the Verifone Ruby 2 Console
For saving a certain sensitive data in the Verifone Ruby2 console, you will require to enter a one-time password (OTP).
To get instructions on how to generate OTP, in the One-Time Password form, click the Guideliness to generate an OTP link.
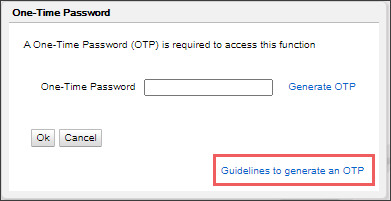
The One-Time Password form opens each time you click Save on the form with the sensitive data.


