


To configure the LPA infrastructure settings:
- Log in to the LPA Settings Console on the DC Box. Do the following:
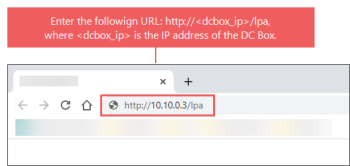
- Open a web browser and in the address bar, enter the DC Box IP address as it is displayed in the image below.
- Log in to the settings console using the following credentials:
- Username: admin
- Password: Use the password you configured in the Direct Connect Options section > Web interface password field. For more information, see Update Default DC Box Password.
- Click Login.
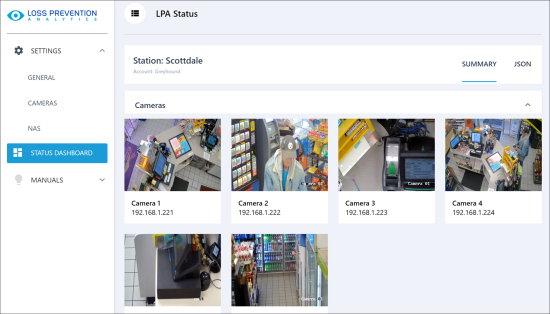
Result: LPA displays the Status Dashboard page.
If the LPA Settings Console is not displayed, see FAQs: Loss Prevention Analytics.
- In the left pane, select Settings > General and make sure all fields have values. If some values are missing, configure the LPA settings as required. The recommended values are the following ones:
- Video file duration: 300
- Video offset: 15
- Port: 12501

To find the correct IP address of your DC Box, check the DC Box Installation Manual.


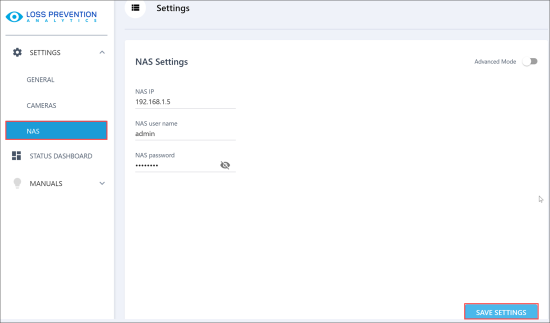
- In the left menu, select NAS and make sure all fields have values. If the fields are empty, it might mean the default NAS password has been changed. In this case, enter the NAS IP address, username and password manually and at the bottom right of the view, click Save Settings.
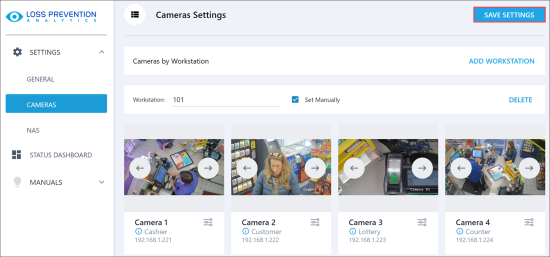
- In the left menu, select Cameras and configure the cameras settings:
- At the top right of the view, click Add Workstation. The system must create a new workstation with four camera slots.
If in the Workstation field the workstation name is not displayed in 15-20 seconds, the workstation is probably not set up in CStoreOffice®. Then configure the workstation settings manually. To do this, in the Workstation field, enter the Terminal ID. The Terminal ID can be found in the 'til report' of your cash register.
If you are using SmartPOS, the Terminal ID is the same as the token key. You can find it by clicking the ? icon in SmartPOS.

- Choose the appropriate IP for each camera slot. Select the camera IP using the back and forward buttons on the slot. You can also click the settings icon at the bottom right of the camera slot and select the IP address from the list.
- At the top right of the view, click Save Settings to save all changes.
- In the left menu, select Status Dashboard and make sure there are no errors. If you do not see any errors, the LPA installation is completed.


