The Happy Hours promotion is actually a variation of the existing promotion types and is set up with the help of these promotions. However, while most promotions give a 'permanent' discount that is in effect for the whole duration of the promotion, the Happy Hours promotion allows you to define the 'schedule' when the discount must be active.
For more information on cash register limitations, see Compatible Cash Registers.
How Happy Hours Promotion Works
A store has lentil soup on the menu which has a regular price of $6.00. A Happy Hours promotion can be created and its settings defined in the following way:
- Promotion type - Price reduction
- Price reduction value - $2.00
- Promotion schedule - 11:00 AM-04:00 PM Monday through Friday
In this case, if a customer orders the lentil soup on Saturday at 11:00 AM, its cost will be $6.00. If a customer orders the lentil soup on Monday at 12.00 PM, its price will be $4.00.
Setting Up Happy Hours Promotion
To set up a Happy Hours promotion:
- Go to Discount Management.
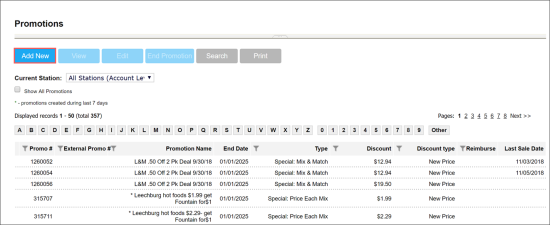
- At the top of the Promotions form, click Add New.
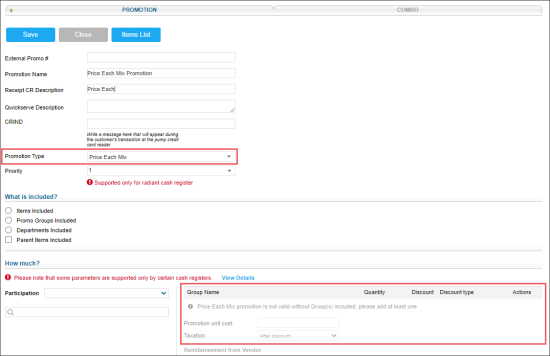
- In the Promotion Name field, enter the name for the new promotion.
- In the Receipt CR Description field, specify the promotion description that must be displayed on cash register receipts. The name length must not exceed ten characters including spaces. By default, the promotion name is displayed in this field.
- In the Promotion Type list, select the promotion type that may be configured as the Happy Hours promotion.
For more information on what promotion and CR types support for the Happy Hours parameter, see Compatible Cash Registers.
Result: The promotion default settings are uploaded in the How much? section according to the selected promotion type.
- In the How much section:
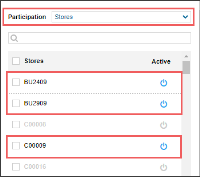
- In the Participation list, select the type of objects for which the promotion must be activated: Stores, Division, Company, and so on.
- In the list of objects below that is opened for the selected type of objects, click the power icon on the right of the object for which you want to activate the promotion.
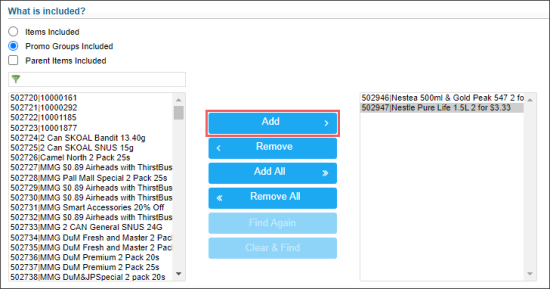
- In the What is included section, select what you want to add to the promotion. You can add items and promo groups. For details, see Promotion Setup Form.
- In the How much section, specify the promotion parameters depending on the selected promotion type.
- Configure the following promotion's settings:
- Reimbursement from Vendor
- Timeframe
The Reimbursement from Vendor and Timeframe settings are configured equally for all promotion types. For more information on how to configure them, see Promotion Setup Form.
- Scroll down to the Promo Results table and make sure that the promotion is set up correctly. The promo results depend on the type of promotion that was selected. For details, see Promotion Types.
- At the top of the promotion form, click Save to save the changes.


