


This page consists of the following sections:
- About ATG
- Enabling ATG for Current Station
- Configuring ATG Connection
- DC Box–HTTP API mode
- DC Box–Router mode
- CSO–External IP mode
- Enabling info messages
- Viewing ATG Connection Information
- Testing ATG Connection
- Requesting ATG Sensors Data Updates
About ATG
Automatic Tank Gauging (ATG) is a powerful tool that enables you to manage fuel inventory and delivery schedules effectively. ATG represents a class of devices, which perform the following functions:
- Gather information on the tanks, pumps, and other equipment status, using various sensors placed on this equipment.
- Share the gathered information through the specialized protocols.
We support the fuel monitoring data for the following ATG brands and models:
- Franklin EVO-400
- Franklin EVO-550
- Pneumercator TMS-3000
- Site Sentinel TS-504
- Veeder Root TLS 200
- Veeder Root TLS 250
- Veeder Root TLS 350
To check the gasoline inventory in CStoreOffice®, use the following forms and reports:
- Consolidated Fuel Inventory Report
- Daily Fuel Inventory Report
- Fuel Inventory
- Gasoline Inventory by Station Report
Enabling ATG for Current Station
By default, ATG is disabled in CStoreOffice®. To enable ATG and configure its settings, the Allow users to set up ATG permission is required for your user in CStoreOffice®. Otherwise, the ATG form is available only in the view mode. For details, see Granting Role Permissions to Roles and Users.
To enable ATG for your station, follow these steps:
- In the CStoreOffice® main menu, select Data Entry > Dashboard.
- In the Station Options grid, select Cash Register.
- Select the Enable CR data processing option and click Save.
- In the left menu, select ATG.
- Select your station in the stations list.
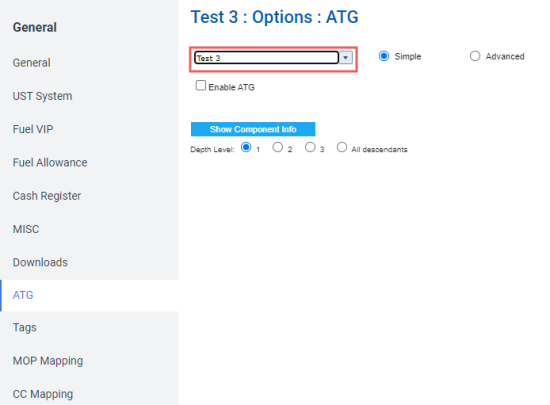
- Select the Enable ATG option.
Result: You can configure the ATG connection settings. For details, see Configuring ATG Connection.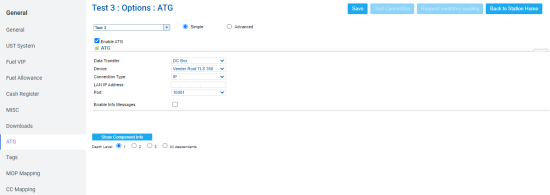


Configuring ATG Connection
You can configure connection with ATG using one of these modes:
- DC Box–HTTP API. Use this mode when DC Box transfers data from the ATG device to CStoreOffice® by using HTTP API. This mode is default and recommended for all stations equipped with DC Box. To configure the connection using this mode, see DC Box–HTTP API mode.
- DC Box–Router. DC Box operates as proxy transferring requests from CStoreOffice® to the ATG device. To configure the connection using this mode, see DC Box–Router mode.
- CSO–External IP. CStoreOffice® requests data from the ATG device directly without DC Box. To configure the connection using this mode, see CSO–External IP mode.
DC Box–HTTP API mode
To configure the ATG connection using the DC Box–HTTP API mode, follow these steps:
- Switch to the Advanced view.
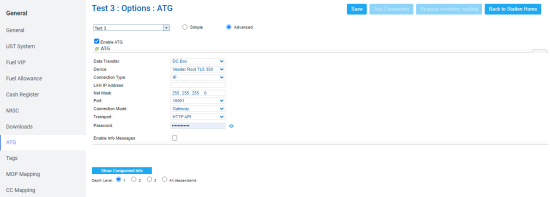
- In the Data Transfer list, select DC Box.
- In the Device list, select the ATG device used in your location.
- In the Transport list, select HTTP API.
- Depending on the interface used in DC Box to connect the ATG device, do the following:
- In the upper-right part of the page, click Save.
- Optionally, you can enable info messages to receive emails about the ATG connection status.


DC Box–Router mode
To configure the ATG connection using the DC Box–Router mode, follow these steps:
- Switch to the Advanced view.
- In the Data Transfer list, select DC Box.
- In the Device list, select the ATG device used in your location.
- In the Transport list, select Router.
- Depending on the interface used in DC Box to connect the ATG device, do the following:
- In the upper-right part of the page, click Save.
- Optionally, you can enable info messages to receive emails about the ATG connection status.
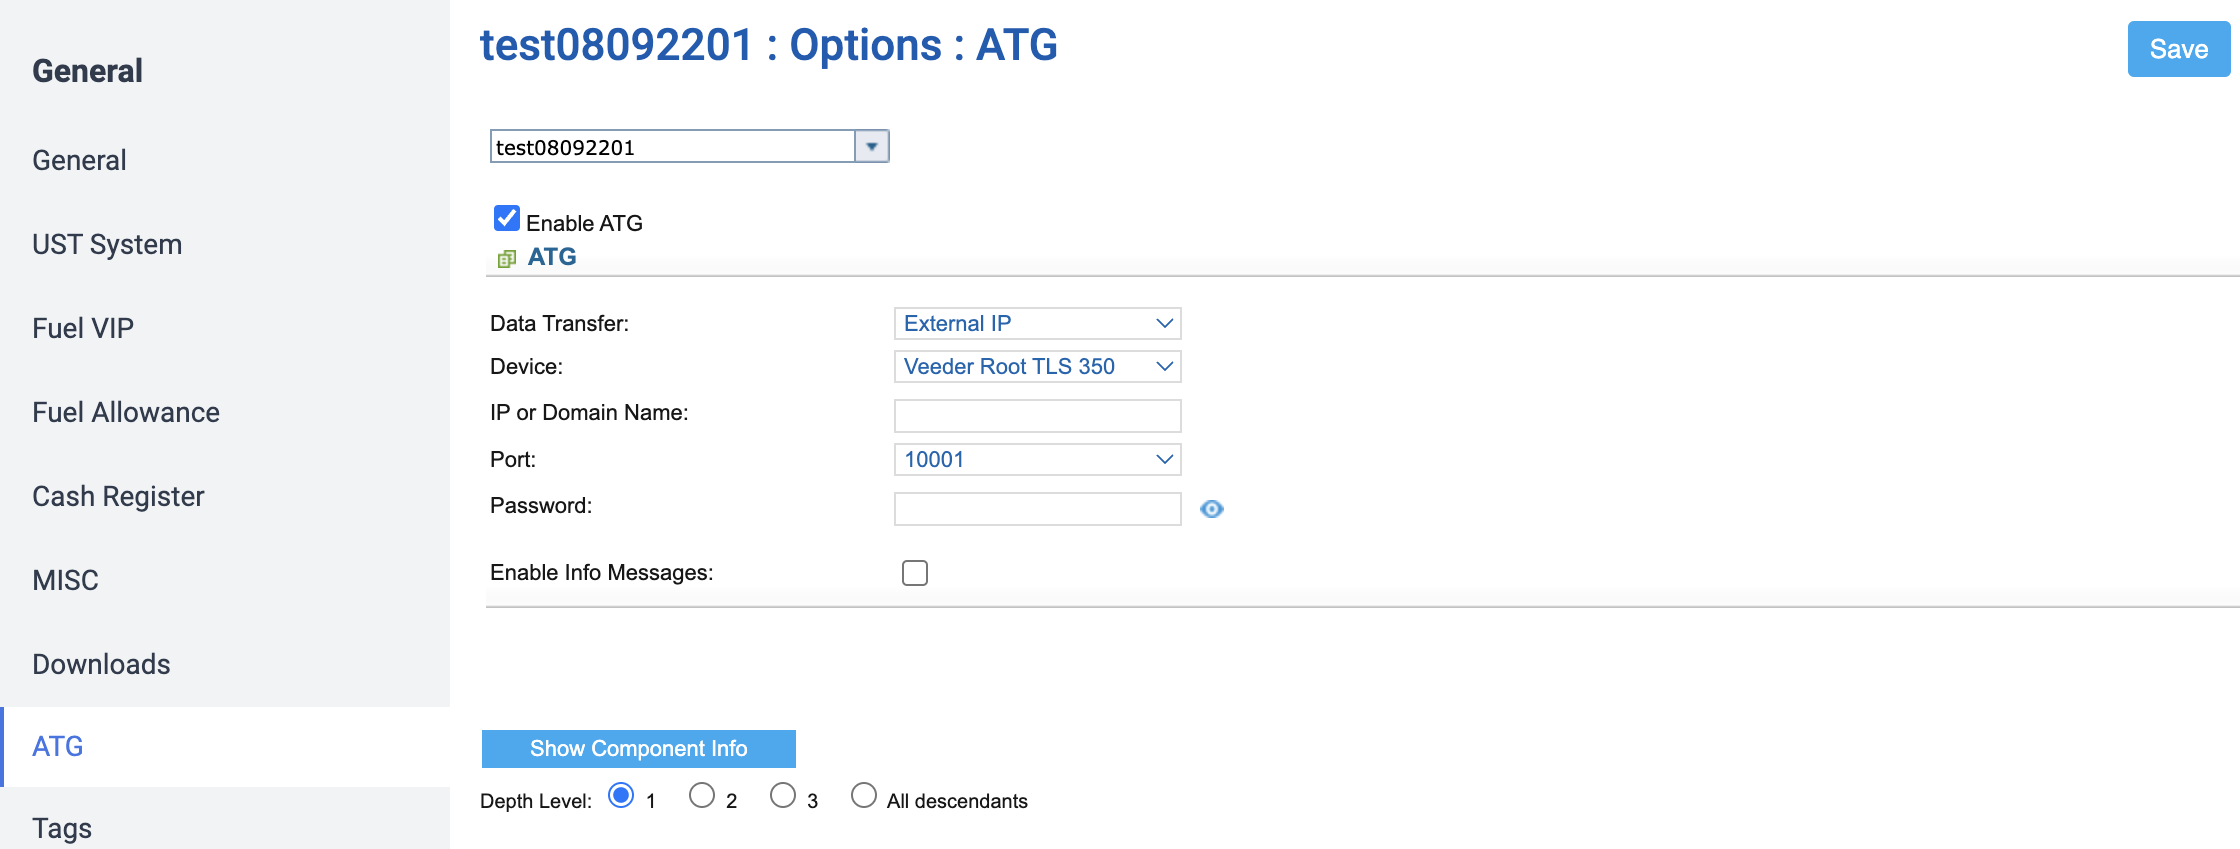
CSO–External IP mode
To configure the ATG connection using the CSO–External IP mode, follow these steps:
- In the Data Transfer list, select External IP.

- In the Device list, select the ATG device used in your location.
- In the IP or Domain Name field, enter IP address or domain name of the ATG device.
- In the Port list, select the port of the ATG device.
- In the upper-right part of the page, click Save.
- Optionally, you can enable info messages to receive emails about the ATG connection status.
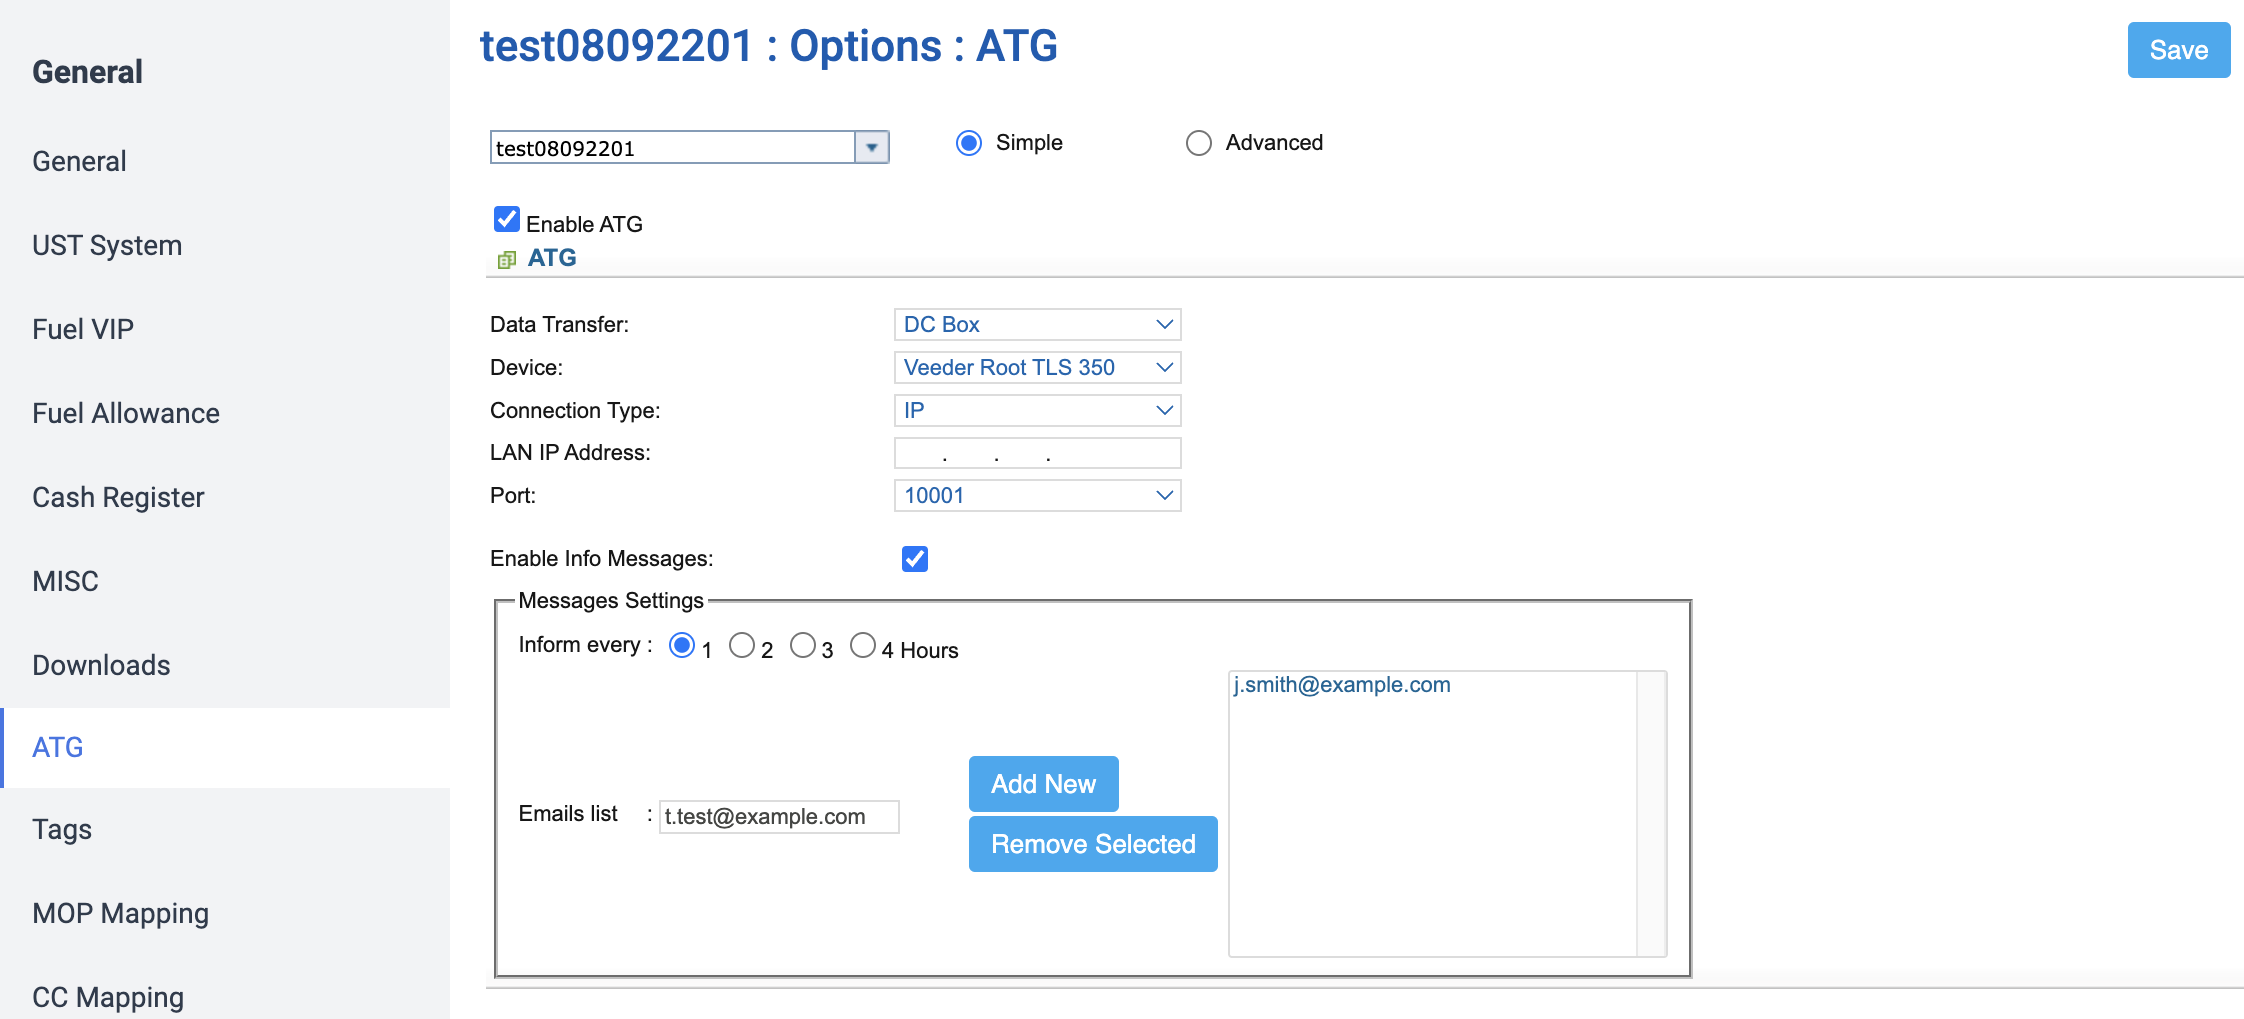
Enabling info messages
To receive notifications about the ATG connection status from CStoreOffice® via email, follow these steps:
- Select the Enable Info Messages option.
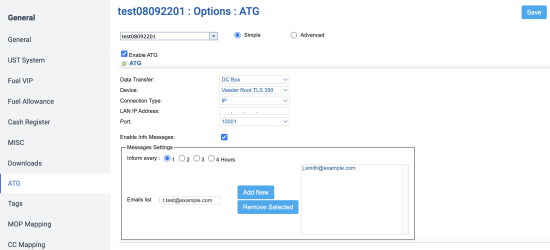
- In the Inform every group of options, select 1, 2, 3, or 4 Hours to define the notifications sending interval.
- Enter an email address you want to send the notifications to in the Email list field and click Add New.
- To remove an email from the list, select it and click Remove Selected.
- In the upper-right part of the page, click Save.
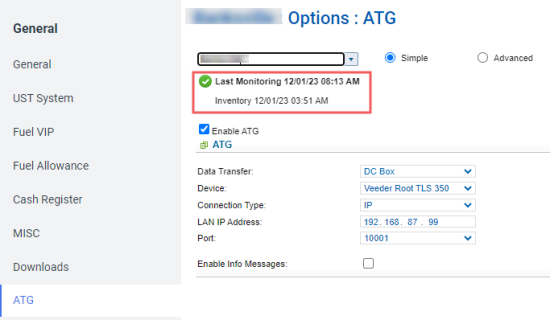
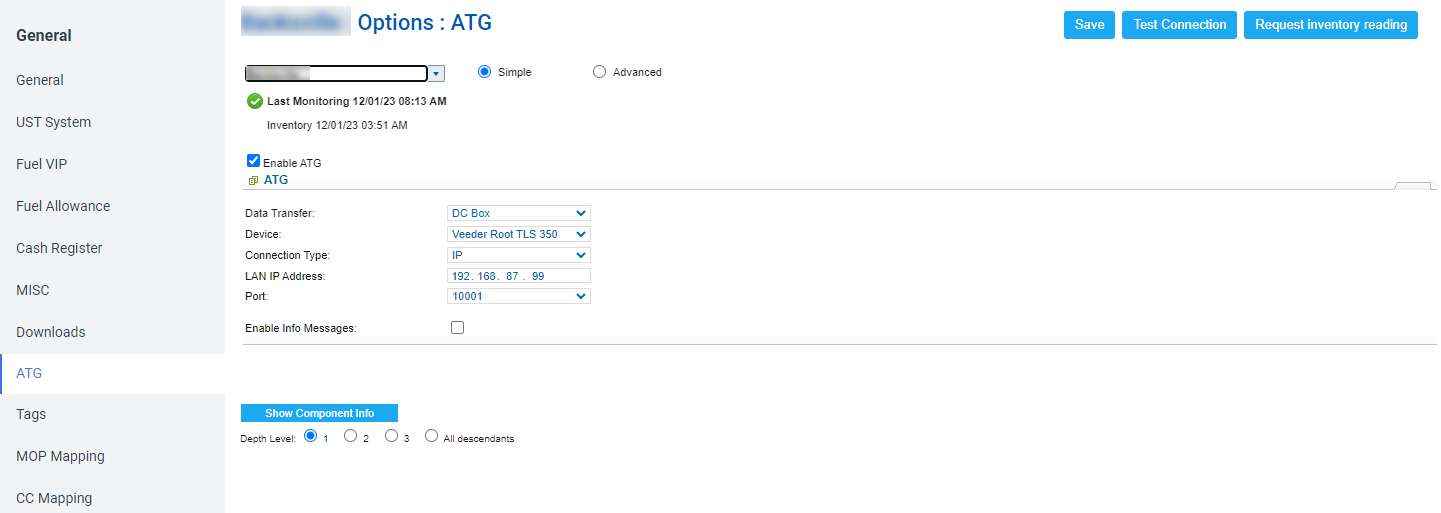
Viewing ATG Connection Information
You can see the following information about the ATG connection below the stations drop-down list:
- Last Monitoring: date and time when the ATG connection was monitored for the last time. CStoreOffice® monitors the connection every 10 minutes.
- Green icon means the connection was successful.
- Red icon means there were issues with the ATG connection.
- Inventory: date and time of the last inventory data download.

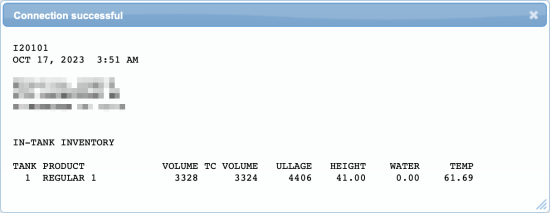
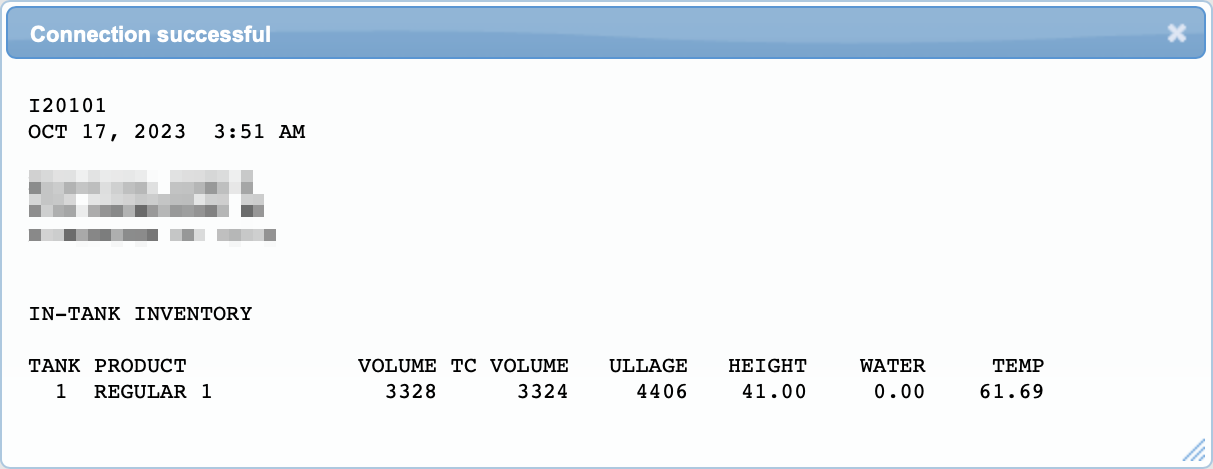
Testing ATG Connection
To test the ATG connection, follow these steps:
- In the upper-right part of the page, click Test Connection.

- If the connection is successful, you can view the fuel inventory details in the appeared pop-up.
Requesting ATG Sensors Data Updates
You can request the ATG sensors data updates to update the fuel inventory data. To request the ATG sensors data updates, follow the steps:
- In the upper-right part of the page, click Request inventory reading.
- Wait the request to be processed.
- You can check the latest fuel inventory data on the Fuel Inventory page.


