


Custom MOPs are used to reconcile cash at the end of the shift or day. The system processes only base MOPs and custom MOPs. All undefined MOPs (custom MOPs not mapped to any of the base MOPs) are processed as credit.
This option is permission-based. Before adding a new MOP, make sure the Allow users to set up MOP Mapping permission is granted to your user in CStoreOffice®. Otherwise, the MOP Mapping form is available only in the view mode. For details, see Granting Role Permissions to Roles and Users.
To add a custom MOP:
- Go to Data Entry > Dashboard > Station Options > General.
- In the list of options on the left side select MOP Mapping.
Result: The MOP mapping form is displayed.
- Click Add New MOP.
Result: A new entry in the Custom MOPs table appears.

- Specify the following MOP settings:
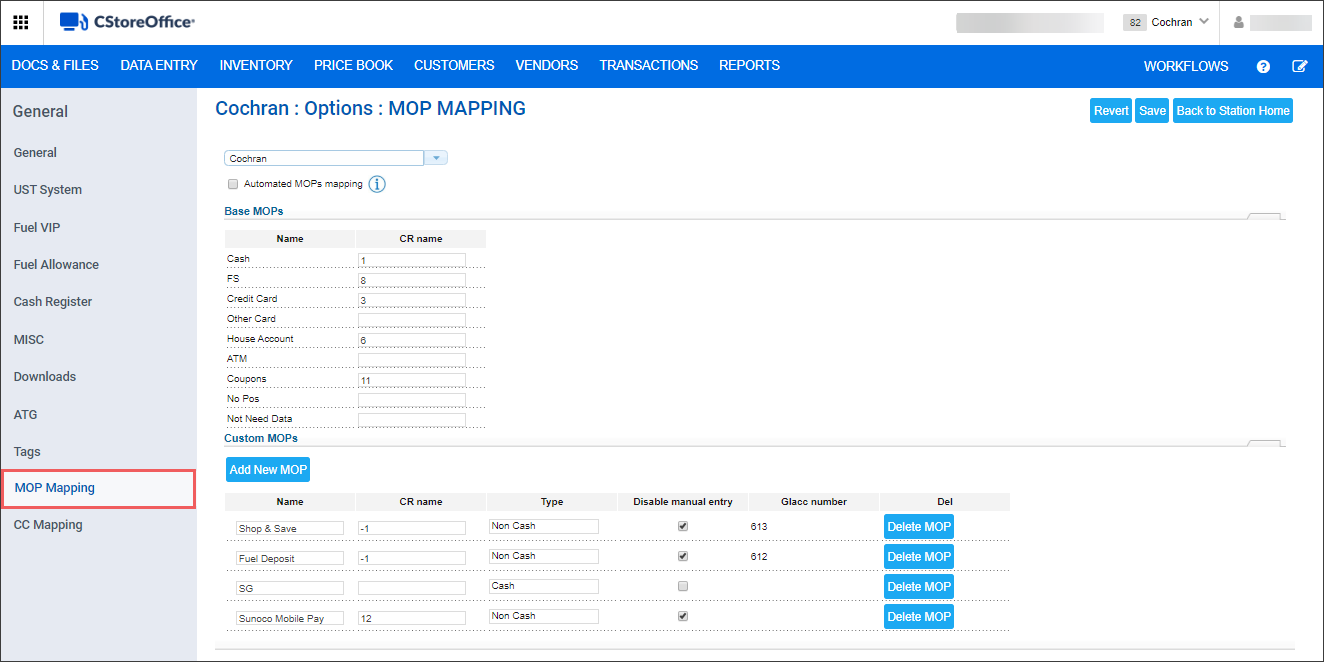

- Name: Name of a custom MOP.
- CR name: MOP name at the cash register. You can either select a name in the combo box of the names available at the cash register or enter any text value.
- Type: Select the type of the payment method, cash or non-cash.
- Disable manual entry: To disable manual entry of values for this MOP in the Cash Reconciliation > Daily Data form, select this check box.
- Glacc number: GL number.
Please use unique name and make sure the name of a custom MOP is not equal to the name of base MOP or any other system method of payments. Otherwise, it may cause sales data discrepancies.
For more information on editing MOP values on the Daily Data form, see Daily Data and Custom Payments.
- Click Save.
Result: A new custom MOP is added to the system. It is displayed in the Custom Payment section of the Daily Data form, located at Data Entry > Cash Reconciliation > Cash Register for the current station.


