


This section describes the specifics of accessing and interpreting the Pending Invoices Consolidated report.
The Pending Invoices Consolidated report's functionality is permission-based. To view the list of permissions for this form, go to Invoices Permissions.
Opening the Report
You can find the report at Reports > Store > Merchandise > Pending Invoices Consolidated.
The Pending Invoices Consolidated report can be opened at all levels:
- Account
- Company
- Division
- Location (Station)
For more information, see Viewing Reports.
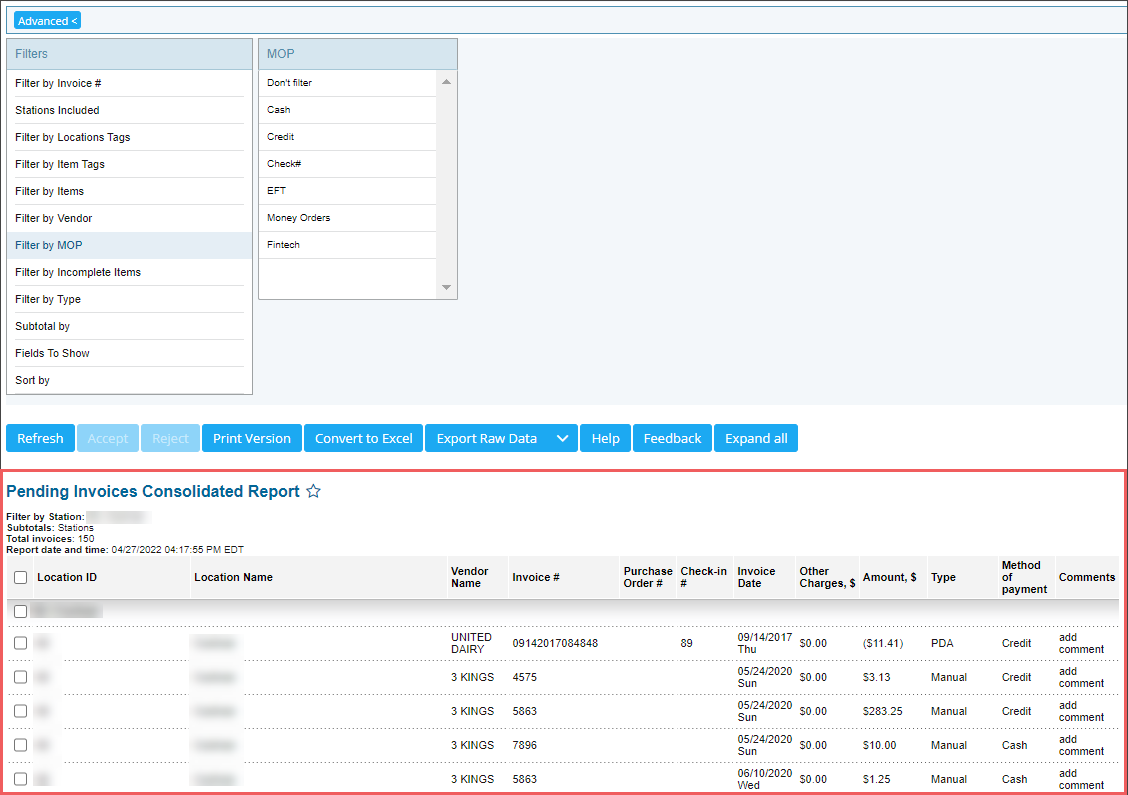
Viewing the Report
The Pending Invoices Consolidated report provides information on the station current invoices.
The report contains the following data:
- Report header:
- Filter by: Applied filters.
- Subtotals: Selected subtotals.
- Total invoices: The number of invoices displayed in the report.
- Report date and time: The date and time when the report was generated.
- Report table:
- Location ID
- Location Name
- Vendor Name
- Invoice #
- Purchase Order #
- Check-in #
- Invoice Date
- Other Charges, $
- Amount, $
- Type
- Method of Payment
- Comments
Basic columns displayed in the report by default are listed below. You can configure more columns to be displayed in the Fields to Show filter.
Filtering and Sorting the Report Data
To get the exact information you need, you can apply filters to the report. To set up a filter, select one or more filtering options. Once the filter is set up, at the bottom of the filter section, click the Refresh button to display the report data by the filter criteria.
The report provides the following filtering and sorting options:
- advanced. Click the advanced button, select one several filtering options you want, and then click Refresh. There are the following advanced filtering options available:
- Filter by Invoice #: In the InvoiceNumber field, enter the number of the invoice you want to display in the report. Only one invoice number can be entered.
- Stations Included. Select the stations you want to view the report for.
- Filter by Locations Tags. Use this option to filter the report data by tags assigned to locations. The generated report will contain data only for those locations to which the selected tags are assigned.
To select tags by which the report data must be filtered, expand the tags tree and select the check boxes next to the necessary tags. You can filter the report data by root tags and tags of the lower level in the tags hierarchy. You can also create a combined filter by selecting different root and child tags. - Filter by Item Tags: Use this option to filter the report data by tags assigned to items. The generated report will contain data only for those items to which the selected tags are assigned. To select tags by which the report data must be filtered, expand the tags tree and select the check boxes next to the necessary tags.
The report data can be filtered by root tags and tags of the lower level in the tags hierarchy. A combined filter can also be created by selecting different root and child tags. - Filter by Items: Select this option and use the search tool to find the particular items to be filtered.
- Filter by Vendor: Select the vendor you want to generate the report data for.
- Filter by MOP: Select the method of payment to filter the report's data.
- Filter by Incomplete Items: To filter the report results by incomplete items, select one of the following options:
- Don't filter: Select this option, to display all invoices with complete and incomplete items.
- With incomplete items only: Select this option, to display the invoices with incomplete items only.
- Ready to be Accepted Only: Select this option, to display only the invoices that can be accepted and have no issues with incomplete items.
- Filter by Type: Select the invoice type to be displayed in the report and to be exported to the XLS file. For more information, see Exporting the Report Advanced Data to XLS File.
- Subtotal by: Select the options in the columns to break-down the report results further.
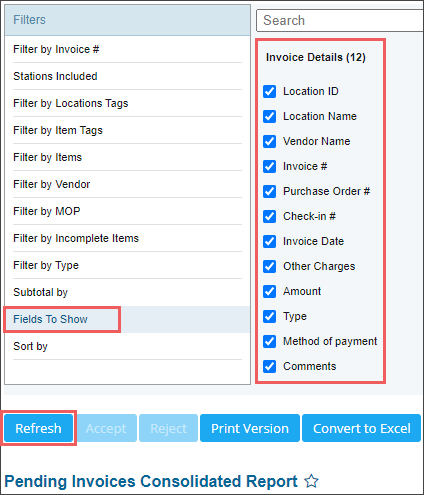
- Fields to Show: Select the fields to be displayed in the report.
- Sort by: Select the order of the report columns you want.
Press CTRL, to select several items at a time.
Select the Show Only option to view only the information for the selected items, and Show All Except to view the information for all the items except the selected ones.
Exporting the Report Advanced Data to XLS File
To export the report's advanced data to an XLS file:
- Customize the data export settings, if needed:
- Go to Filters > Fields To Show.
- In the Invoice Details section, select the report data to be exported to XLS file.
- Click Refresh.

- Go to Filters > Fields To Show once again.
- In the Raw Data Export section, select additional data to be added to the report's XLS file. The following data can be exported additionally:
- Invoice Status
- Has Incomplete Items
- SKU Code
- Invoice UIC
- PB UIC
- Category ID
- Category Name
- CR Department ID
- Unit Cost
- Extended Cost
- Negotiated Cost
- Incomplete Item Reason

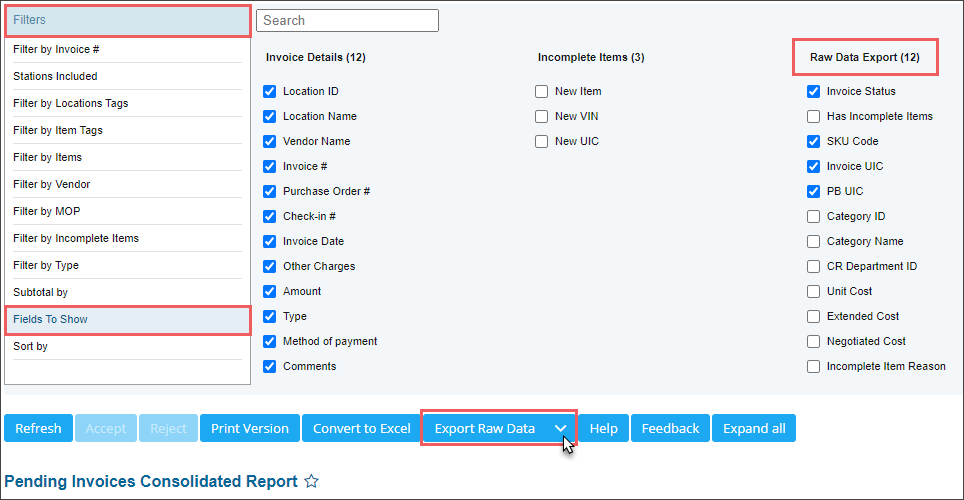
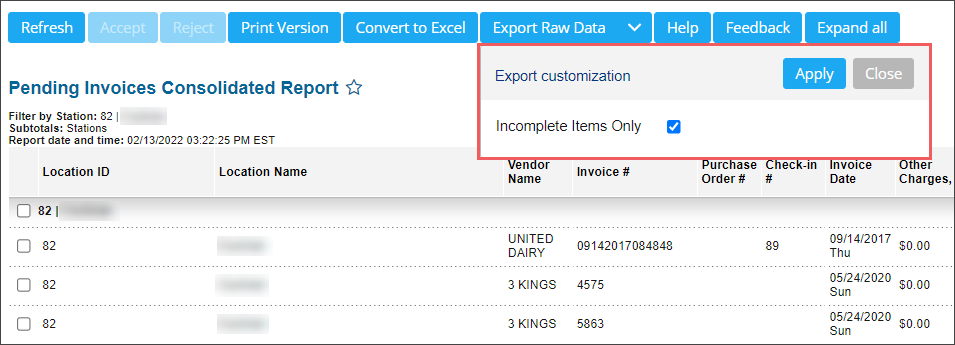
- Click the right arrow on the Export Raw Data button.
- In the Export customization form:
- Select Incomplete Items Only, if you need to export the invoices with incomplete items only.
- Click Apply.
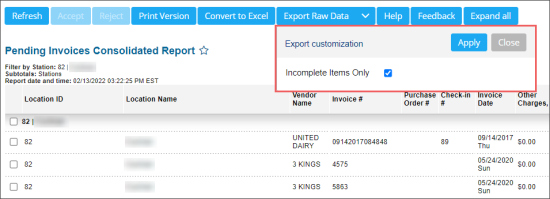
- Click the Export Raw Data button.
- Save the exported XLS file.
In addition to the Invoice Details data selected in the filters, the following advanced data is exported to the XLS file via the Export Raw Data button:
- Invoice Status
- Has Incomplete Items
- SKU Code (without check digit)
- SKU Code
- Item Name
- VIN
- Case Quantity
- Invoice UIC
- PB UIC
- Size
- Category ID
- Category Name
- CR Department ID
- Unit Cost
- Extended Cost
- Negotiated Cost
- Incomplete Item Reason


Additional Actions
- To accept the invoice, select it and then click Accept. You can select and accept all invoices at once.
- To reject the invoice, select it and then click Reject. You can select and reject all invoices at once.
- To export advanced report data into the XLS file, click Export Raw Data. For more information, see Exporting the Report Advanced Data to XLS File.
- To add comment to the invoice, in the Comments column, click add comment for this invoice.
- To open the Pending Invoices report, click any row in the table.
- To expand all rows in the report, click Expand all.
Please note that the Accept and Reject buttons are displayed only if the corresponding permissions are granted to the user. For more information, see Invoices Permissions.
For more information on additional report features, see Reports.


