


This section describes the specifics of accessing and interpreting the Account Register report.
Opening the Report
You can find the report at Transactions > Account Register > Related Information > Account Register Report.
To open the report in the Account Register section:
- In the Options subsection, define the following report settings:
- Company
- Class
- Account
- From and To

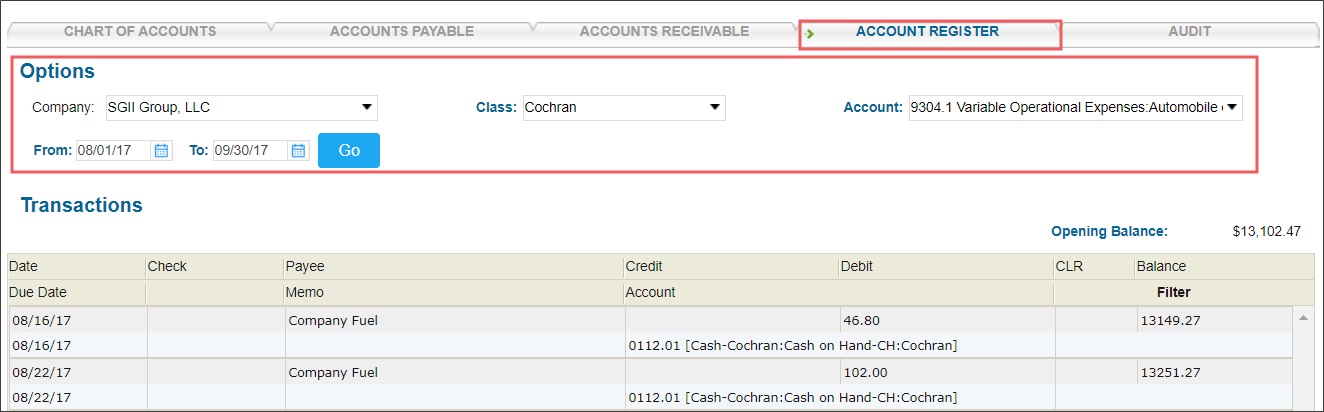
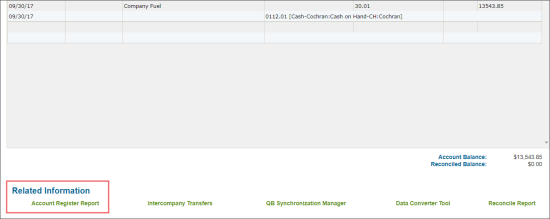
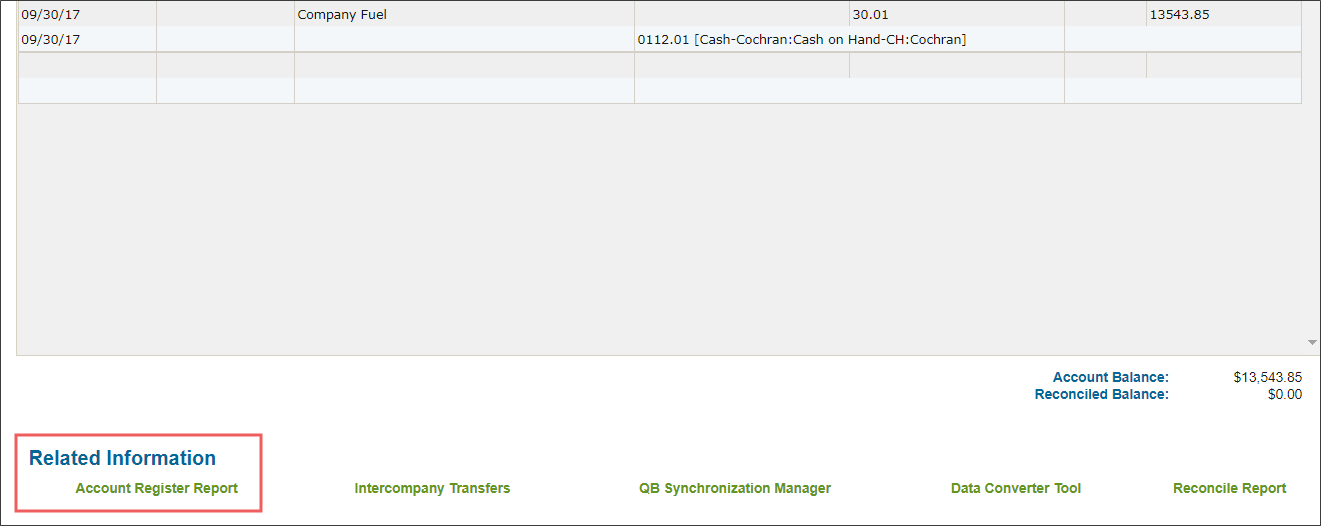
- Go to the bottom of the Account Register section.
- In the Related Information section, click Account Register Report.
Viewing the Report
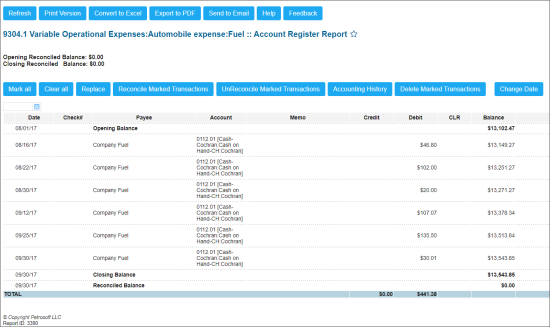
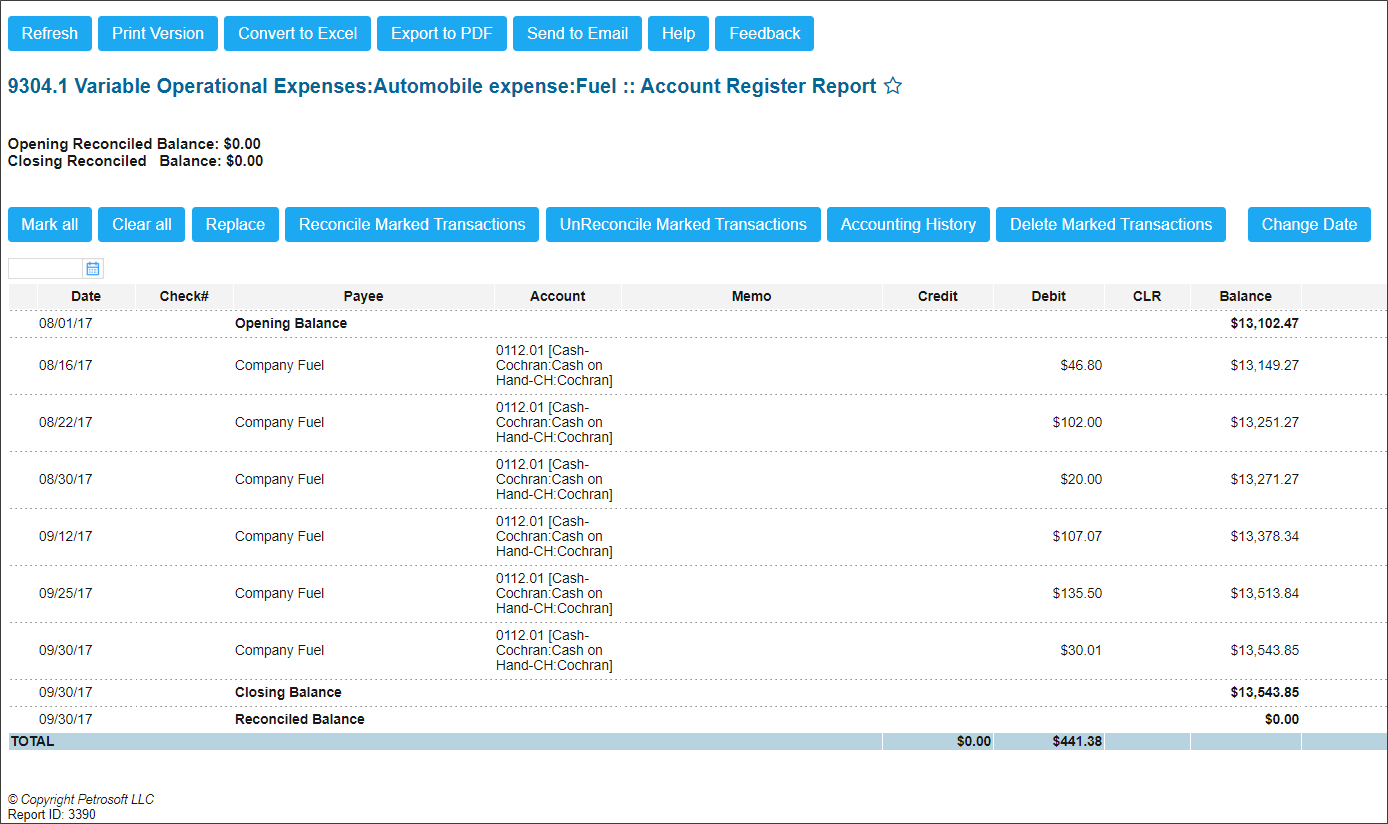
The Account Register report is used to work with a large volume of transactions: to view transactions and update many of them at once.
The report contains the following information:
- Date
- Check #
- Payee
- Account
- Memo
- Credit
- Debit
- CLR
- Balance
Filtering and Sorting the Report Data
To get the exact information you need, you can apply filters to the report. To set up a filter, select one or more filtering options. Once the filter is set up, at the bottom of the filter section, click the Refresh button to display the report data by the filter criteria.
The report provides the following filtering and sorting options:
- Date: Specify the period you are interested in manually using the calendar or use one of the available filtering options, and then click Refresh There are the following filtering periods available:
- Yesterday
- Current Month
- Current Quarter
- Current Year
- Last Month
- Last Quarter
- Last Year
- Last 12 months
- advanced: Click the advanced button, select one several filtering options you want, and then click Refresh. There are the following advanced filtering options available:
- Filter By: Select one or several options to filtering the report results.
- Classes: Select the stations you want to view the report for.
- Account Types: Select the account types to be displayed in the report.
- Data Types: Select the data types to be displayed in the report.
- Amount: Select this option, specify amount and comparison conditions, in case you need to view the transactions with a specific amount only or matching the comparison conditions
- Memo: Select this option end enter a memo, in case you need to view the transactions containing this memo only.
- Sort by: Select the order of the report columns you want.
- Subtotal By: Select one or several filtering options to break down the report results by the specified criteria.
- Replace: Use this section, to replace the transaction data. For more information, see Replacing Transaction Values.
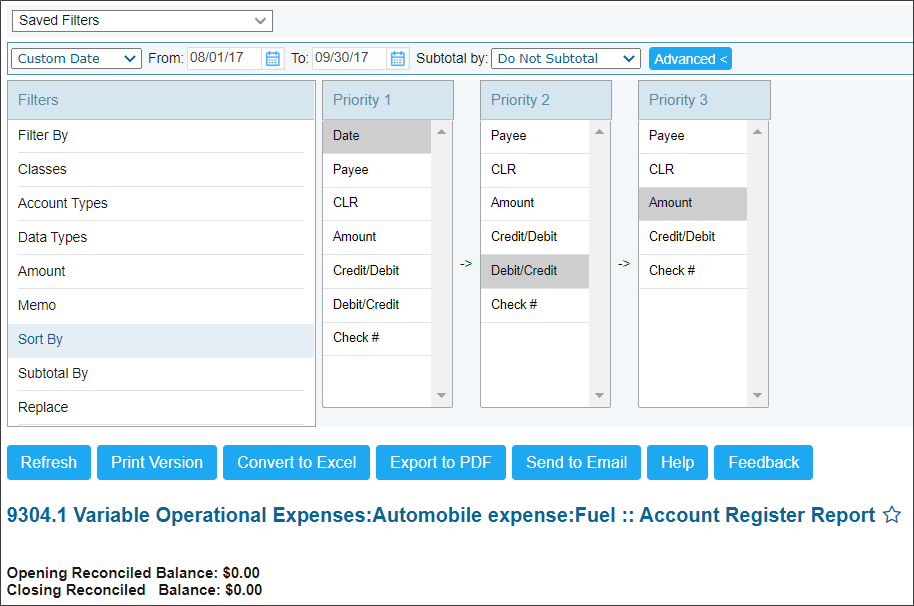
Press CTRL, to select several items at a time.
Additional Actions
To select all transactions in the report, click Mark all.
To deselect all transactions in the report, click Clear all.
To reconcile a transaction, select it, click Reconcile Marked Transactions and then in the confirmation window, click OK.
To mark a transaction as 'Unreconciled', select it, click UnReconcile Market Transactions and then in the confirmation window, click OK.
To view the transactions changes history report, select it and then click the Accounting History button.
To edit a transaction, click this transaction date, in the opened window make necessary changes and then click Save and Close.
![]()
To delete a transaction, select it, click Delete Marked Transactions and then in the confirmation window, click OK.
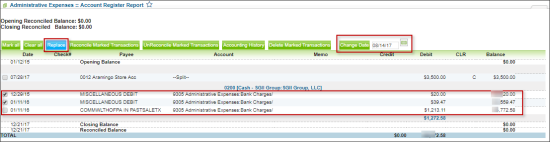
Updating Transaction Date
To update the date of a transaction:
- Select one or several transactions, for which you want to change a date.
- Make sure the selected transactions match the following criteria:
- The transactions are not audited
- These transactions are not system transactions
- The transactions are not the Inter Company Transfers
- In the Change Date field, enter a new date for the selected transactions.
- Click the Replace button.
- In the confirmation window, click OK.
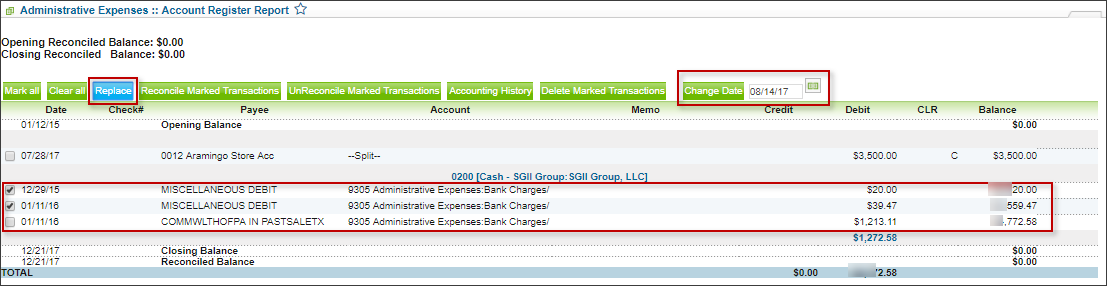
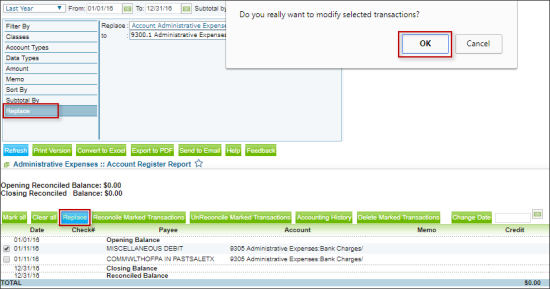
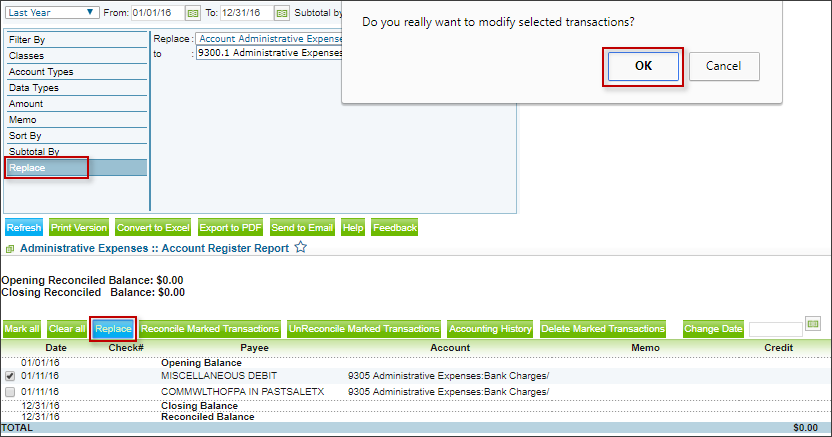
Replacing Transaction Values
To replace the account or the last part of one or several transactions, follow the steps:
- Select one or several transactions, for which you want to make a replacement.
- Make sure the selected transactions match the following criteria:
- The transactions are not audited
- These transactions are not system transactions
- The transactions are not the Inter Company Transfers
- At the bottom of the filtering options, click Replace.
- In the Replace field, select one of the following parameters which values you want to replace:
- Account Administrative Expenses
- Other side of transactions
- In the to: field, select the new value for the selected parameter.
- At the top of the report table, click the Replace button.
- In the confirmation window, click OK.
For more information on additional report features, see Reports.


