


This section describes the specifics of accessing and interpreting the Circle K Export report.
Opening the Report
You can find the report at Reports > Accounting > Export Data > Circle K Export.
The Circle K Export report can be opened at all levels:
- Account
- Company
- Division
- Location (Station)
For more information, see Viewing Reports.
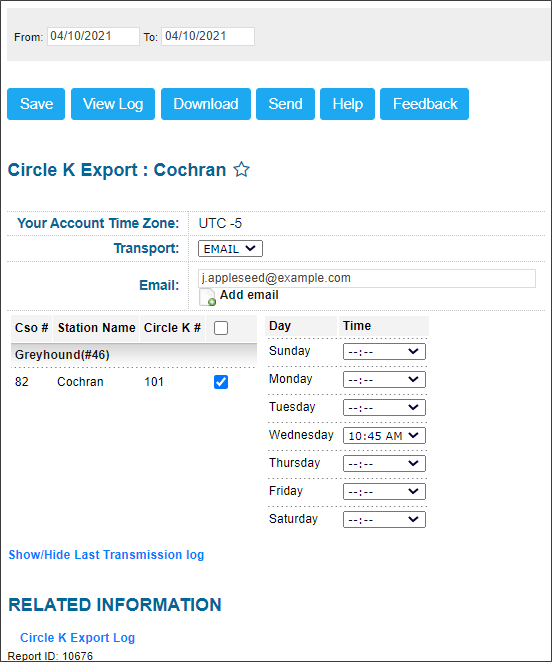
Setting Up the Report's Export
Using the Circle K Export report, you can collect and send the sales data in a specific format.
To set up the report's export settings:
- In the From and To fields, set the report's period.
- In the Transport list, select one of the following methods of data transferring:
- FTP: Select this option to export the report's data to the FTP server. Configure the following FTP settings:
- Host: Specify the host name of the FTP server.
- Path: Specify a path to the folder in which the exported data must be stored.
- Name: Specify the name of the user who will access the FTP server.
- Password: Specify the password of the user who will access the FTP server.
- Passive Mode: It is recommended to keep this option selected.
- EMAIL: Select this option and in the Email field, specify the email address to which the report must be sent.
- In the list of stations, select the station from which to send the export data.
- In the Day and Time columns, specify the time period of the exported data.
- At the top left of the report, click the Save button.

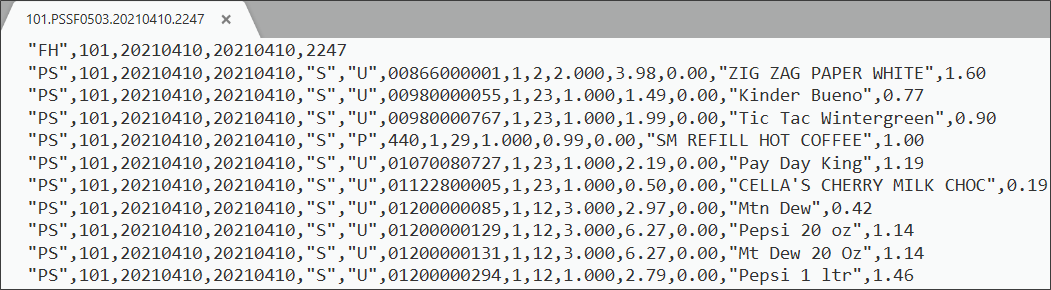
Circle K Export File Format
The Circle K Export report is generated as an archived ZIP file that contains raw exported data.
Additional Actions
You can perform the following actions with the Circle K Export report:
- To save the export settings, click Save.
- To view the export history, click View Log at the top of the window or click Circle K Export Log at the bottom of the window.
- To download the exported data, select the necessary period and click Download.
- To export the report data ahead of the schedule, select the necessary period and click Send.
For more information on additional report features, see Reports.


