


You can set up the postpone negotiated cost for one or several items at once.
To set up the postpone negotiated cost for the items:
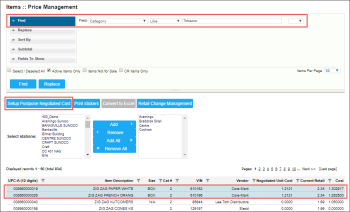
- From the CStoreOffice® main page, click Price Book > Items.
- In the Items form, click the Price Management button.
Result: The Price Management form opens. - In the Price Management form:
- Find the items you need to set up the postpone negotiated cost for. Use the Find and Replace tool, if needed. For details, see Operational Panel (Find and Replace Tool).
- Select the items. Use the Select / Deselect All check box, if needed.
- Click the Setup Postpone Negotiated Cost button.
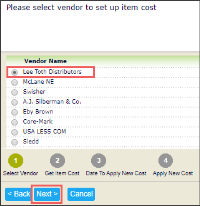
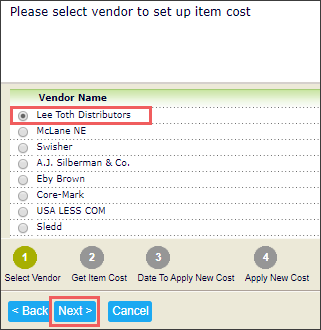
Result: The Vendors Cost Wizard opens. - At the first step of the Vendors Cost Wizard, select the vendor and then click Next.
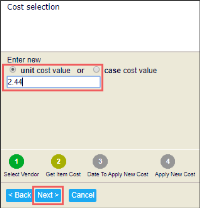
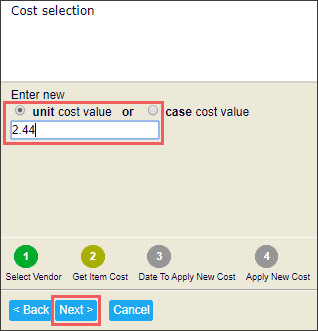
- At the next step of the wizard:
- Select the cost value type you are going to change:

- unit cost value
- case cost value
- Enter a new cost value.
- Click Next.
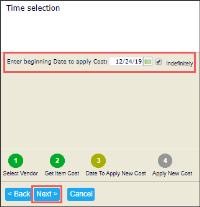
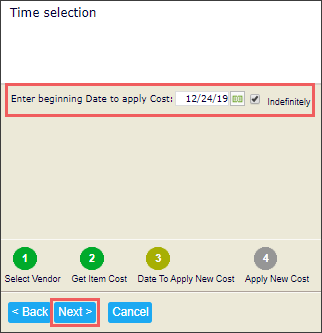
- At the next step of the wizard, set up the period during which a new negotiated cost will be effective:
- Specify the beginning date. The current date is specified by default.
- Specify the ending date. If the ending date is unknown, select Indefinitely.
- Click Next.
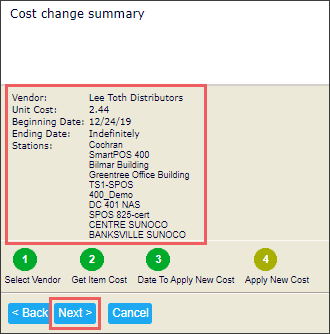
- At the last step of the wizard, review the configured settings and click Next to apply them.

To apply the postponed negotiated cost changes to the items, you must sent updates to the CR using the Cash Register Updates Manager. For more details, see Cash Register Updates Manager.
You can keep track of the set up upcoming prices with the Consolidated Cost Changes History report > Additional Actions and in the Postpone Cost Change report.


