


- Primary, or trigger group: Items in this group are sold at their regular price.
- Linked promo group: Items in this group are sold with a discount if they are bought together with the items from the trigger group.
A typical example of the Linked Saver promotion is the following: 'Buy two burgers and get a fountain drink at a 20% discount'.
For items in the trigger group, the discount is not specified since these items are sold at their regular price. For items in the linked promo group, the Link Saver promotion supports the following types of discounts:
- New price: A new price for promoted items can be specified.
- Discount amount: A discount as the exact amount can be specified.
- Discount rate in percent: A discount as the percent rate can be specified.
For more information on cash register limitations, see Compatible Cash Registers.
Setting Up Link Saver Promotions
To set up a Link Saver promotion:
- Go to
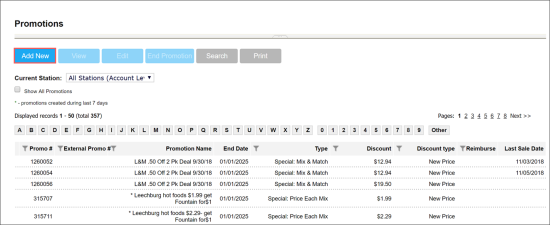
- At the top of the Promotions form, click Add New.
- In the Promotion Name field, enter the name for the new promotion.
- In the Receipt CR Description field, specify the promotion description that must be displayed on cash register receipts. The name length must not exceed ten characters including spaces. By default, the promotion name is displayed in this field.
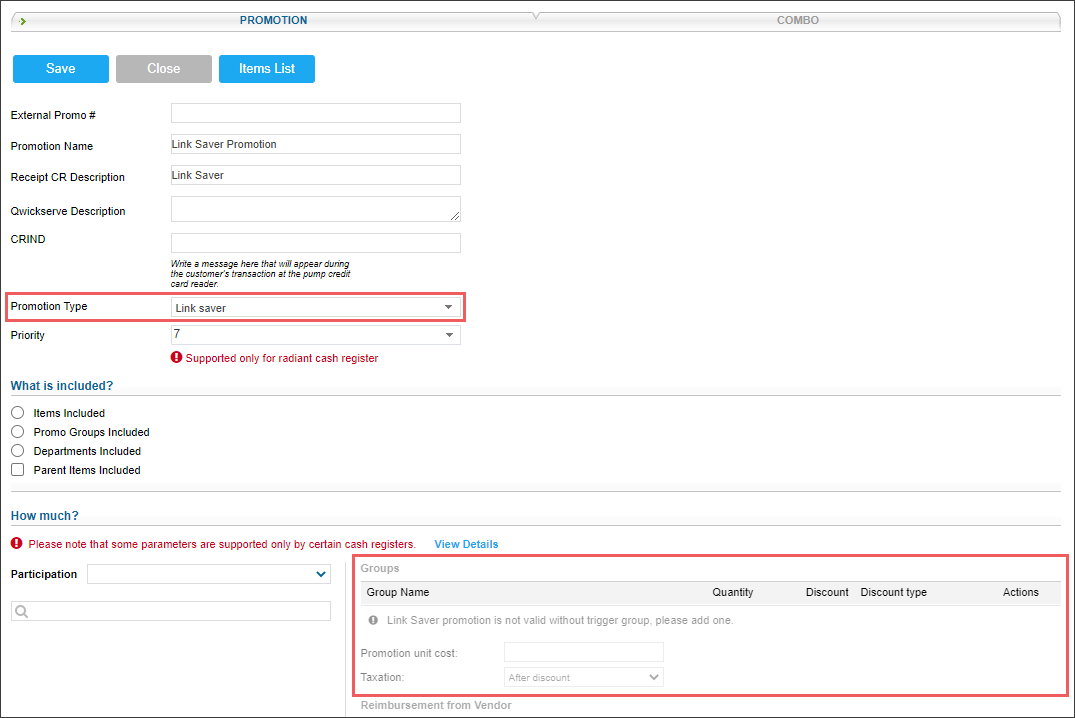
- In the Promotion Type list, select Link Saver.
Result: The promotion default settings are uploaded in the How much? section according to the selected promotion type. - In the Priority list, in case you have several promotions for same group of items, specify the priority in which the promotion will be applied on the cash register in order to be in compliance with the vendor policy. Possible values:

- Empty: Leave the Priority field blank, if you have only one promotion for one certain group of items.
- From 0 to 10: Define the promotion's priority by setting up the lowest value to the highest priority level.
The Priority field is supported only by the Radiant cash registers and available. For more information about promotion limitations depending on the CR type, see Compatible Cash Registers.
- In the How much section:
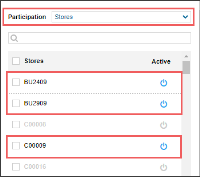
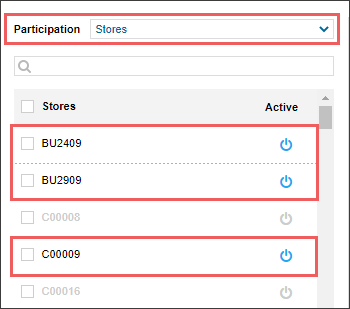
- In the Participation list, select the type of objects for which the promotion must be activated: Stores, Division, Company, and so on.
- In the list of objects below that is opened for the selected type of objects, click the power icon on the right of the object for which you want to activate the promotion.
- Configure the promotion's trigger group:
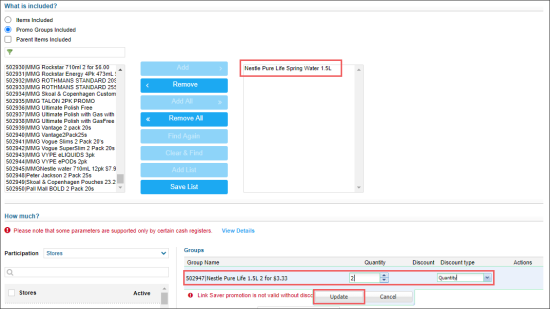
- In the What is included? section, click Promo Groups Included.
- In the left column, select the promo group and click the Add button.
Result: Selected promo group is added to the right column. - In the right column, select the promo group and click the Add List button.
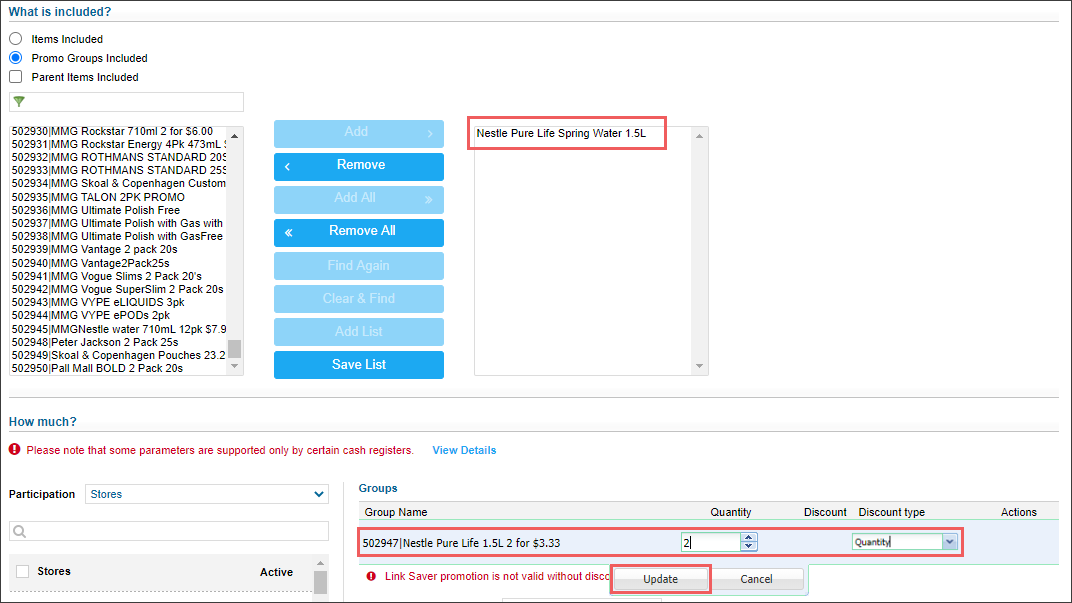
Result: The promo group is added to the How much? section > promo groups. - In the How much? section > promo groups:
- Double-click added promo group.
- (For SmartPOS only) In the Discount Type list, select one of the following types of applied discount:
- Quantity: Select this option of you want to specify the number of items a customer must purchase.
- Spent Amount: Select this option of you want to specify the amount of money a customer must purchase. - In the Quantity field, depending on the value selected in the Discount Type list, specify one of the following values:
- If Quantity is selected, specify the number of items that a customer must purchase for the promotion to take effect.
- If Spent Amount is selected, specify the amount of money that a customer must purchase for the promotion to take effect.
The Spent Amount option is supported only by the SmartPOS cash register. For more information on cash register limitations, see Compatible Cash Registers.
- Click the Update button.
- Add the promotion's discount group:
- In the What is included? section, click Promo Groups Included.
- In the left column, select the promo group and click the Add button.
Result: Selected promo group is added to the right column. - In the right column, select the promo group and click the Add List button.
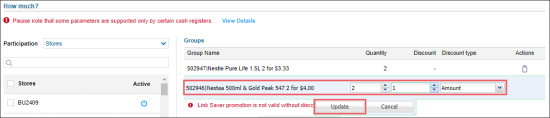
Result: The promo group is added to the How much? section > promo groups. - In the How much? section > promo groups, double-click added promo group and specify the following settings:
- In the Quantity field, specify the number of items that a customer must purchase for the promotion to take effect.
- In the Discount type field, select the type of discount that you want to set for the promotion:
- New price: Select this option if a new price for items in the group is to be set.
- Amount: Select this option if a discount as the exact amount is to be specified.
- Percent: Select this option if a discount as the percent rate is to be specified. - In the Discount field, specify the new price or the discount value, depending on the discount type that has been selected. This field is mandatory for the Link Saver promotion
- Click the Update button.
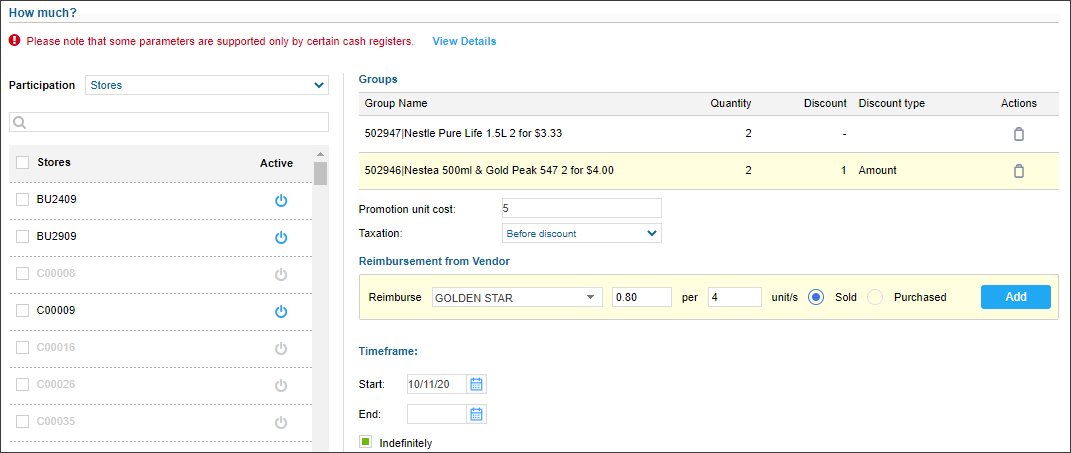
- In the Promotion unit cost field, specify the item cost for the promotion.
- In the Taxation list, select when the taxes must be calculated for items added to the promotion: After discount or Before discount.
- Configure the following promotion's settings:

- Reimbursement from Vendor
- Timeframe: Only days can be configured for this promotion type without hours.
The Reimbursement from Vendor and Timeframe settings are configured equally for all promotion types. For more information on how to configure them, see Promotion Setup Form.
- Scroll down to the Promo Results table and make sure that the promotion is set up correctly. The results are calculated for each group separately and then summed up for the Price Change values. The promo results are calculated by the following formulas:
- Retail:
- New Price: Retail = Promo Price
- Amount: Retail = Current Retail * QTY - Amount Discount
- Percent discount: Retail = Current Retail - ((Current Retail / 100) * Discount Percent)*QTY
- Price Change:
- New Price: Price Change = Promo Price - (Current Retail * QTY) + Buydowns
- Amount: Price Change = -(Amount Discount * QTY) + Buydowns
- Percent discount: Price Change = -((Percent Discount*Current Retail/100) * QTY) + Buydowns
- The initial retail price for the promoted item is $8.00.
- If a customer buys items from the primary group, the new price for the promoted item is $7.75.
- Retail: $7.75
- Price Change: $7.75 - ($8.00 * 1) = (0.25)
For example, you set up a promotion in the following way:
In this case, in the Promo Results section, you will see the following values:
To view the explanation about the promotion results, to the right of the necessary location name, click Explanation.
- At the top of the promotion form, click Save to save the changes.


