


Shelf tag template editor helps you customize how product information appears on printed shelf tags. In this article, you will learn how to modify existing templates to match your branding and in-store requirements, including layout, text fields, and formatting.
To access the shelf tag editor:
- Open the Price Management interface.
- Select an item.
- Click the Print Stickers New button.
- Click the Create New button.


Creating a template
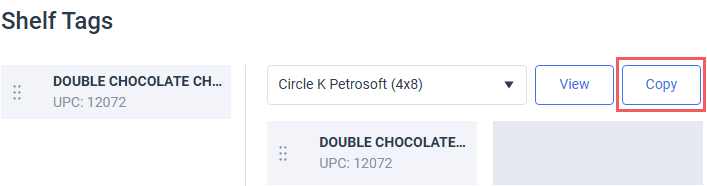
The fastest way to design a new shelf tag is to clone one of the existing templates and edit it:
- Select the source template from the dropdown. You can click the View button to preview the shelf tag.
- Click the Copy button.
You can also create a shelf tag template from scratch by clicking the Create New button.
Template builder
Add elements to the shelf tag template and click the Save Template button to apply changes.
General settings
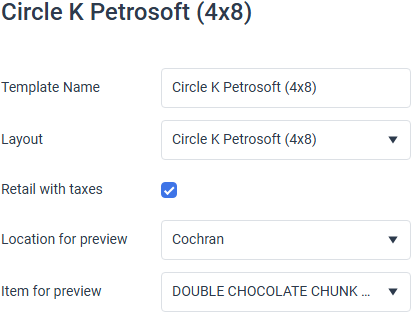
- Template Name: Specify the human-readable name for the shelf tag template to quickly locate it in the list.
- Layout: Select the shelf tag size from the predefined layouts.
- Retail with taxes: Select this option to include taxes in the retail price.
- Location for preview: Select a location (station) from which to take the data for the design-time preview. This setting only affects the editing mode; the resulting template content will depend on the item selected when the shelf editor is opened.
- Item for preview: Select a price book item from which to take the data for the design-time preview. This setting only affects the editing mode; the resulting template content will depend on the item selected when the shelf editor is opened.
Shelf tag elements

To add a specific element to the shelf tag, click the plus icon in the corresponding tile. The value added to the shelf tag area depends on the Location for preview and Item for preview defined in general settings.
The list of shelf tag elements include the most popular items. To see all items, click the Other tile and scroll through the dropdown.
Items already added to the shelf tag are marked with a green checkmark.
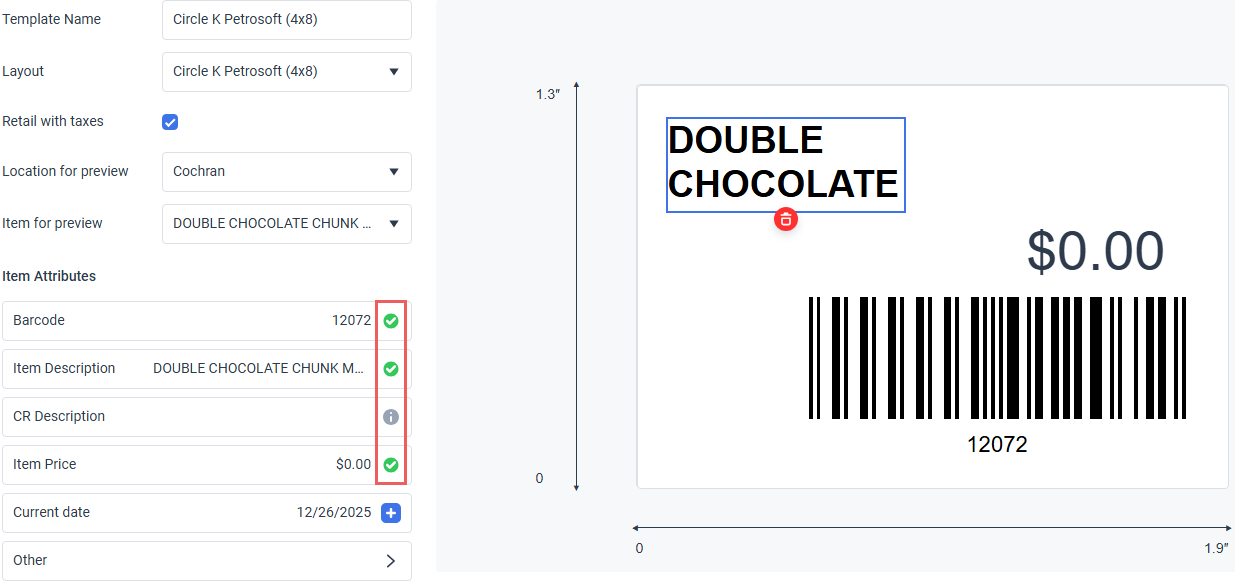
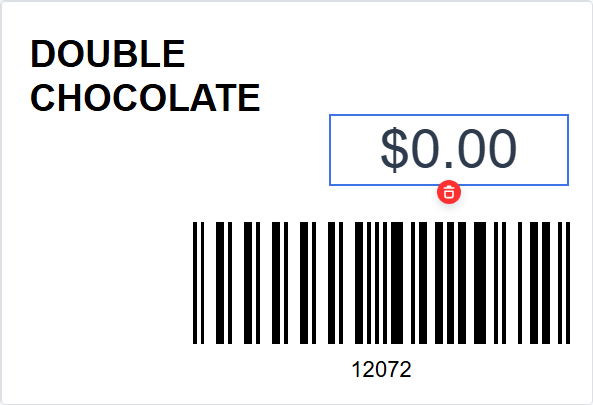
You can only add an item once. To remove an item added to the shelf tag, click the element in the preview area and click the recycle bin icon.
Price customization
- Enable the Currency Sign switch to show a currency symbol next to price.
- Choose a specific currency from the list to update your price format.

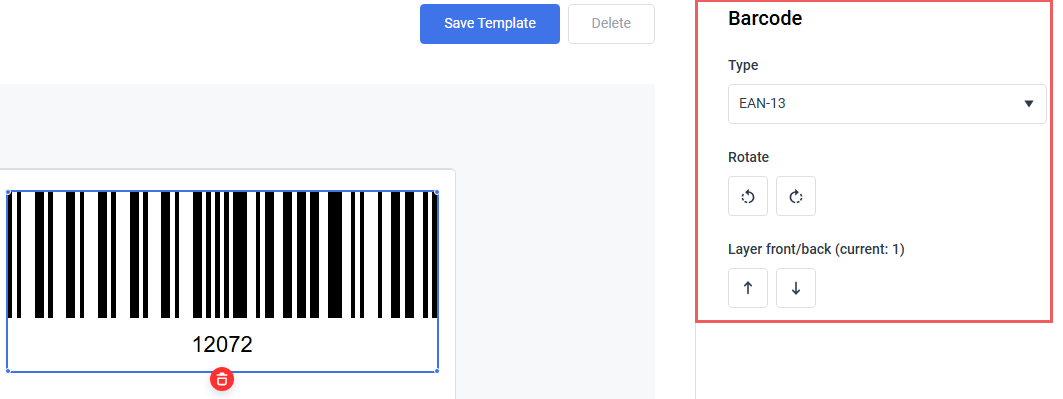
Barcode customization
- To resize a barcode, select an element and drag its border.
- To customize a barcode, select an element and specify its properties in the right pane.
- Type: Select a barcode type.
- Rotate: Click the corresponding button to rotate the barcode clockwise or counter-clockwise by 45 degrees.
- Layer front/back: Click the up or down buttons to increase the relative element priority. Elements with higher priority are shown above layers with lower priority.
Textual element customization
To customize a textual element, like an item description or price, select an element and specify its properties in the right pane:
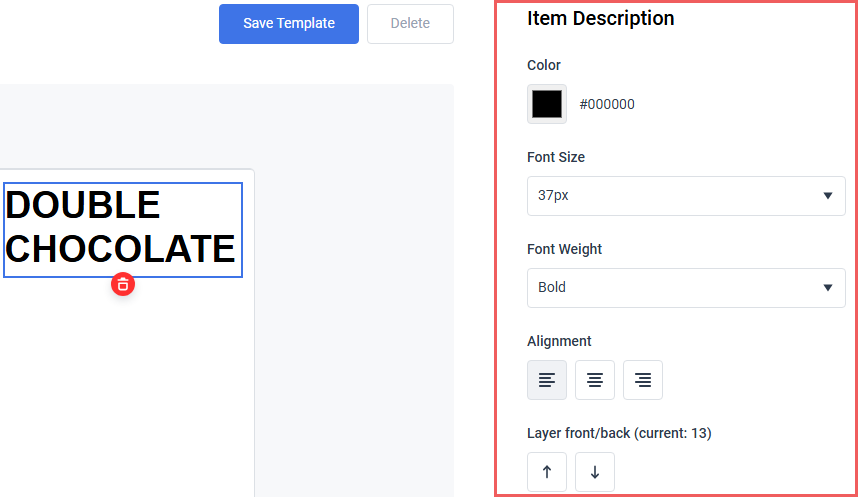
- Color: Text color.
- Font Size
- Font weight
- Alignment: Text alignment within the box.
- Layer front/back: Click the up or down buttons to increase the relative element priority. Elements with higher priority are shown above layers with lower priority.
Common elements
You can add any number of images, texts and separator lines to enrich the shelf tag design. Click the plus icon in the corresponding element type tile.
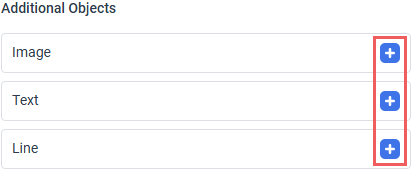
You can add multiple elements of the same type. To remove an element added to the shelf tag, click the element in the preview area and click the recycle bin icon.
To customize the added element, click it and specify its properties in the right pane:
Image

- To specify the image, click the Upload Image button and select an image on your computer. Once uploaded, you can change or remove the image file by clicking the corresponding links blow the image.
- To resize the image, drag its border.
- Rotate: Click the corresponding button to rotate the image clockwise or counter-clockwise by 45 degrees.
- To move an image, drag it with a mouse. Alternatively, you can click the buttons in the Position section.
- Layer front/back: Click the up or down buttons to increase the relative element priority. Elements with higher priority are shown above layers with lower priority.
Text

- Text
- Color: Text color.
- Font Size
- Font weight
- Alignment: Text alignment within the box.
- Layer front/back: Click the up or down buttons to increase the relative element priority. Elements with higher priority are shown above layers with lower priority.
Separator line

- Color: Line color.
- Line weight
- Layer front/back: Click the up or down buttons to increase the relative element priority. Elements with higher priority are shown above layers with lower priority.


