


To install and activate DC-700 series:
- Power up the DC-700 series.
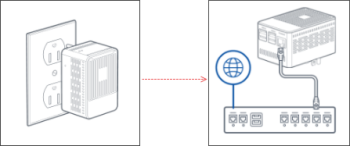
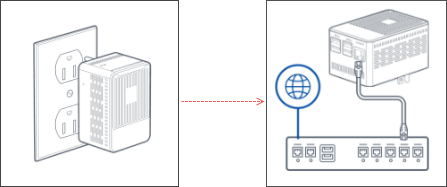
- Plug in your DC-700 series.
- Plug the cord into the Ethernet port on the DC 700 series.
- The status light will be red.
- Connect to the DC Box network using one of the following ways:
- At the top of the DC Box, scan the QR code.
- Choose the DC Box network manually:
- SSID: DCBox WiFi
- Password: _P3tr0s0ft*
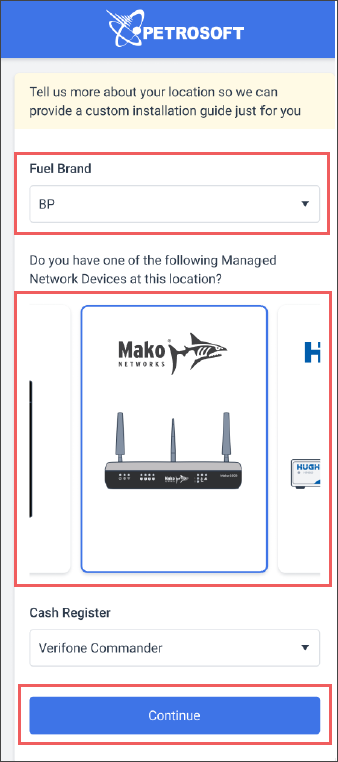
- Customize your customer journey.
- In the Fuel Brand list, select your fuel brand.
- Select your Managed Network Device.
- Click Continue.

- Activate DC-700 series over the Internet:
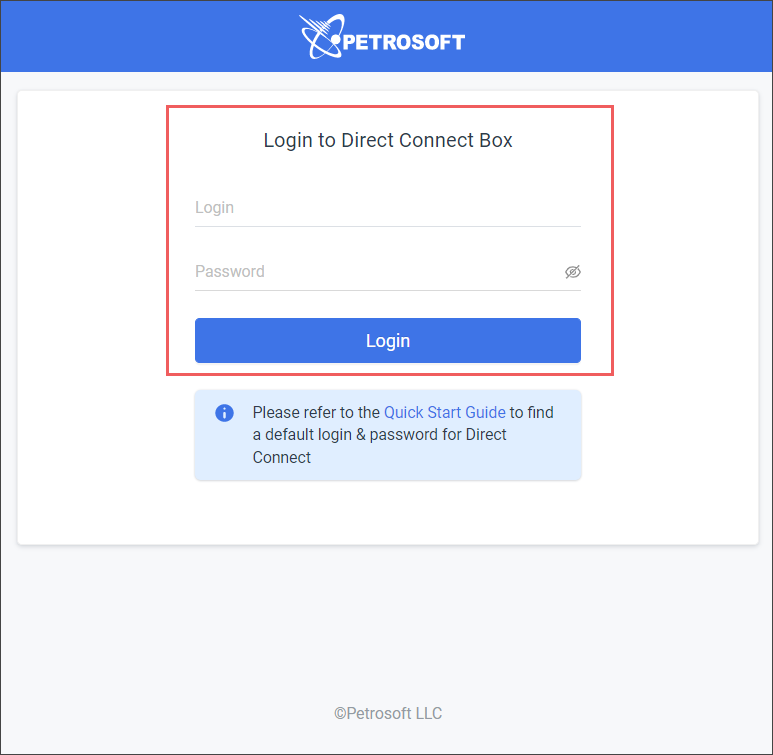
- Open a web browser and navigate to http://10.10.2.1.
- Log into the Direct Connect Installation page using the following credentials:
- User name: admin
- Password: SwHH3g

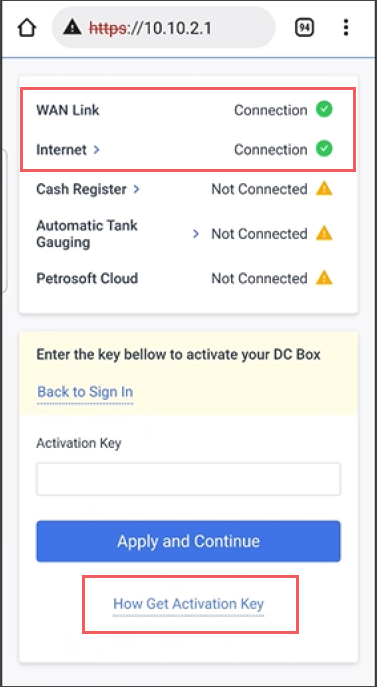
- In the Direct Connect Installation page:
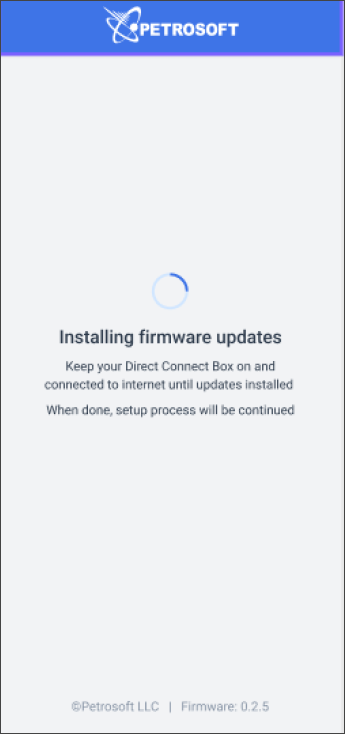
- Wait until firmware updates are installed. Updates installation process will start automatically in case of any updates.
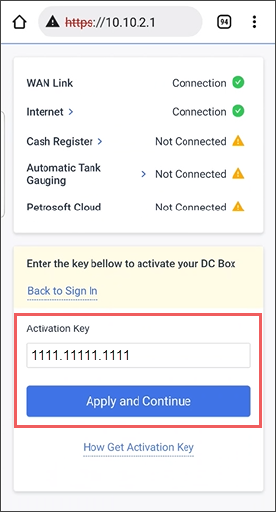
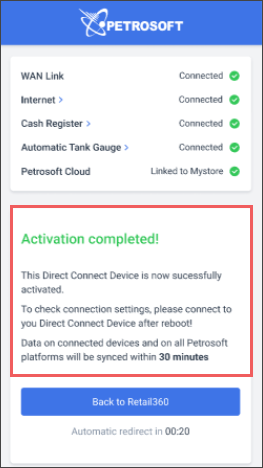
- Wait until DC Box is installed. You will see successful connection statuses for the following sections:

- WAN Link
- Internet
- Click How Get Activation Key, to obtain your DC Box activation key.

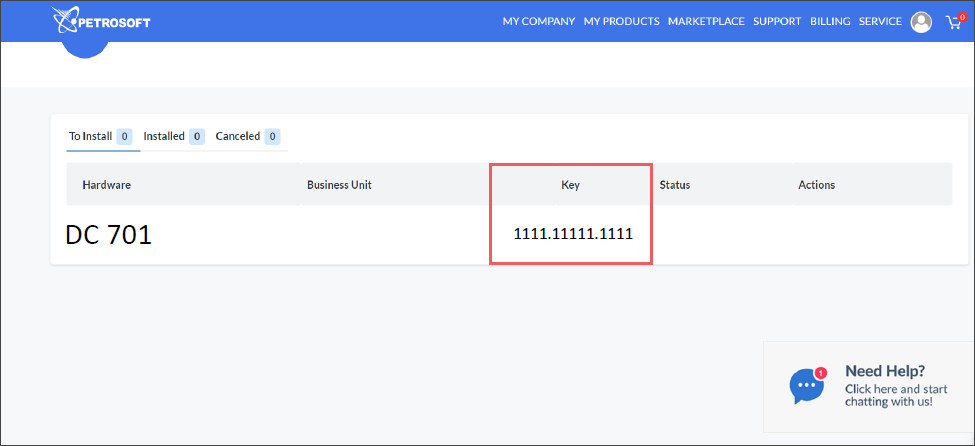
Result: The Customer Portal opens where you need to sign in using your Petrosoft account credentials. - In the Customer Portal > Hardware section > Key column, find your DC 700 activation key.

- Go back to the Direct Connect Installation page.
- In the Activation Key field, enter the DC-700 activation key.
- Click Apply and Continue.
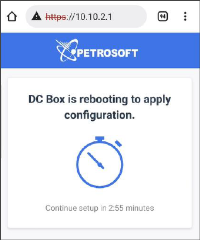
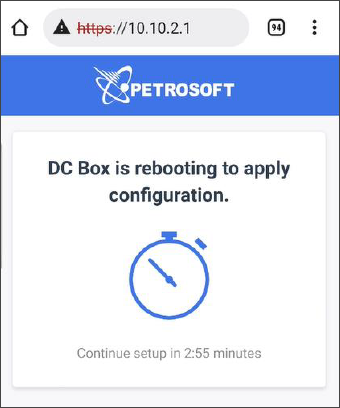
- Wait until the DC Box is rebooted to apply updated settings. During the update process, the corresponding message will be displayed.
- After successful activation, the Activation completed! successful message is displayed.


In case of connection issues, you can click the corresponding section and adjust the corresponding settings. For more information, see Configuring DC-700 Connection Settings.


