The procedure on how to connect to MAS90 from CStoreOffice® is described below.
After all connection settings are configured, make sure that all the departments in CStoreOffice® have relevant matched categories assigned. Otherwise, the data from such departments is not included into the MAS90 data export.
For more information on how to check and assign, if needed, the matched category to a department, see How to assign the matched category to a department in CStoreOffice®.
Please note that the Connecting to MAS90 feature is permission-based. Before you start the procedure below, make sure the Allow users to modify Export Settings and MAS 90: Report Settings permissions are granted to your user in CStoreOffice®. For more information on how to grant a permission to the user, see Roles Management Permissions.
To connect to MAS90 from CStoreOffice®:
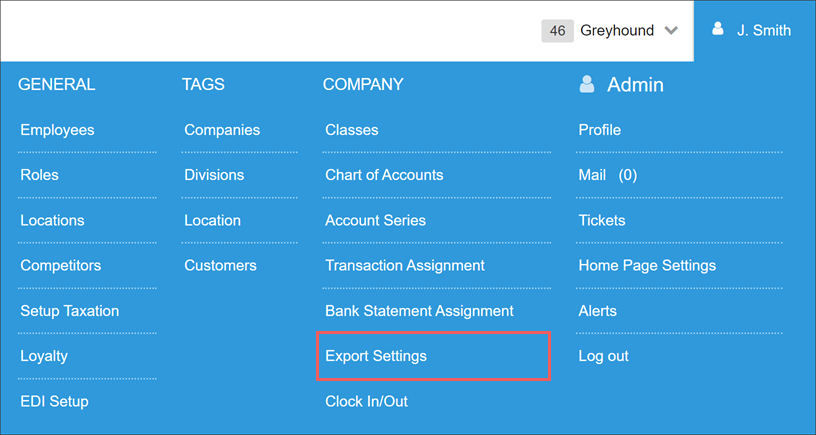
- Go to Settings > Company > Export Settings.

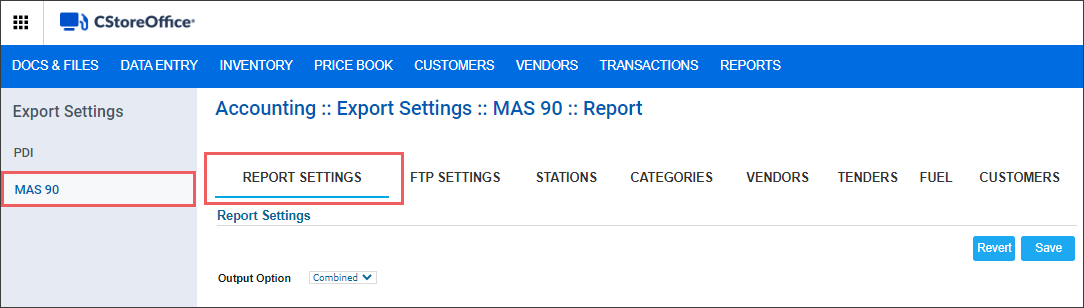
- Click the MAS90 tab.
- Click the Report Settings tab.

- In the Output Options list, select one of the following options:
- Individual: Select this option to export sales and purchases for locations in individual files.
- Combined: Select this option to export sales and purchases for locations in combined files—purchases and stores.
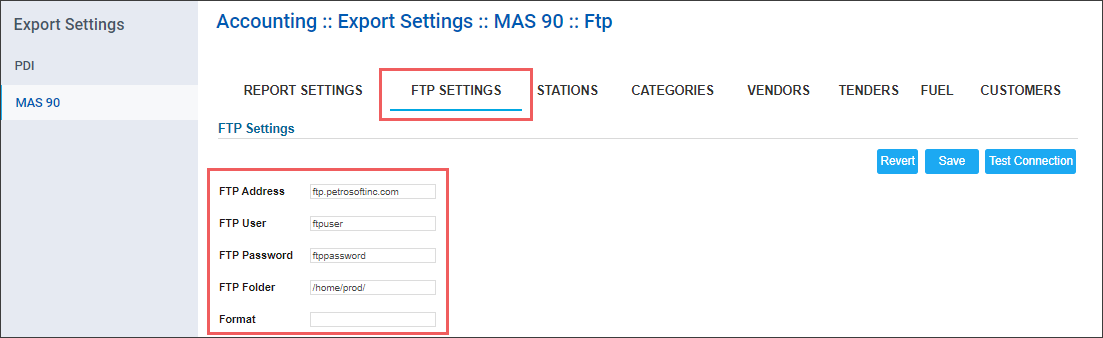
- Click the FTP Settings tab.

- Enter the following FTP settings:
- FTP Address
- FTP User
- FTP Password
- FTP Folder
- Format
- Click Save.
- Set up the GL numbers for the following:
- In the Stations tab, enter the MAS 90 GL numbers for your stations and click Save.
- In the Categories tab, enter the MAS 90 GL numbers for your categories and click Save.
- In the Vendors tab, enter the MAS 90 GL numbers for your vendors and click Save.
- In the Tenders tab, enter the MAS 90 GL numbers for your tenders and click Save.
- In the Fuel tab, enter the MAS 90 GL numbers for your fuel product tenders and click Save.
- In the Customers tab, enter the MAS 90 GL numbers for your customers and click Save.

To make sure all the MAS90 connection settings are applied properly, download the MAS90 Export report. Go to Reports > Accounting > Export Data > Mas90Export. For more information on how to work with the report, see Mas90 Export Report.
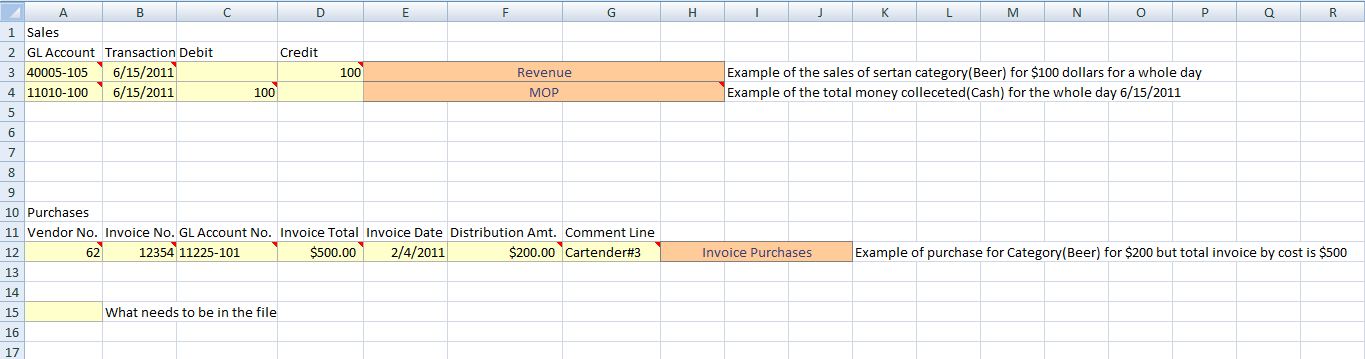
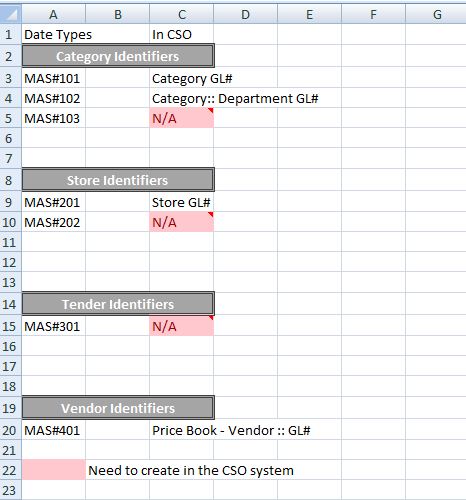
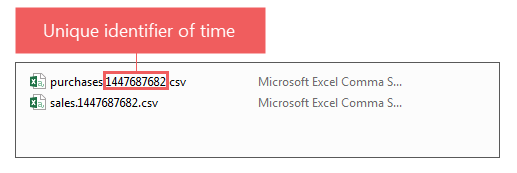
Key to understanding MAS 90 transfer file: