To introduce a new QwickServe user:
- Create a QwickServe user.
- Select the QwickServe role for the user.
- Provide the user with the QS related permissions.
Creating QwickServe User
First you create the user and then you provide access to QS related permissions when editing the user.
To create a new QwickServe user:
-
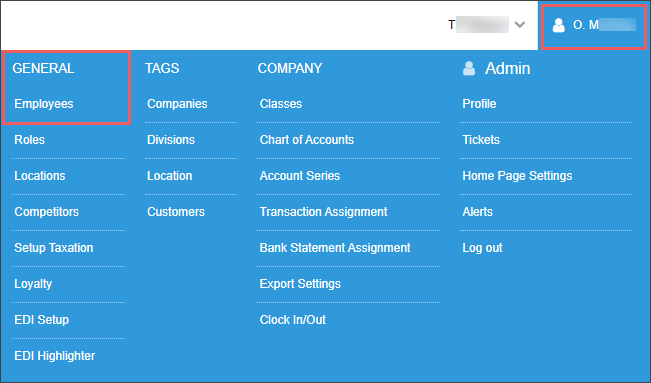
Go to Settings > General > Employees.

- In the Employee list report, click the New button.
- In the New Employee form, set up the following mandatory employee's data:
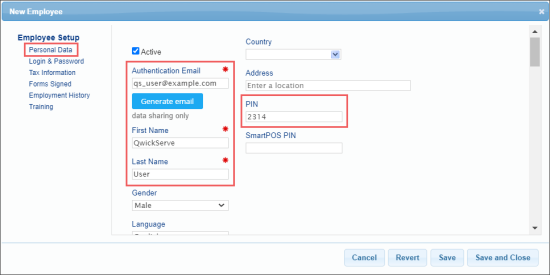
- Go to the Personal Data section and set up the following user data:
- Authentication Email: It will be used as a login into CStoreOffice®, if needed.
- First Name: The user first name.
- Last Name: The user last name.
- PIN: This PIN will be used as the Administrator PIN to access the administrative interface of the QwickServe Ordering Terminal. You can configure it later. Default PIN is 1111.

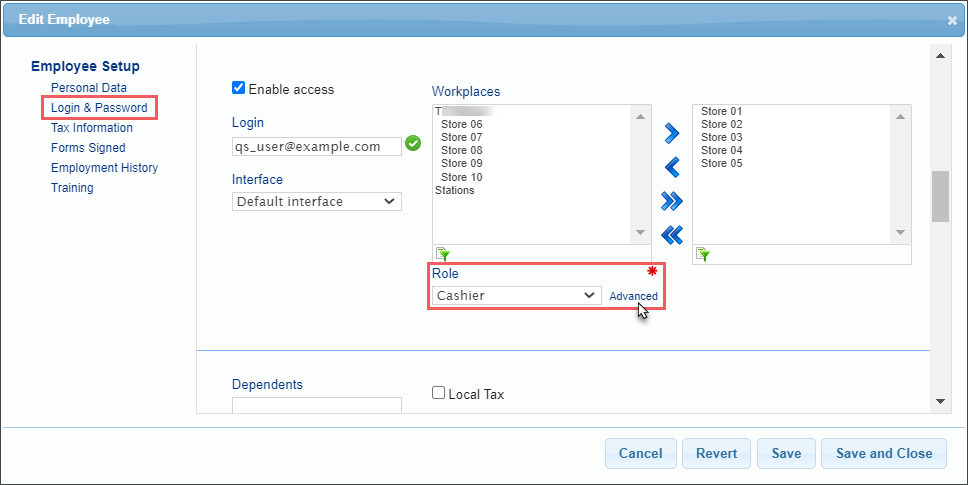
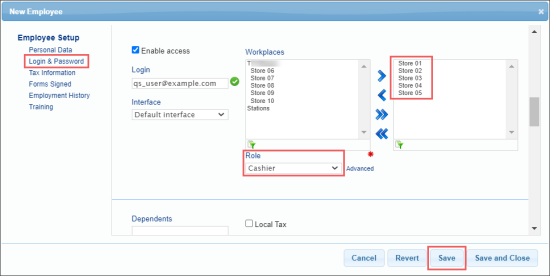
- Go to the Login & Password section and set up the following user data:
- Workplaces: Assign the locations (stations) where the QwickServe solution will be installed. Select the locations (stations) you need and move them to the right column.
- Role: Select the QwickServe user role.
For more information about granting user access to several locations at once, see How to assign all newly created locations to an employee in bulk.

- At the bottom right of the form, click Save.
QwickServe Roles and Roles Templates
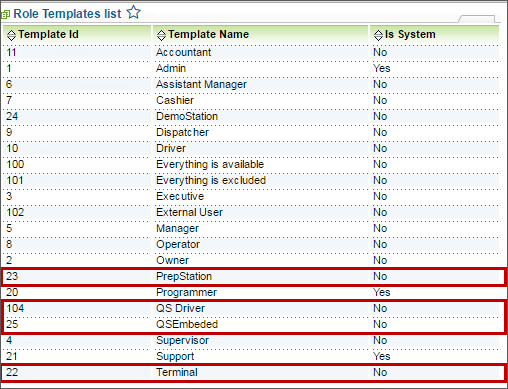
There are the following QwickServe related role templates available in the CStoreOffice®:
- Prepstation. Provides access to the QwickServe Order Manager, where order goes from QwickServe Ordering Terminal, QwickServe Mobile or QS Embedded.
- QSEmbedded. Provides access to QS Embedded - version of QwickServe embedded into the POS device.
- QS Driver. Provides access to QwickServe delivery driver features.
- Terminal. Provides access to the administrative interface of the QwickServe Ordering Terminal.
To view the role templates, you need the system user's permissions.
To view the role templates and manage permissions within them, go to Settings > General > Roles > Role Templates.
For more information on roles, see the
Providing User Permissions
To provide the user with the QS related permissions:
- Select the user and then click Edit.
- In the Edit Employee form, go to the Login & Password section.
- In the Role list, click Advanced.

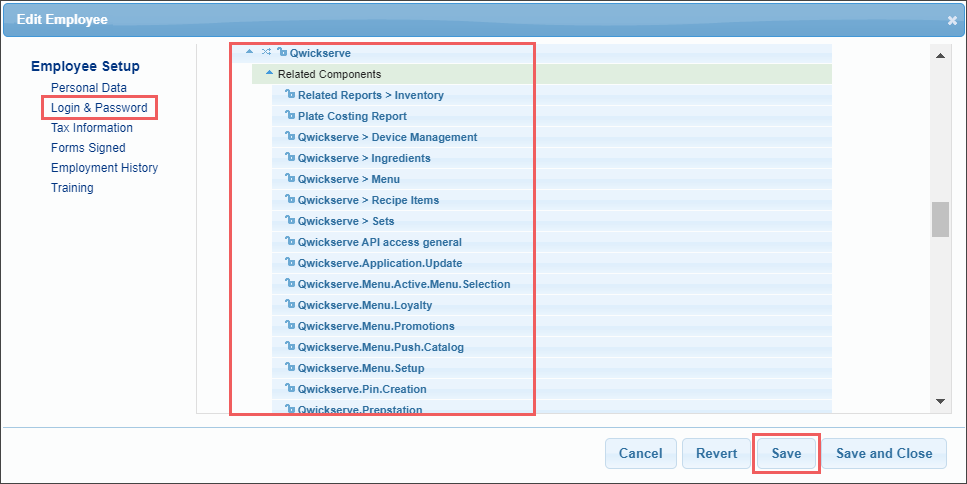
- Enable the QwickServe tag.
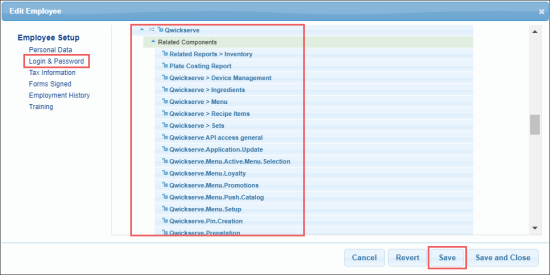
- Click Related Components.
- Turn on the QwickServe permissions you want to provide to the current user.
- Click Save.