- Open a web browser, in the address bar, enter the default gateway IP address and then press Enter on the keyboard.
- Log in to the router using the username and the password given by your Internet provider.
For Comcast users, the default login and password values are the following:
- Login name: cusadmin
- Pasword: highspeed
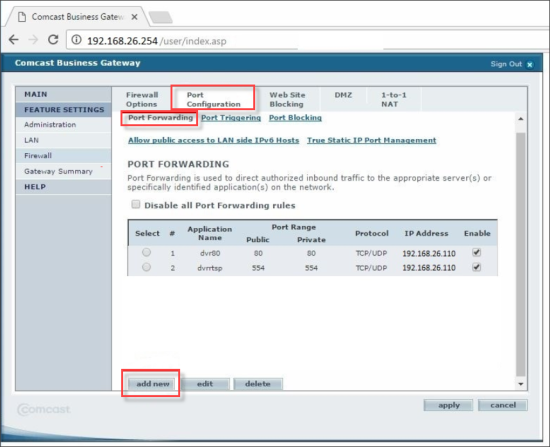
- In the Comcast Business Gateway window, in the left menu, select Firewall.
- Click the Port Configuration tab, click the Port Forwarding link and then click add new.
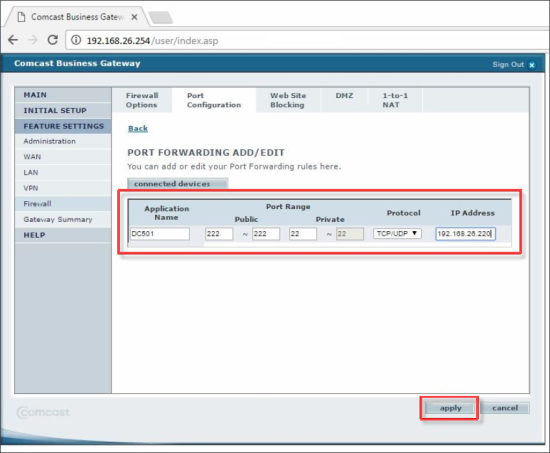
- In the PORT FORWARDING ADD/EDIT view, configure the following data and then click apply:
- In the Application Name field, enter DC.
- In the Public fields, enter the port range from 222 to 222.
- In the Private field, enter 22.
- From the Protocol list, select TCP/UDP.
- In the IP Address field, enter X.X.X.220.
- Click add new once again.
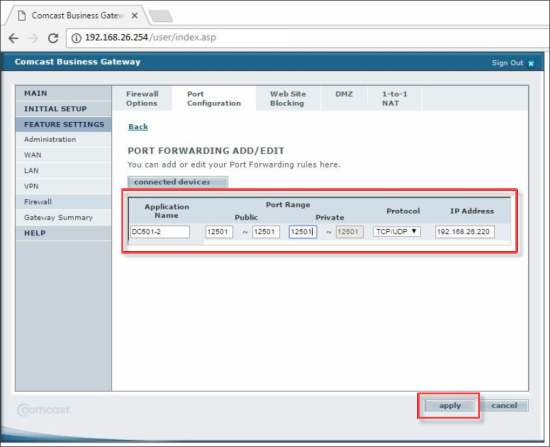
- In the PORT FORWARDING ADD/EDIT view, configure the following data and then click apply:
- In the Application Name field, enter DC-2.
- In the Public fields, enter the port range from 12501 to 12501.
- In the Private field, enter 12501.
- From the Protocol list, select TCP/UDP.
- In the IP Address field enter X.X.X.220.
The first three octets of the IP address – 192.168.26 in this example – must match the first three octets of your default gateway. The last octet of the IP address must be 220.
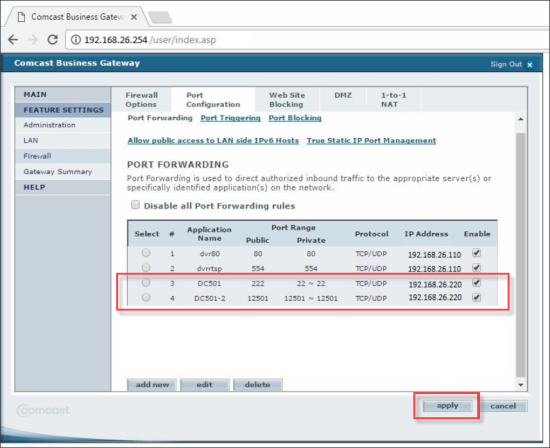
- When DC and DC-2 are added, click Apply.
- (Optional) If you have another Internet provider, contact the provider technical support to find out how to set up port forwarding. Then apply the same logic to add DC and DC-2 ports.


