


DC-401 device is no longer available for purchase. It has been replaced by DC-420, which offers the same features and functionality. Since both models are identical from the user experience and UI part, they will be collectively referred to as the DC-400 series.
Follow these steps to check the Ethernet connection for DC-400 series device:
Step 1. Make sure the button glows green.
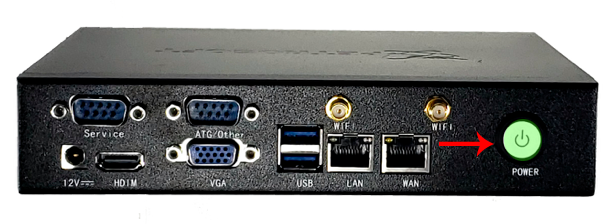
If the button glows green, go to Step 4. If the button does not glow green, go to the next step.
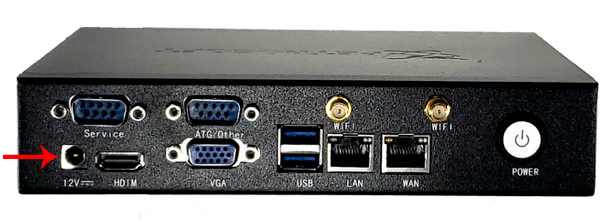
Step 2. Make sure you plugged one end of the AC power adapter into the port shown below and the other end into a power outlet.
Step 3. Press the power button and wait for 5 minutes.
Step 4. On the home page of CStoreOffice®, hover the cursor over the red connection status icon and click Check Now.
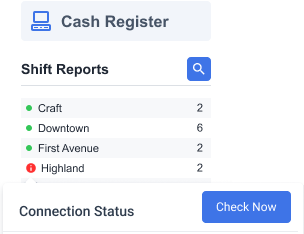
If the red connection status icon remains, go to the next step.
Step 5. Make sure you plugged the Ethernet cable into the WAN port and the WAN indicator over the port is blinking green.
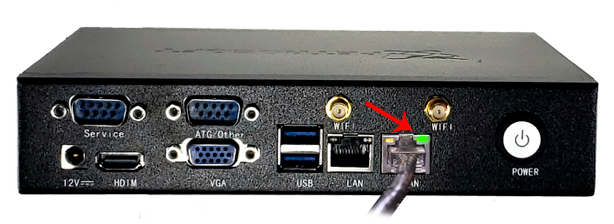
Do the following depending on what you see on the indicators over the port:
- If there are no indicator lights over the port, go to Step 6.
- If the WAN indicator is blinking green, go to Step 7.
Step 6. Make sure you plugged the Ethernet cable into the DC Box and the main router correctly.
- If the Ethernet cable is plugged in correctly, go to Step 7.
- If the Ethernet cable is not plugged in, then follow the instructions in Check DC-420 Network Connection Settings.
Step 7. Pull the power cable out the DC Box and wait for 10 seconds.
Step 8. Plug the AC power cable back into the DC Box. Press the power button to power on the DC Box. Wait for 5 minutes.
Step 9. On the home page of CStoreOffice®, hover the cursor over the red connection status icon and click Check Now.
If the red connection status icon remains, follow the instructions in Check DC-420 Network Connection Settings.


