You can set up the price group retail price for one or several locations or any other locations tags.
You can also set up retail prices for several price groups at once.
To set up the price group retail price in PIM, follow the steps:
-
Go to Price Management.
Result: The Price Management form opens.
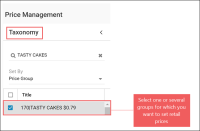
- Go to the Taxonomy section and then do the following:
-
In the Set By list, select Price Group.
Result: The list of existing price groups opens.
- Select one or several price groups, for which you want to set up the retail price. Use the Search field, if needed.
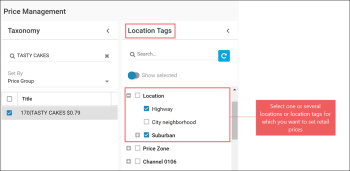
- Go to the Location Tags section and then select one or several locations or other location tags, for which you want to set up the retail price for the selected price group.
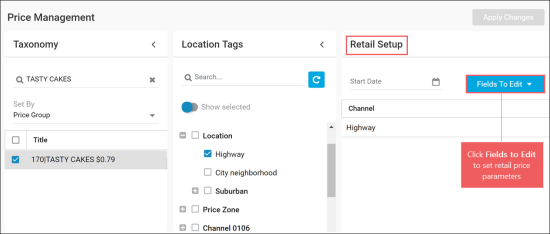
- Go to the Retail Setup section and then do the following:
- Go to the Channel column, and select a location, for which you want to set up prices.
- Click Fields To Edit and then select one or several of the following parameters:
- Recommended Retail: The purchase price recommended by the account owner.
- Apply Recommended Retail: Select this option if you want to forbid the recommended retail price change at the selected locations.
- Min Retail: The least possible retail price value for the selected locations.
- Max Retail: The greatest possible retail price value for the selected locations.
- Negotiated Cost: The originally agreed price with the vendor.
- Set values for the parameters selected at the step 4.b. For details, see Working with Retail Setup.
- In the Start Date calendar, select the date, from which specified retail prices will be applied.
- At the top right of the Price Management form, click the Apply Changes button.
After setting up retail prices for locations, you need to send these updates to the locations in the Updates Manager section.


