


To assign a price group to the item in PIM, follow the steps:
-
Go to Product Catalog > Items.
Result: The Items list opens.
- In the Items list, do the following:
- Search for the item you need to add to the price group. Use search, if needed.
- Select the item you need to add to the price group.
-
At the top right of the items list, click the Edit button.
Result: The item editing form opens.
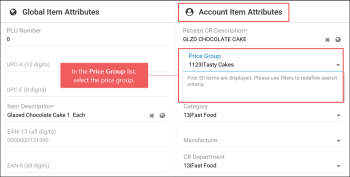
- In the item editing form, go to Item Attributes > Account Item Attributes.
- In the Price Group list, select the price group you want to assign to the item.
- At the top right of the item editing form, click the Save button.
- Make sure the price group is assigned to the item:
- Go to Product Catalog > Items, find the item and make sure that in the Price Group column, the assigned price group is displayed.
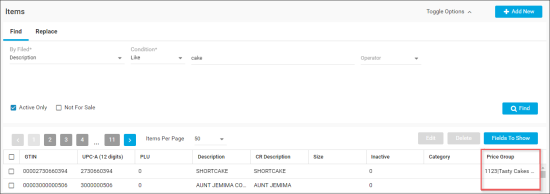
In case the Price Group column is not displayed in the Items list, click Fields to Show, in the Item Attributes list, select Price Group and then click Save.
- Go to Taxonomy > Price Groups, find assigned price group and make sure that in the Items QTY column, the number of items is increased by 1.


