


In PIM, you can link several items to an already existing item and send these updates to the cash register at your location. All linked items are added to the transaction automatically when the primary (parent) item is purchased.
Currently multiple linked items can be sent only to the Radiant Cash Register.
The procedure of sending multiple linked items to a cash register includes the following steps:
- Link several items to a primary item.
- Send updates to a location.
- Accept changes on the location with primary item.
- Send linked items updates to a cash register.
Linking Several Items to Primary Item
To link items to your primary item in PIM, follow the steps:
- Log in PIM, using the Head Office role.
- Go to Product Catalog > Items.
Result: The Items list opens.
- In the Items list, find the item, to which you want to link the other items. This item will be a primary item.
- Select the primary item and then click the Edit button.
- In the item's editing form, do the following:
- Go to the Linked Items section.
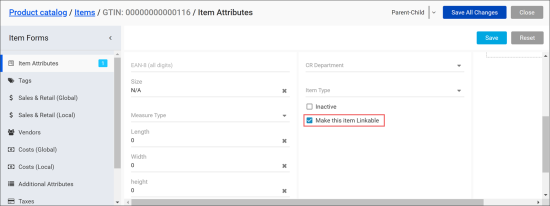
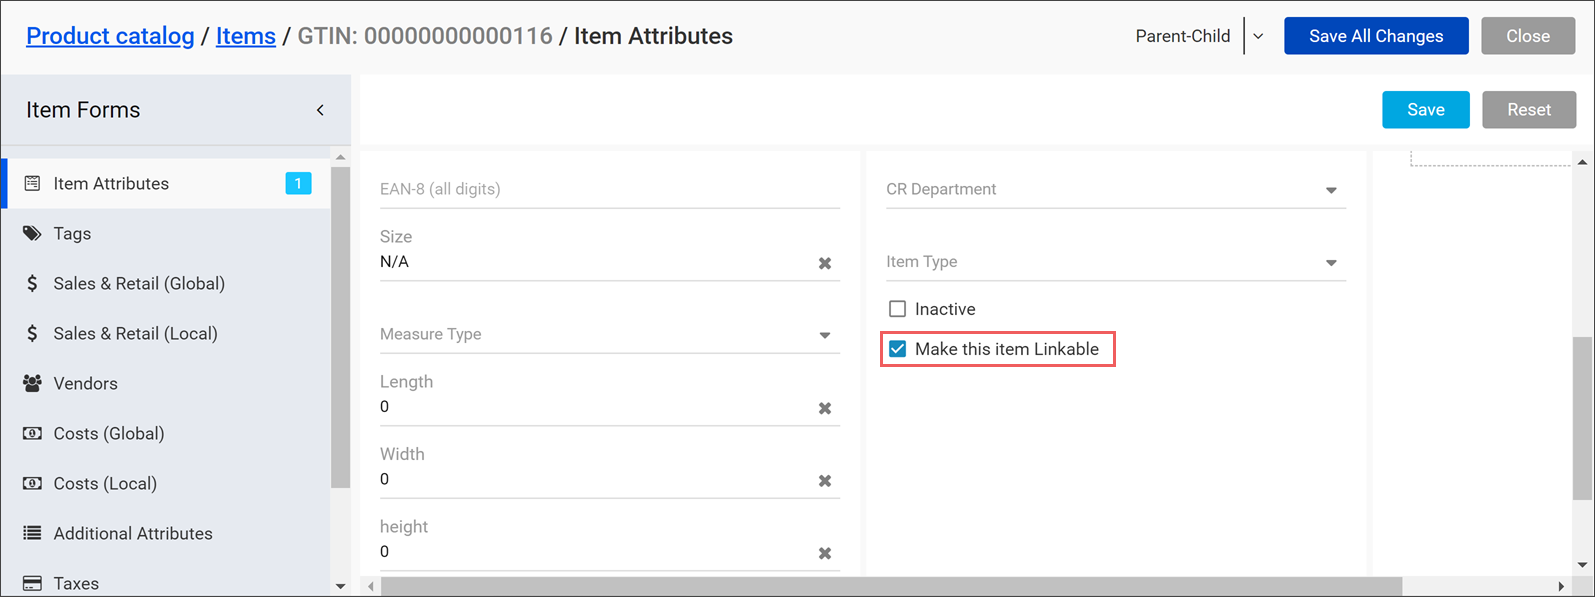
- Go to Item Attributes section > Account Item Attributes subsection.
- Clear the Make this item Linkable check box.
- At the top right of the item's editing form, click the Save button.
- On the right of the Linked Items list, click the Add button.
- In the displayed linked items list, search for the necessary item by its UPC or description.
- Select check boxes next to all items that you want to link to the primary item.
- At the top right of the linked items list, click the Add button.
- At the top right of the Linked Items section, click the Save button.
Result: Linked items are added to your primary item.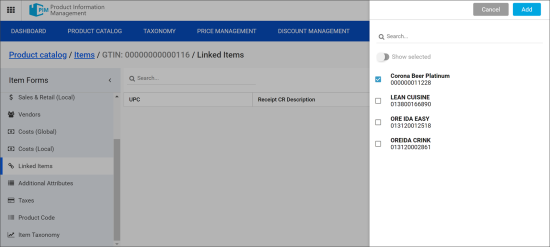
For more information on the PIM roles, see PIM User Roles.
In case you don't see the Linked Items section, it means that your current item is linkable. Linkable items cannot have linked items.
To remove the linkable option from your item, follow the steps:

Sending Updates to Location
To send your primary item's updates the location with this item, follow the steps:
- Make sure you are logged in PIM as the Head Office user who linked items to your primary item.
- Make sure the primary item with linked items updates is active on the location, to which you are going to send this item's updates.
 How to activate an item for the location
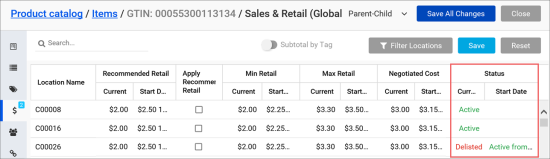
- In the item's editing form, go to the Sales and Retail section.
- Check the Status column for the location you need:
- Current column:
- Active: The item is activated on the selected location.
- Delisted: The item is inactive on the selected location.
- Upcoming column:
- Active from: The item will become active on the selected location starting from the specified date.
- Delisted from: The item will become inactive on the selected location starting from the specified date.
- Double-click the location, for which you want to activate the item.
Result: The item settings window opens on the right of the Sales and Retail section. - Move the item settings window till the Status section.
- In the Upcoming Cost field, select the date, from which the item will become active for this location.
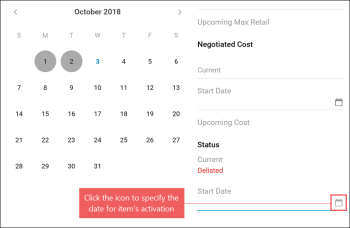
- At the top right of the item settings window, click Done.
Result: The information about the date of the item's activation is added to the Status column.
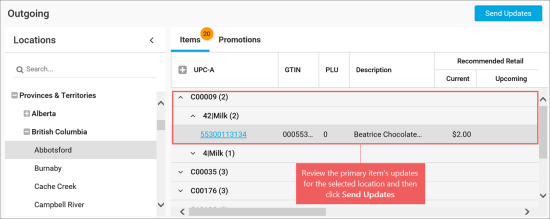
- Go to Updates Manager > Outgoing.
- In the Locations list, select the location with the primary item, for which the linked items are added.
- In the Items list, review updates.
- At the top right of the Outgoing form, click Send Updates.
- In the confirmation window, click Yes.
Result: Primary item updates are sent to the selected location.
For more information on the PIM roles, see PIM User Roles.


Accepting Changes on Location
- Log in PIM as the Branch Office user with the location account where the items were linked to the primary item.
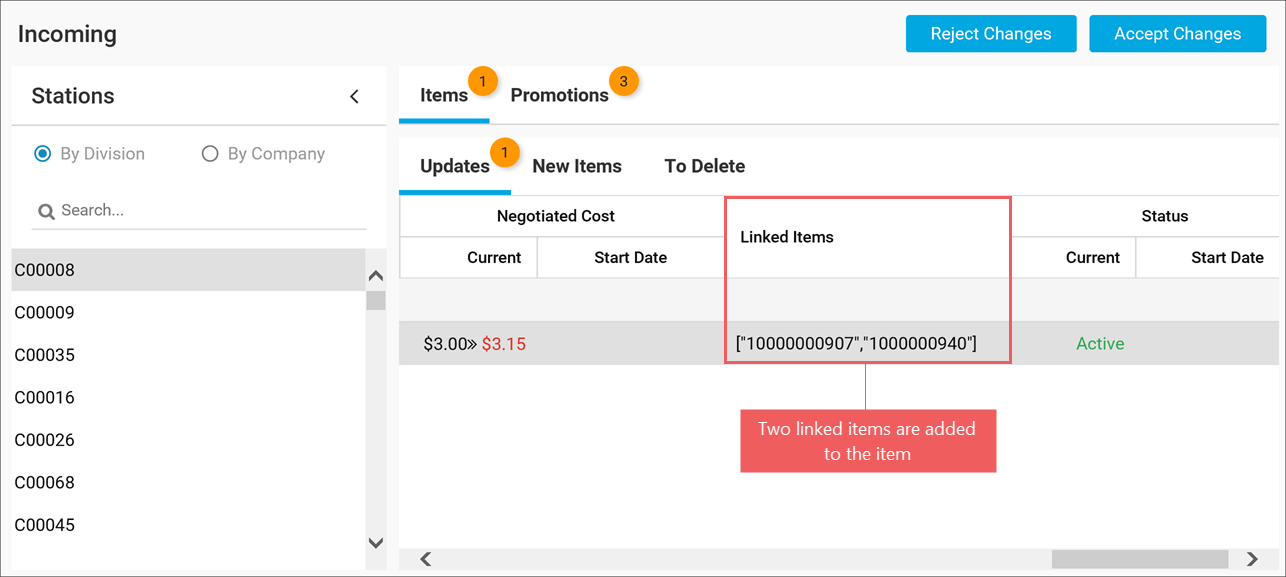
- Go to Updates Manager > Incoming.
- In the Stations list, select the location with the primary item's updates.
- In the Items list, review updates.
- At the top right of the Incoming form, click Accept Changes.

- In the confirmation window, click Yes.
Result: The primary item's updates are accepted on the selected location.
The changes are displayed in red color in the Items list.
Sending Linked Items Updates to Cash Register
To send updates on the added linked items to the primary item on your location, follow the steps:
- Log in CStoreOffice® as the Branch Office user with the location account where the items were linked to the primary item and the changes were accepted in PIM.
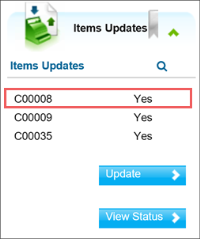
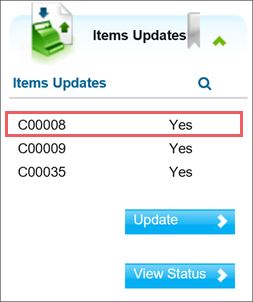
- Move the CStoreOffice® home page to the Items Updates section.
- In the Items Updates section, click the station with the linked items updates.
Result: The Cash Register Updates Manger opens in a new window. - In the Cash Register Updates Manager, do the following:
- Go to the Changes section and review items updates.
- Move the Cash Register Updates Manager page till the Delete Items section.
- At the bottom right of the Delete Items section, click Accept Changes.
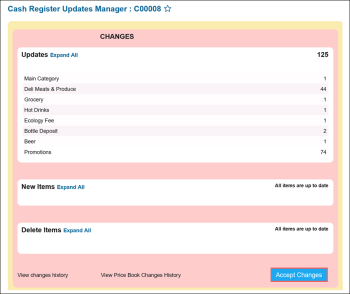

Result: The primary item's updates are sent to the location cash register.


