


The Payroll step is available not to all accounts in CStoreOffice®.
At the Payroll step, you can work with three sections of the Payroll form:
To switch between the sections, in the left menu of the Payroll form, click the necessary section tab.
Adding Employees
You can add employees directly from the Payroll form. To add an employee:
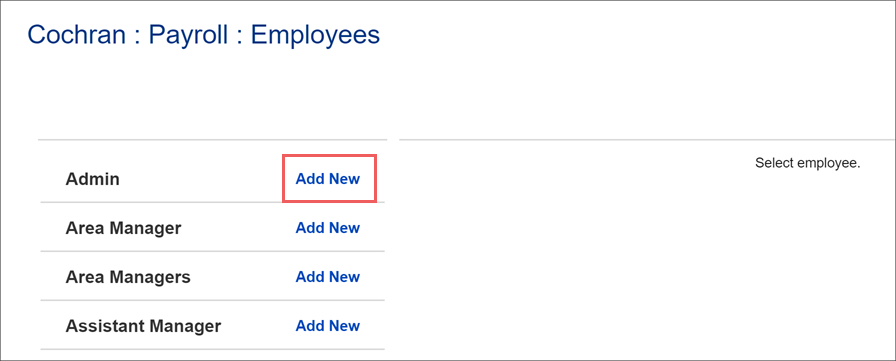
- In the left menu of the Payroll form, select Employees.
- Next to the necessary user role, click Add New.

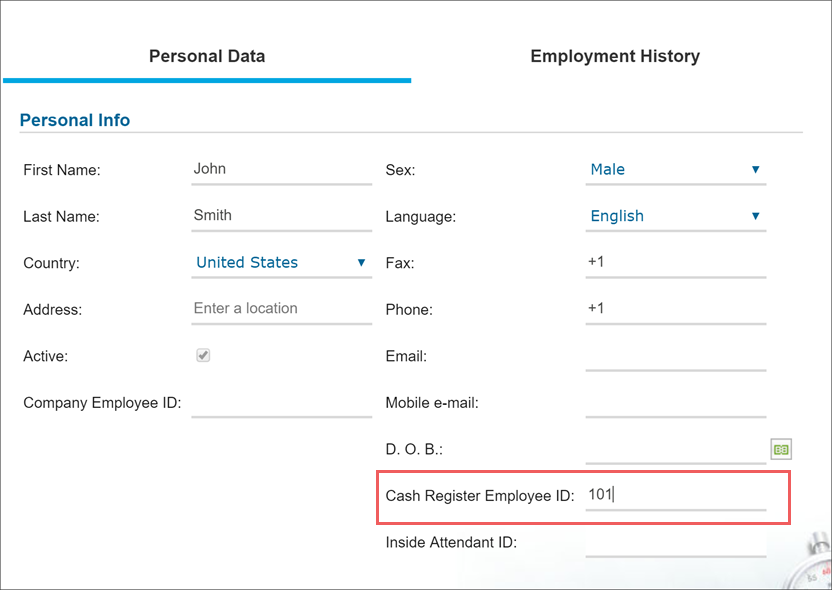
- In the form to the right, enter employee's data.
- Make sure to enter the Cash Register Employee ID number. If the ID was previously set up at the cash register, you can select the ID from the list.

- At the top right corner of the form, click Save.
For the pay rate data to populate in the reports, the employees' current rate of pay must be set up in the employees records. To specify the current rate for an employee, in CStoreOffice®, go to Settings > General > Employees, then open the employee record for editing and go to the Employment History section.
Managing Payroll Data
To manage payroll data for employees:
- In the left menu of the Payroll form, select Payroll Data.
- Make sure the correct location is selected and you can view the location employees.
- In the Time In and Time Out columns, enter the time when the employee clocked in and out.
- Select the PM check box if the employee has clocked in and out in the PM period.
- Enter the break time if any.
- Check the Hours column and make sure hours are calculated correctly.
- At the top of the form, click Save.
When entering the hours, make sure to use a decimal point, not a colon.


Managing Payroll Checks
In the Payroll Checks form, you can account the checks according to which the salary is paid.
To enter information about checks:
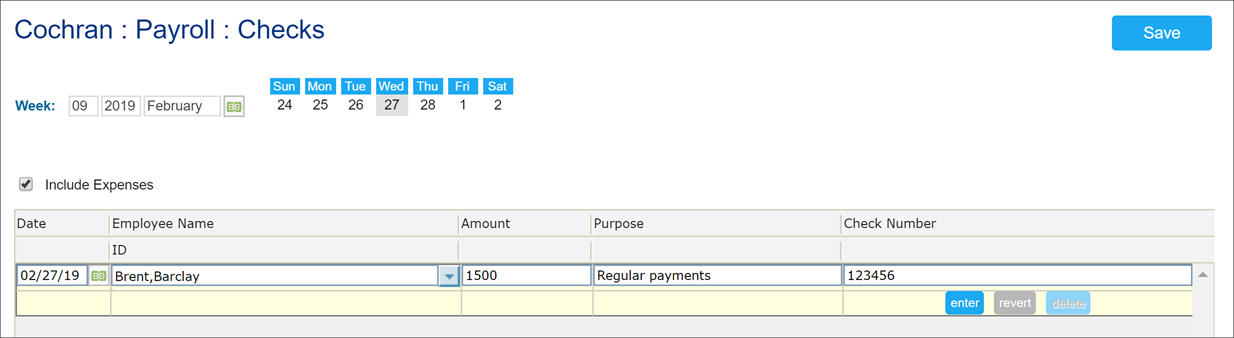
- In the left menu of the Payroll form, select Payroll Checks.
- At the top of the checks list, select the Include Expenses check box. This option allows enabling automatic update of expenses linked to payroll checks each time checks are created, edited or deleted.
- Click the first row in the checks list.
- In the Date field, specify the date when the check is issued.
- From the Employee name list, select the employee to whom the check is issued.
- In the Amount field, specify the check amount.
- In the Purpose field, specify the purpose for which the check is issued.
- In the Check Number field, specify the check number.
- Repeat steps 3-7 for all checks that were issued during the shift.
- At the top right corner of the form, click Save.

Viewing Payroll Reports
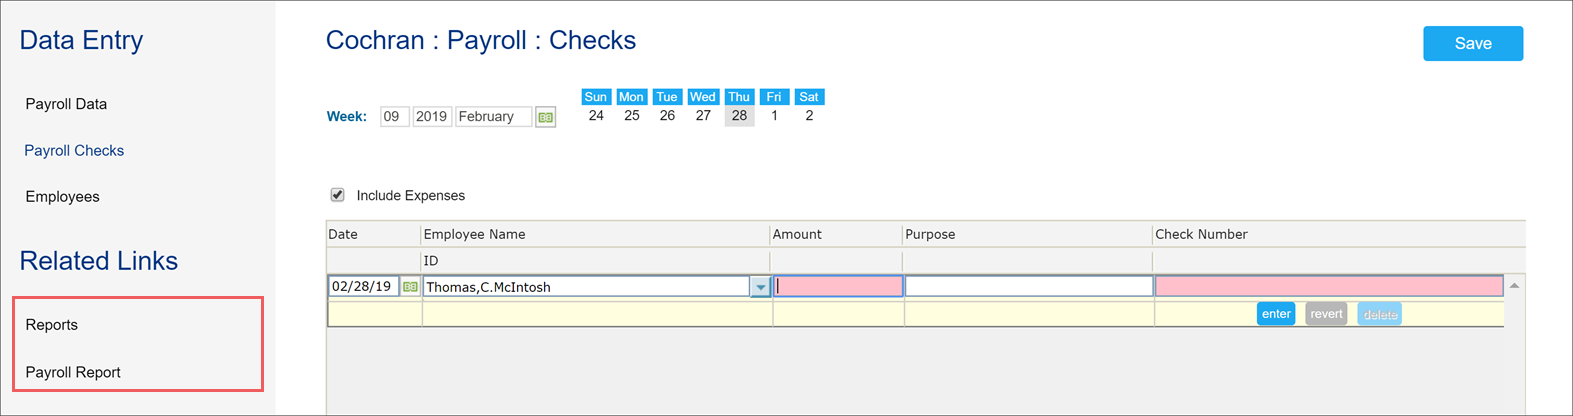
In the Related Information section of the Payroll form, you can see links that allow you to open and view payroll reports.
- Use the Reports link to open the list of Payroll reports available in CStoreOffice®.
- Use the Payroll Report link to run the Payroll report for the selected location.
To run CStoreOffice® payroll reports:
- In the left menu of the Payroll form, under Related Links, select Reports.
- In the left pane, select the location for which you want to run payroll reports.
- Click the Payroll tab and then click the necessary report in the list. You can run the following payroll reports:
- Labor Analysis: This report provides information on the recommended number of employees for the specific period and location.
- Payroll: This report does not calculate taxes. It only shows hours worked and pay dollars. To list each employee's time card, click Advanced, filter the report data by employee's name, select the necessary date range and click Refresh.
- Payroll Graphic: This report visualizes the work graphic information for employees.
- Payroll Total: This report displays information on the total location hours and money spent.
- To display data for a specific period in the report, use the date fields to select the necessary time range and then click Refresh.
- To convert the report to a PDF or Microsoft Excel file, click Print Version or Convert to Excel, correspondingly.


