


Vendors are necessary to properly account for the delivery and payment of merchandise being received by the site. At the Non-EDI Vendor Setup step, you need to add vendors from whom you are planning to receive merchandise and fill the profiles for them.
To add a vendor to CStoreOffice®:
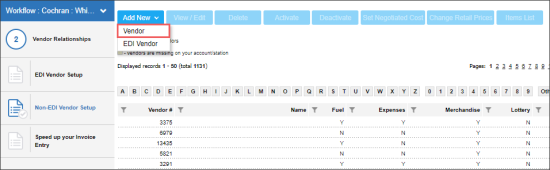
- At the top left of the vendors list, click Add New and select Vendor.
-
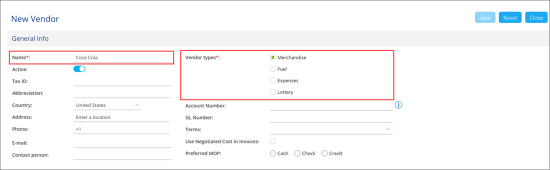
For non-EDI vendors, you do not need to enter an account number.
-
If you use DPS, scanning invoices will automatically associate items with the vendor. If some items are not associated with a vendor, this does not affect selling, but it may impact accurate velocity reporting and vendor-filtered sales reports. To run reports filtered by vendor, ensure items are assigned to the correct vendor. If items are not assigned, you can still run reports without vendor filters.
- In the Name field, enter the vendor name. If the vendor is common, CStoreOffice® will display a list of suggestions. Select the necessary vendor from the list. Otherwise, enter the vendor name manually. When you click out of the name field, similar vendor names may appear; you can select one if it matches or continue with your entry.
- In the Vendor types section, select the vendor type.
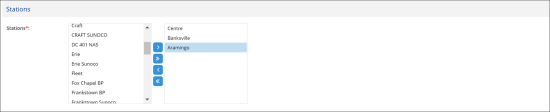
- In the Stations section, set up the list of locations for which the vendor must be active.
- At the top right of the form, click Save.
- Repeat steps 1-5 for all vendors you want to add.


