


To synchronize data between the cash register and back-office system, CStoreOffice® offers the mechanism of automatic MOP mapping. Automatic MOP mapping is launched when CStoreOffice® receives shift reports containing sale transactions with unknown MOPs. In such situation, CStoreOffice® attempts to register the imported MOP in the system so that this MOP can be recognized and used as a payment method for sales.
Automatic MOP mapping is supported for Verifone Ruby/Sapphire, Verifone Ruby/Topaz, Verifone Ruby/Commander and Gilbarco Passport cash registers.
How Automatic MOP Mapping Works
During automatic MOPs mapping, the following activities take place:
- When new shift reports come to the system, CStoreOffice® analyzes the TenderCode value for sale transactions having unknown MOPs.
- CStoreOffice® attempts to map unknown MOPs to MOPs registered in the system, either base or custom.
- If there are no MOPs to which the unknown MOPs can be mapped, CStoreOffice® creates new custom MOPs.
To notify users about the new MOPs, CStoreOffice® displays a notification in the following forms:
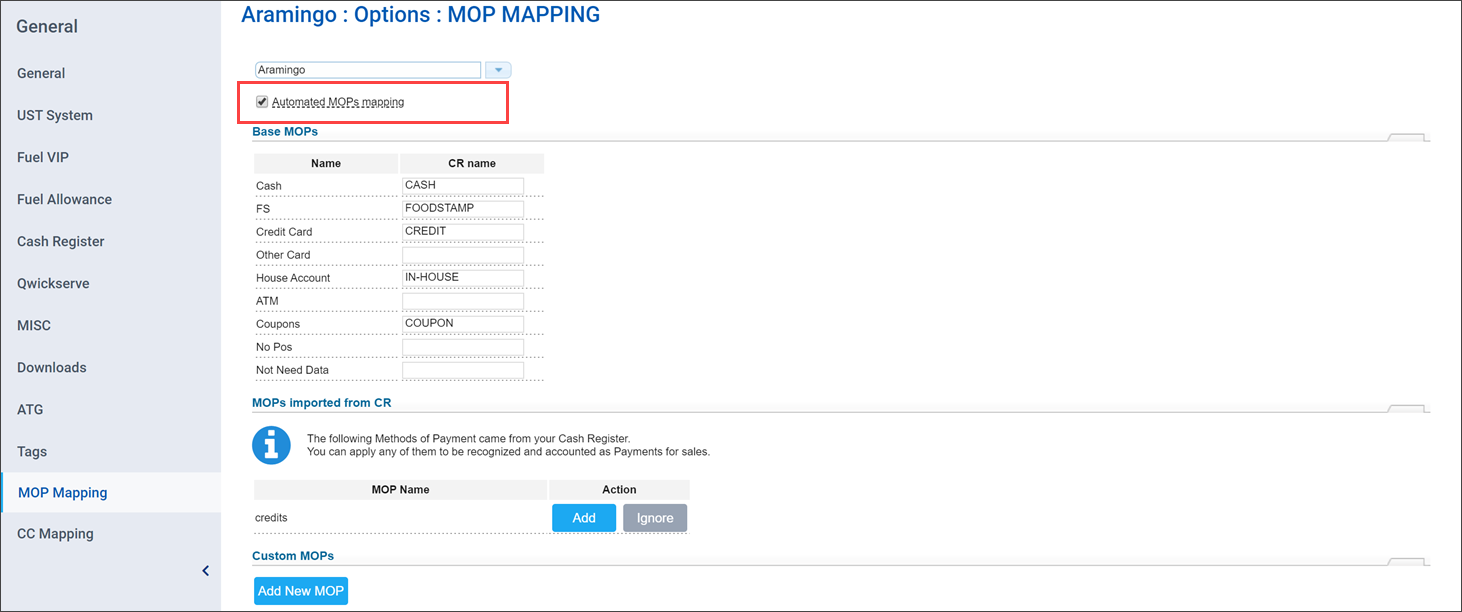
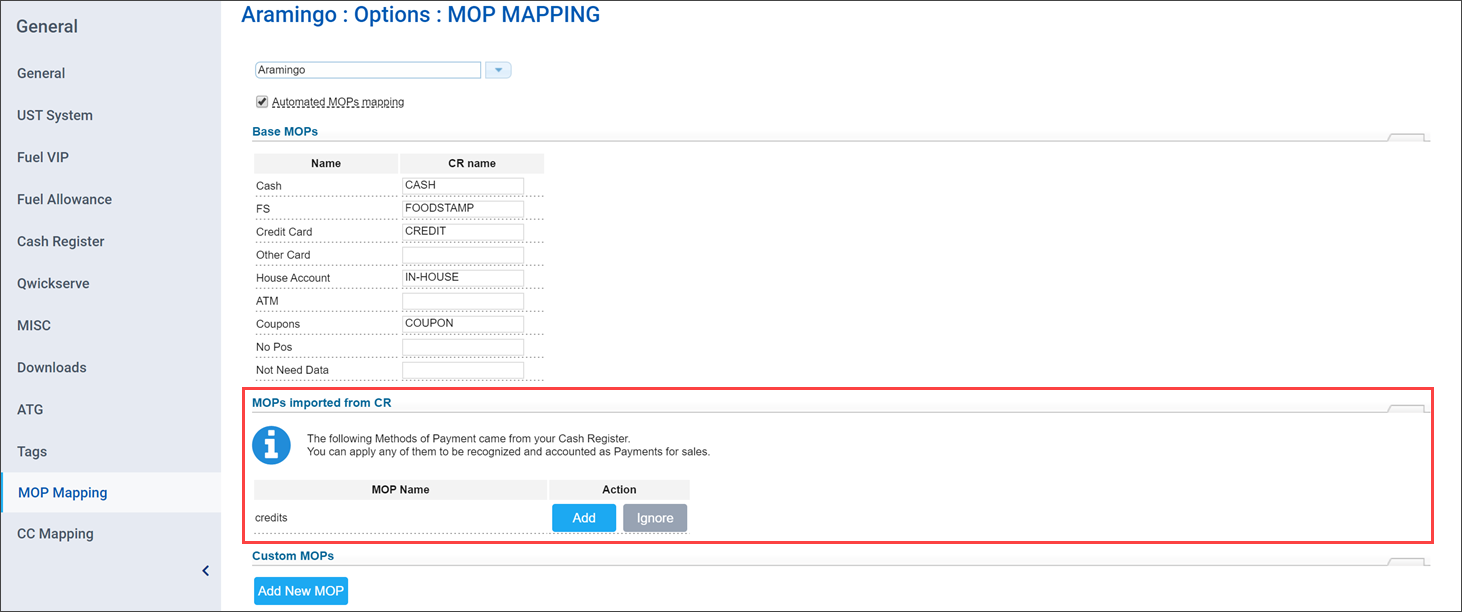
- Station Options > MOP Mapping
- Cash Register > Shift Reports
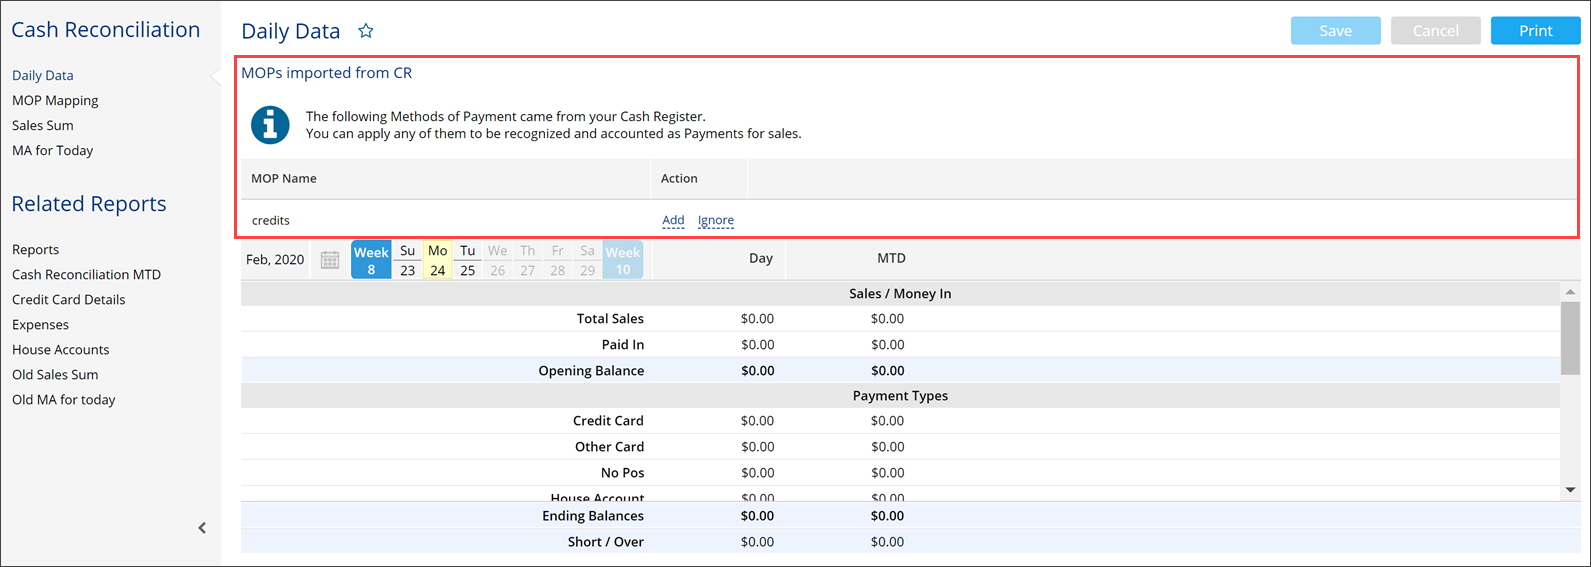
- Data Entry > Cash Reconciliation > Cash Register
- Data Entry > Cash Reconciliation > Cash Register > MOP Mapping
Users must review the created MOPs and accept the changes or ignore them. To details, see Reviewing and Accepting Imported MOPs.
- If new custom MOPs are created in the system, CStoreOffice® automatically reprocesses shifts that have sale transactions with unknown MOPs and updates information in these shifts.
Disabling Automatic MOP Mapping
By default, the automatic MOP mapping mechanism is enabled for newly created locations. You can disable it, for example, if you want to avoid possible discrepancies. With automatic MOP mapping disabled, CStoreOffice® ignores unknown MOPs coming in shift reports.
To disable automatic MOP mapping:
- In CStoreOffice®, go to Settings > Locations > Station Options.
- In the left menu, select MOP Mapping.
- At the top of the form, clear the Automated MOP Mapping check box.

- At the bottom of the form, click Save.
Reviewing and Accepting Imported MOPs
Before CStoreOffice® can add an imported MOP to the system, you need to review this MOP and agree to add it to the system or ignore the changes.
To review imported MOPs:
- In CStoreOffice®, go to any of the following forms:
- Station Options > MOP Mapping
- Cash Register > Shift Reports
- Data Entry > Cash Reconciliation > Cash Register
- Data Entry > Cash Reconciliation > Cash Register > MOP Mapping
- In the MOPS imported from CR list, review the imported MOPs and for each MOP, do one of the following:
- To add the MOP to the system, to the right of the MOP, click Add.
- To skip the MOP, to the right of the MOP, click Ignore.
When you add an imported MOP to the system, you can encounter the following situations:
- The CR name for the imported MOP is already mapped to a MOP registered in the system. In this situation, CStoreOffice® displays a warning window, and you can choose one of the following options:
- Replace the name of the existing MOP with the name of the imported MOP.
- Ignore the imported MOP.
- The CR name for the imported MOP is already mapped to a base MOP registered in the system. Since you cannot edit or delete base MOPs, CStoreOffice® only prompts to remove the imported MOP.
- A MOP with the same name as the imported MOP is already registered in the system. In this situation, CStoreOffice® displays a warning window, and you can choose of the following options:
- Change the name for the imported MOP.
- Ignore the imported MOP.


