


To help you get the support you need as quickly as possible, our AI-powered chatbot is designed to streamline the process of resolving issues and, when necessary, creating support tickets. You can call AI assistant at any moment:
- Enter your question in the search field located in the product header:

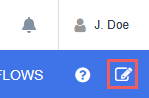
- Clicking feedback icon in the top-right corner:
- Clicking the How can we help you? floating widget:

The AI Assistant is designed to be your first line of support. The support ticket is automatically created when you click the thumbs down icon below the AI assistant answer. You can skip waiting for a live person to assist you in the chat at any time and simply add extra details to the ticket. The Support Team will do its best to resolve the problem and will reply to you as soon as they have an answer.
Alternatively, you can manually create a support ticket by clicking the Create ticket button in the top area of the AI assistant chat session.

Fill in all required fields in the ticket creation form that opens in the sidebar and click Create ticket button.
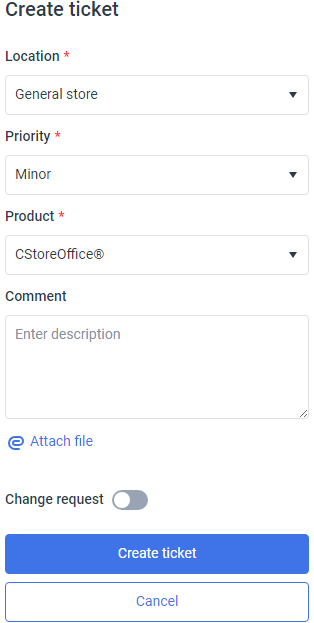
- Location: select the site (location / station) where you encounter the problem.
- Priority: tell us how urgent your issue is.
- Product: select the product, service, app, or device which has an issue.
- Comment: provide as many details on the issue as possible.Use the Attach file link to include screenshots, documents, archives, or other relevant information in your ticket. This can help us understand your issue better.
- If you are suggesting a new feature or improvement rather than reporting a problem, turn on Change request.


