


All tickets submitted by users are available in the tickets list. You can access the ticket list at any time to view and work with your tickets.
To quickly find the tickets that you need, you can perform the following operations:
Searching for Tickets
You can search for tickets in the tickets list. Tickets can be searched for by the subject and ID fields.
To search for tickets:
- At the top right corner of the main application view, click your account name and select Admin > Tickets.
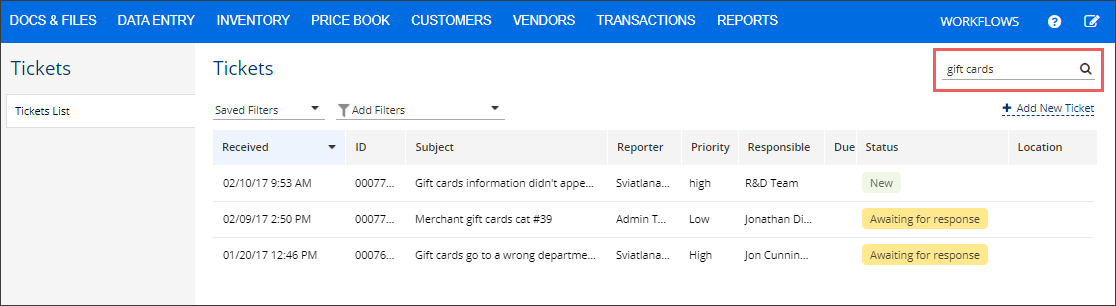
- In the search box at the top right corner of the tickets list, enter the necessary search word or phrase and click the search icon on the right. If you know the ticket ID, enter the ID in the search box.
Result: The tickets list displays only those tickets that match the specified search criteria.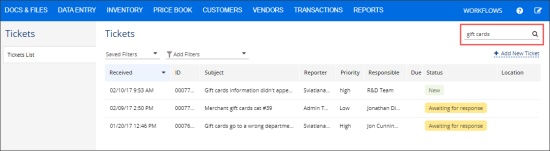
To discard search results and display all tickets in the list, click the close icon on the right of the search box.
Filtering Tickets
To display only those tickets that match specific criteria, you can filter tickets in the tickets list.
To filter tickets:
- At the top right corner of the main application view, click your account name and select Admin > Tickets.
- At the top of the tickets list, click the arrow on the right of the Apply Filters field.
- In the Applied filters form, specify criteria by which tickets must be filtered:
- In the Period field, specify the time interval when the ticket was created. You can specify the interval explicitly or use quick links to set one of the following recent intervals: Day, Week, Month, Quarter, Year.
- In the Priority field, select check boxes next to the necessary priority levels of the tickets:
- Minor
- Important
- Urgent
- Critical
- Other (used for compatibility purposes for tickets created in previous product versions)
- In the Responsible field, enter the name of the person to whom the ticket is assigned for resolution.
- In the Status field, select check boxes next to the necessary tickets states:
- New
- Open
- In Progress
- On Hold
- Awaiting for response
- Escalated
- Lack of response
- Closed
- Closed—First Call
- Other (used for compatibility purposes for tickets created in previous product versions)
- In the ID field, enter the ID of the ticket.
- In the Text field, enter a key word or phrase available in the ticket subject or description.
- In the Location field, enter the location to which the ticket relates.
- After you finish configuring filter criteria, click Done on the right of the corresponding field.
- At the top of the Applied filters form, click Apply.
Result: The tickets list displays only those tickets that match the specified filter criteria.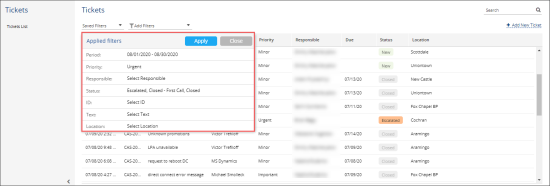

After you set up the filter, you can perform the following actions with it:
- To save the filter, on the right of the filter field, click Save and enter the filter name. You will be able to select and apply the saved filter using the Saved Filters list.
- To obtain a link to the filtered tickets list, on the right of the filter field, clicks Share and copy a displayed link to the Clipboard. You can send the link to other people to share the filter results.
- To discard filter results, on the right of the filter field, click Reset.
Sorting Tickets
You can use sorting options to display the necessary tickets in the tickets list. For example, you can sort the tickets list in the ascending or descending order, or select to display only tickets created on a specific date.
To sort data in the tickets list:
- At the top right corner of the main application view, click your account name and select Admin > Tickets.
- Use one or several of the following sorting options:
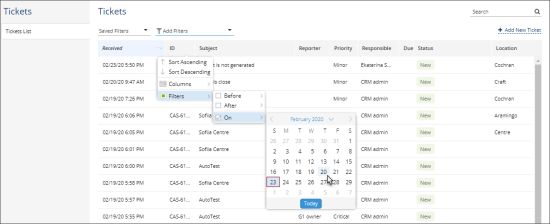
- To sort tickets in the ascending or descending order, click the arrow icon on the right of the necessary column and select Sort Ascending or Sort Descending.
- To display or hide some columns in the tickets list, click the arrow icon on the right of the necessary column, select Columns and select or clear the check box next to the necessary column name.
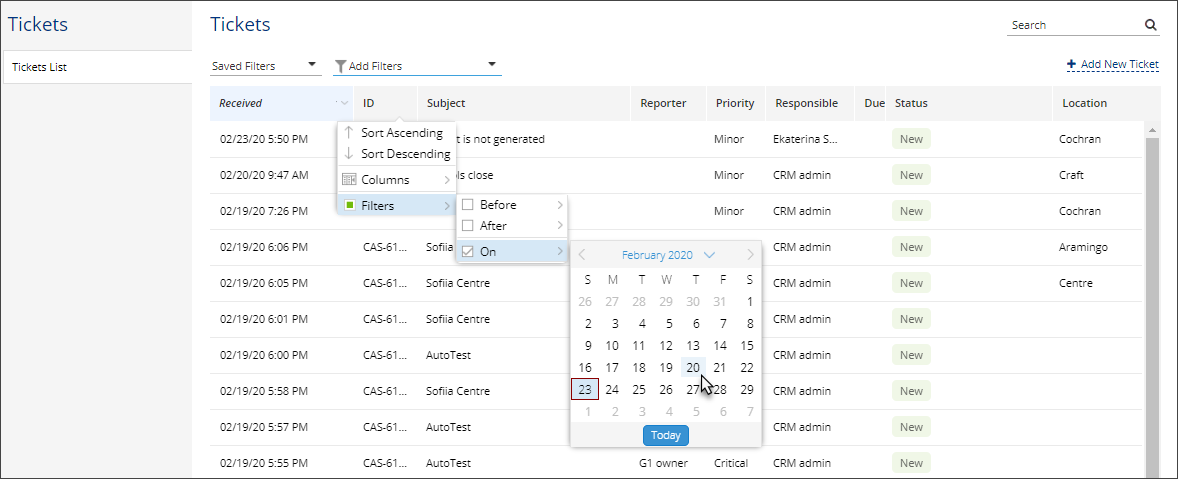
- (For the Received column) To display only those tickets that were created at a specific time interval, click the arrow icon on the right of the Received column and specify the time interval using the Before and After fields. Alternatively, you can use the On field to display tickets that were created exactly on a specific date.
To discard filter results, click the arrow icon on the right of the Received column and click the square icon on the left of the Filters field.


