


You can open the Item Checker report for a certain location (station) in the following two ways:
- In the Reports page:
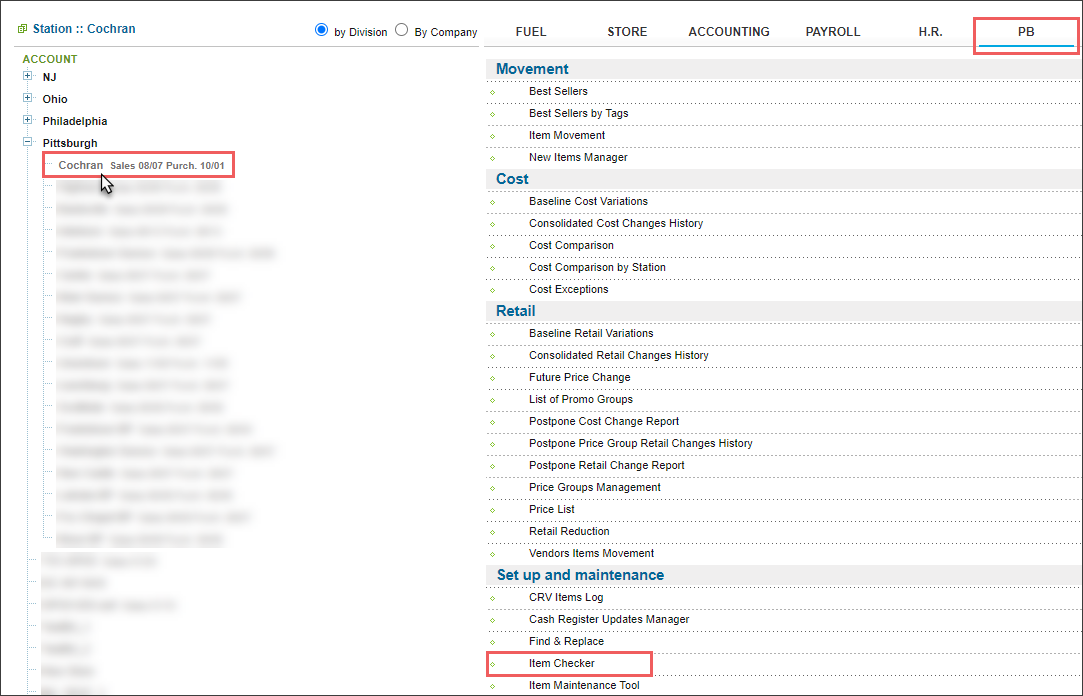
- From the main CStoreOffice® page, go to Reports > Price Book.
- To the left of the Price Book reports list, click the location (station) you need.
- In the Reports list, go to the Set up and maintenance section.
- Click Item Checker.

Result: The empty Item Checker report opens for the current location (station). - In the Item Checker report form, click the Search button.
- In the Items list, select the item you want to open the report for and click the Select button.

Result: The Item Checker report opens for the selected location (station).

- In the Item Setup form:
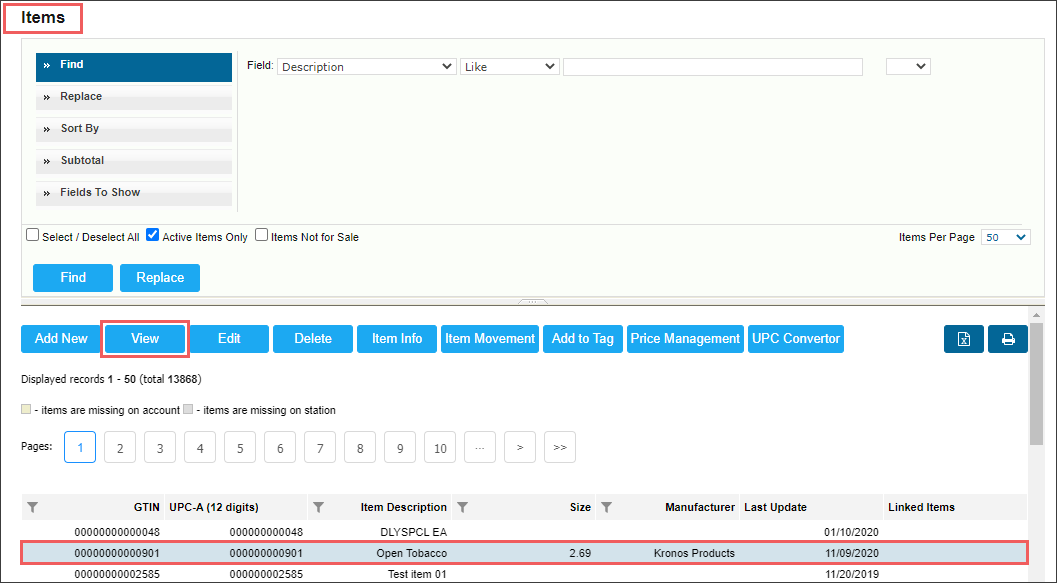
- From the main CStoreOffice® page, go to Price Book > Items.
- In the Items list, select the item you want to open the report for and click the View button.

- In the Item Setup form:
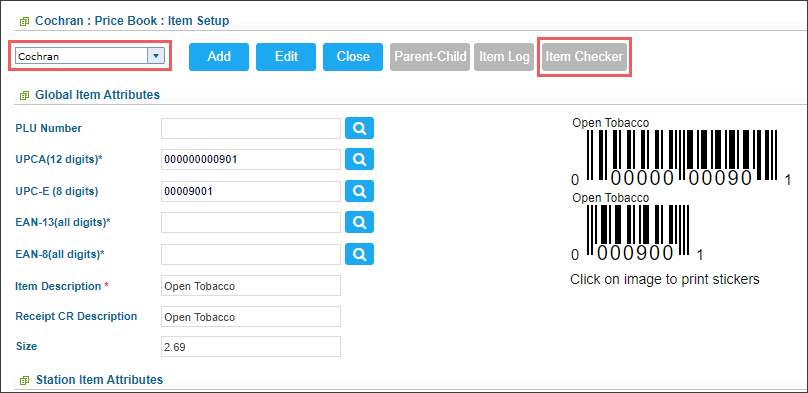
- In the top left list, select the location (station) you want to open the report for.
- At the top right of the form, click the Item Checker button.

Result: The Item Checker report opens for the selected location (station).
For more information on how to find the item you need, see Searching for Price Book Elements.
Viewing the Item Checker Report at the Location (Station) Level
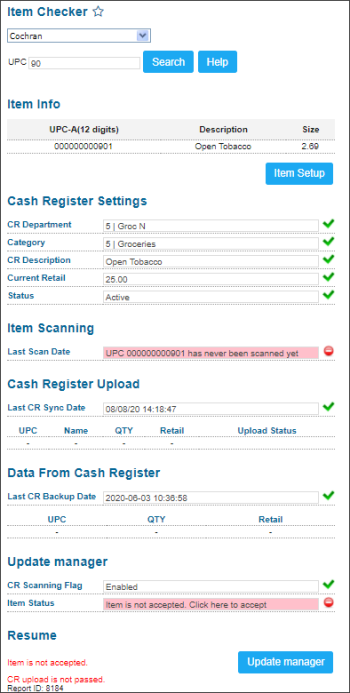
When the Item Checker report is opened for a certain location, it displays the following information:
- Item Info: In this section, the following item's general data is displayed:
- UPC
- Description
- Size
- Cash Register Settings: In this section, you can view the following item's cash register settings:
- CR Department
- Category
- CR Description
- Current Retail
- Status
- Item Scanning: Displays the item's last scanning date. If the item has not been scanned yet, the relevant red icon and status will be displayed.
- Cash Register Upload: Displays the item's last upload date to the cash register.
- Data from Cash Register: Displays the last CR backup date.
- Update Manager: In this section, the following item's data is displayed:
- CR Scanning Flag
- Item Status
- Resume: In this section, all item's issues, if any, are displayed.
One of the possible item's issues is that the item did not get into the PLU batch and, thus, could not be scanned via the handheld. This issue is also displayed in the Resume section and can be fixed by clicking the Add to cache button as it is displayed in the image below.

From the Item Info section, you can switch to the Item Setup form by clicking the Item Setup button.


To view the report for another location, select it in the list at the top of the report.


