


Material code is a mandatory parameter for the item to be accounted in the GSAP reports. In CStoreOffice®, material code can be configured for items in the following ways:
Configuring Material Code via Item Tags
To configure the material code for the items using the Item Tags functionality:
- Make sure the External Number field on the Item Tag form is turned on.
If not, select the Show External Number in Item Tag option in the account settings. To adjust account settings, contact the Petrosoft Support team. - From the CStoreOffice® main page, go to Price Book > Item Tags.
- Add the Global SubCategory tag:
- Do either of the following:
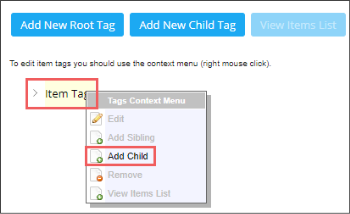
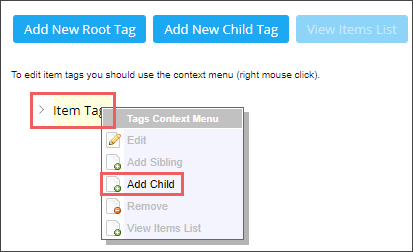
- Right-click Item Tags and in the dialog window, click Add Child.
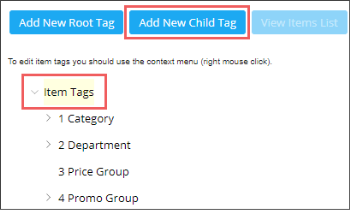
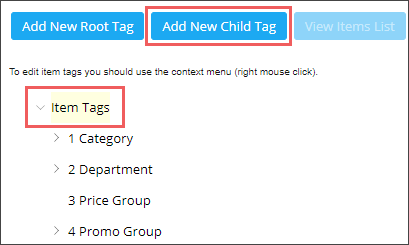
- Click Item Tags and click the Add New Child Tag button.
- In the Add Root Tag form, enter the following tag settings and click Save&Close:
- In the Name field, enter Global SubCategory.
- In the Number field, enter the tag number. This is usually the next sequential item tag number.
- In the External Number field, enter the material code value.
- Configure other item tag settings, if needed.


- Add more child tags, if needed.
For more information on how to configure item tags, see Item Tags. - Assign configured item tags to the items you want to track in the GSAP reports.
For more information, see Assigning Item Tags.
Configuring Material Code via Categories
To configure the material code for the items using the Categories functionality:
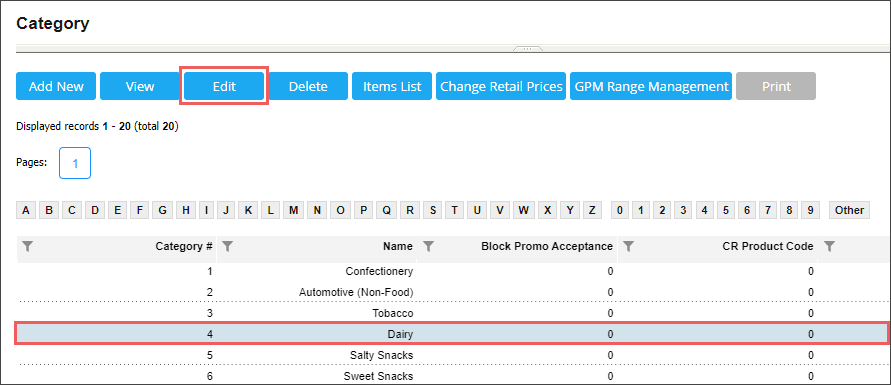
- From the CStoreOffice® main page, go to Price Book > Categories.
- In the Categories list, select the category for which you need to assign the material code.
- Click Edit.

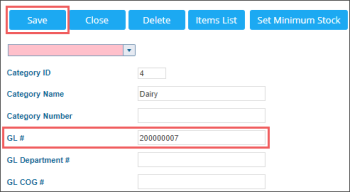
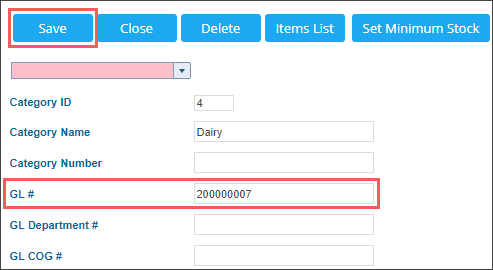
- In the category setup form:
- In the GL # field, enter the material code value.
- At the top left of the form, click Save.
Please note that the category setup form must be opened at the account level. The first list for the stations selection must be empty.
For more information, on how to configure categories, see Categories.


