


Custom view is a flexible way to display your daily sales summary report, allowing you to choose, mix and match the required data areas, filters and metrics. This section describes the specifics of custom views functionality and options.
- Adding Custom Views
- Editing Custom Views
- Exporting Custom Views
- Importing Custom Views
- Deleting Custom Views
- Viewing and Searching Views
Adding Custom Views
The Daily Summary reports are displayed using the preset default set of columns. However, you can also create, save and use your own custom views. You can add as many custom views as needed and easily switch between them to access all required report data.
To add and configure a custom view for the Daily Sales Summary report:
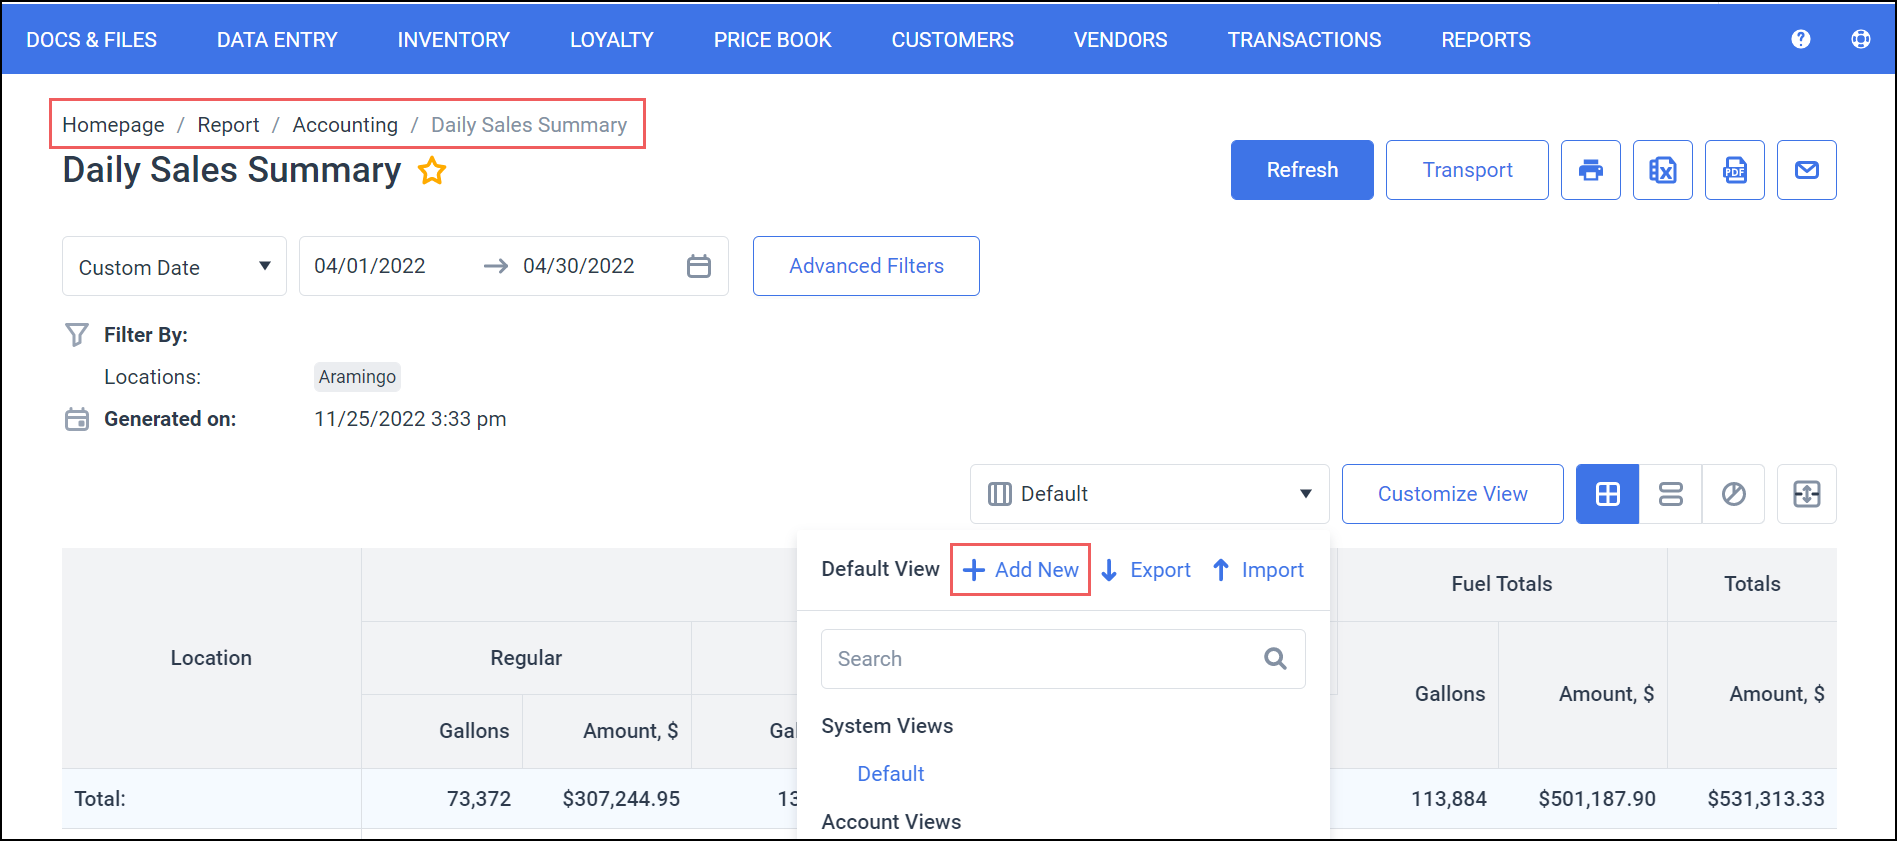
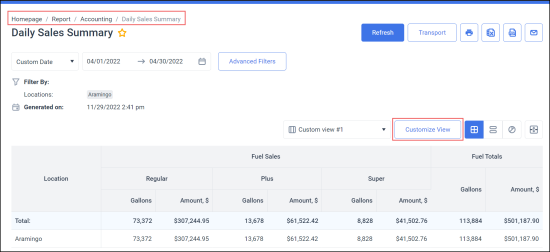
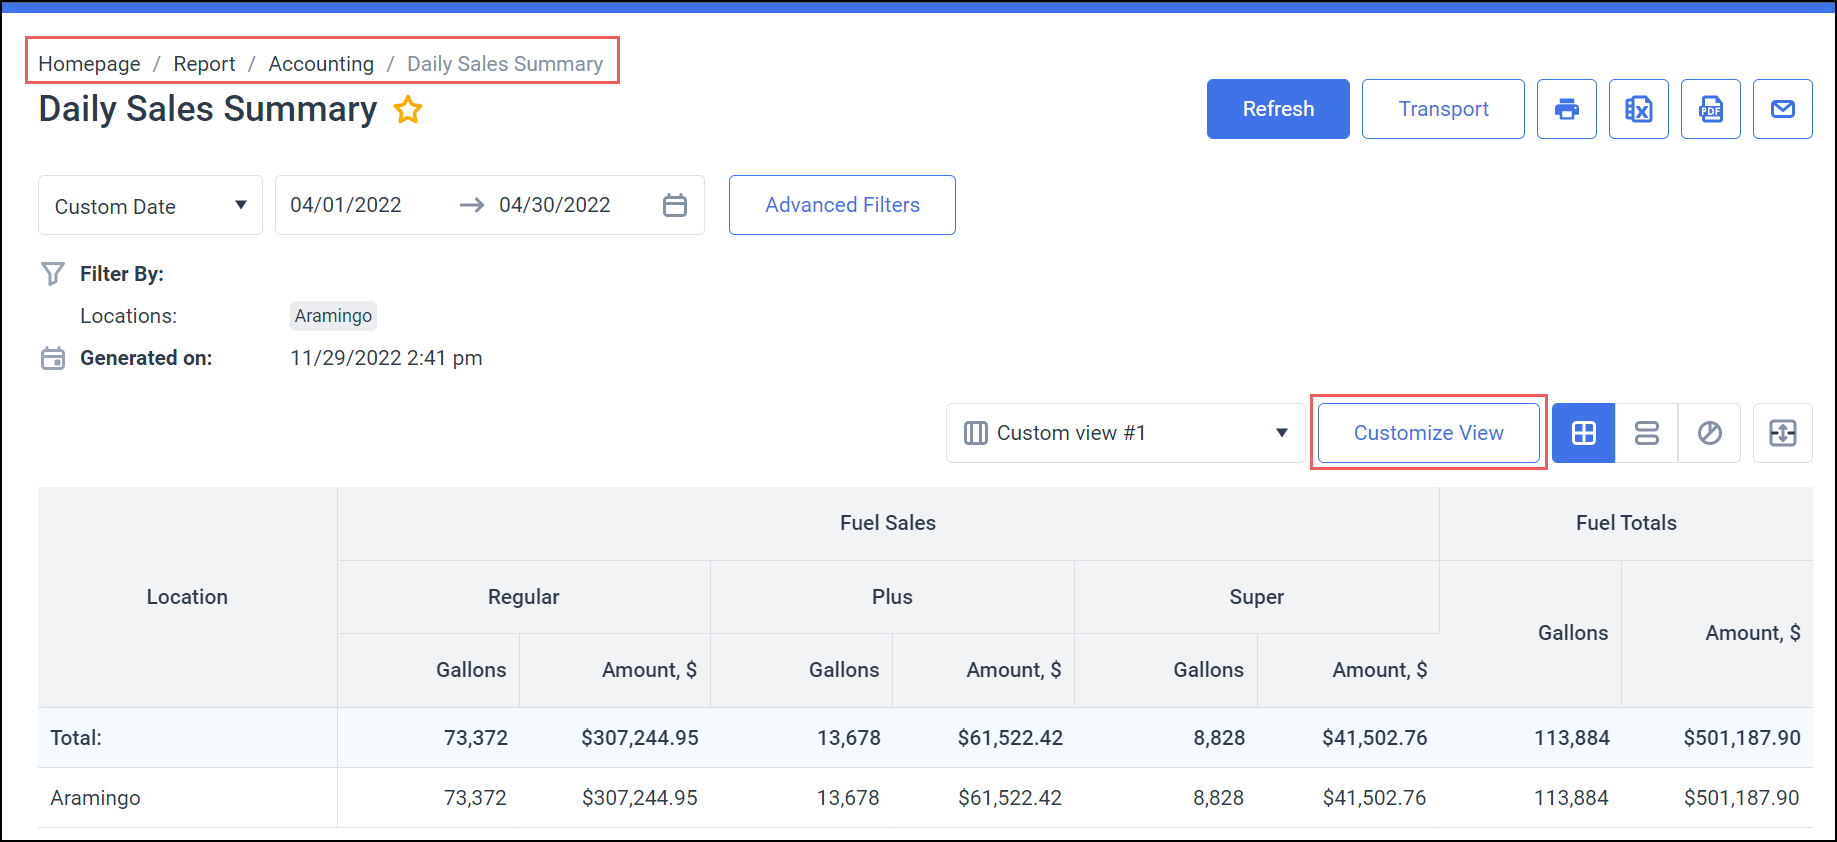
- Open the Daily Sales Summary report. The data is displayed using the Default view.
- Expand the Views dropdown list, and select Add New.

- Now, configure your view.
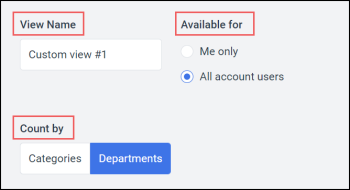
- View name: Select the name for your custom report.
- Available for: Configure who will be able to access the custom view.
- Me only: The view is only visible to the logged in user who created the view.
- All account users: The view is visible to, accessible and editable by all account users.
- Count by: Choose whether you'd like to see the sales report data by Categories or Departments. Note that you can select only one option.
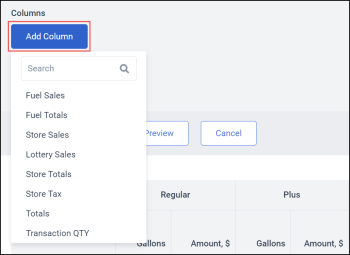
- Columns: Click Add Column and select the required option from the predefined list of data groups.
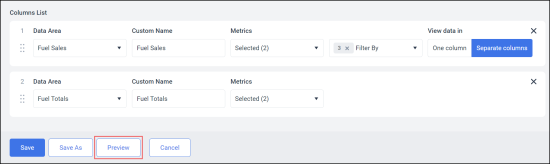
- Columns list: Configure the settings for newly added columns. Note that you can rearrange the list by using the drag-and-drop indicator
 at the beginning of each line.
 - Data Area: Data group selected when adding a new column.
- Custom Name: Column name to be displayed in the custom report.
- Metrics: Available measurement options for the selected data area.
- Filter By: This setting is applicable only to the Fuel Sales, Store Sales and Lottery Sales data areas and is used to filter reporting data by the Fuel Product, Store Department / Category or Lottery Type respectively.
- View data in: This setting is used only in conjunction with the Filter By option.
- One Column: Reporting data is displayed as a summary without being broken down into the subgroups selected in the Filter By settings.
- Separate Columns: Reporting data is displayed in separate columns for each subgroup selected in the Filter By settings.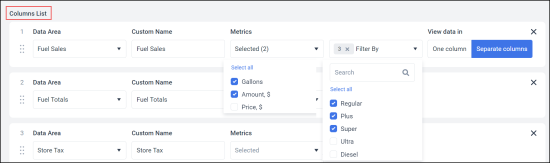


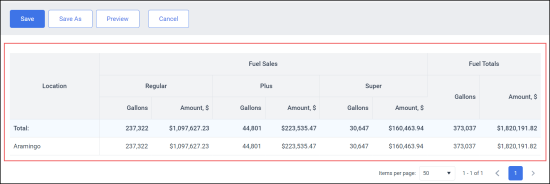
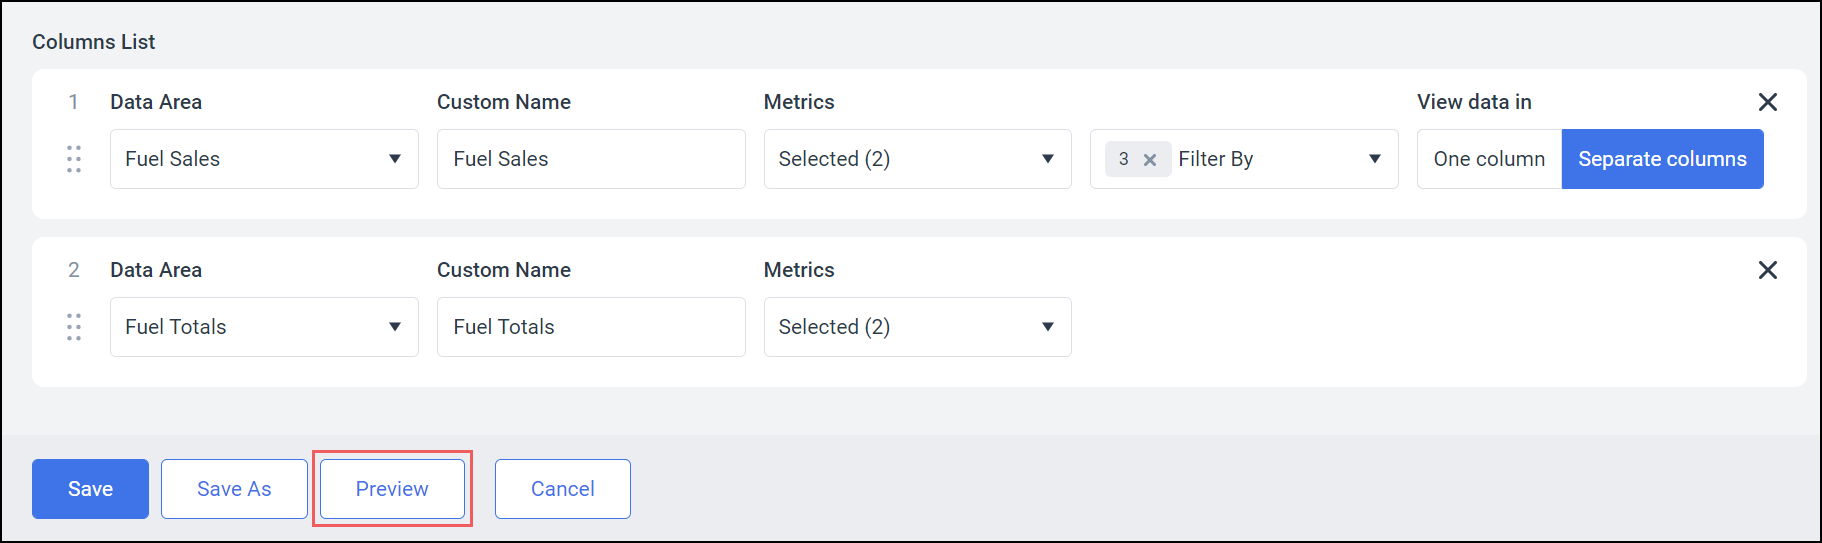
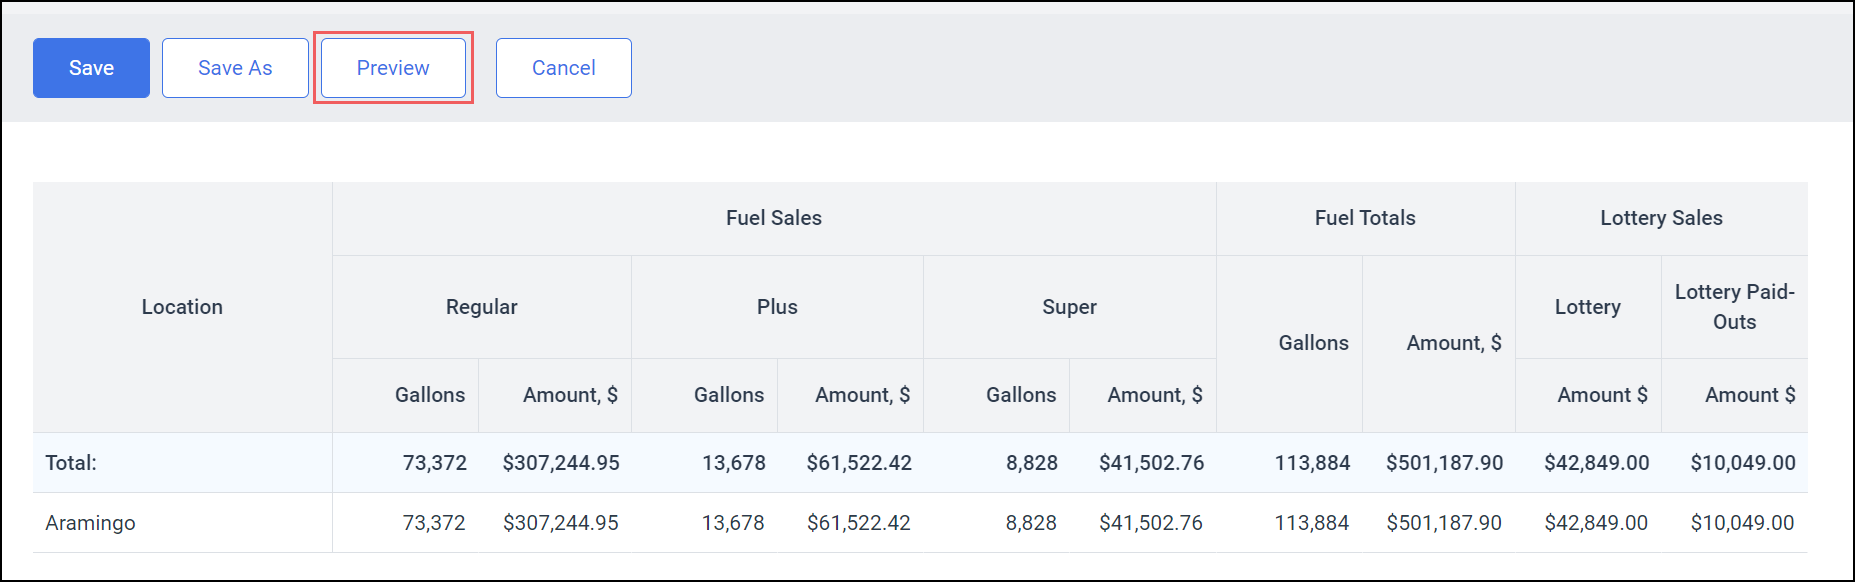
- Once done, you can preview your report without yet saving it. To preview your custom report, simply click Preview under the view configuration form.
The report structure is generated and displayed below. You can check and either proceed to saving it or adjust the settings in the view configuration form.

- Now, click Save to store your custom report view in the system, or Cancel to cancel the changes and close the form.
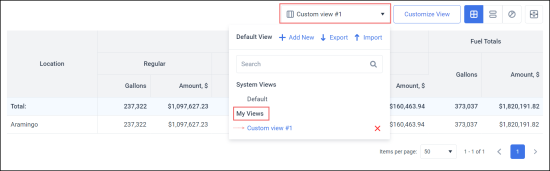
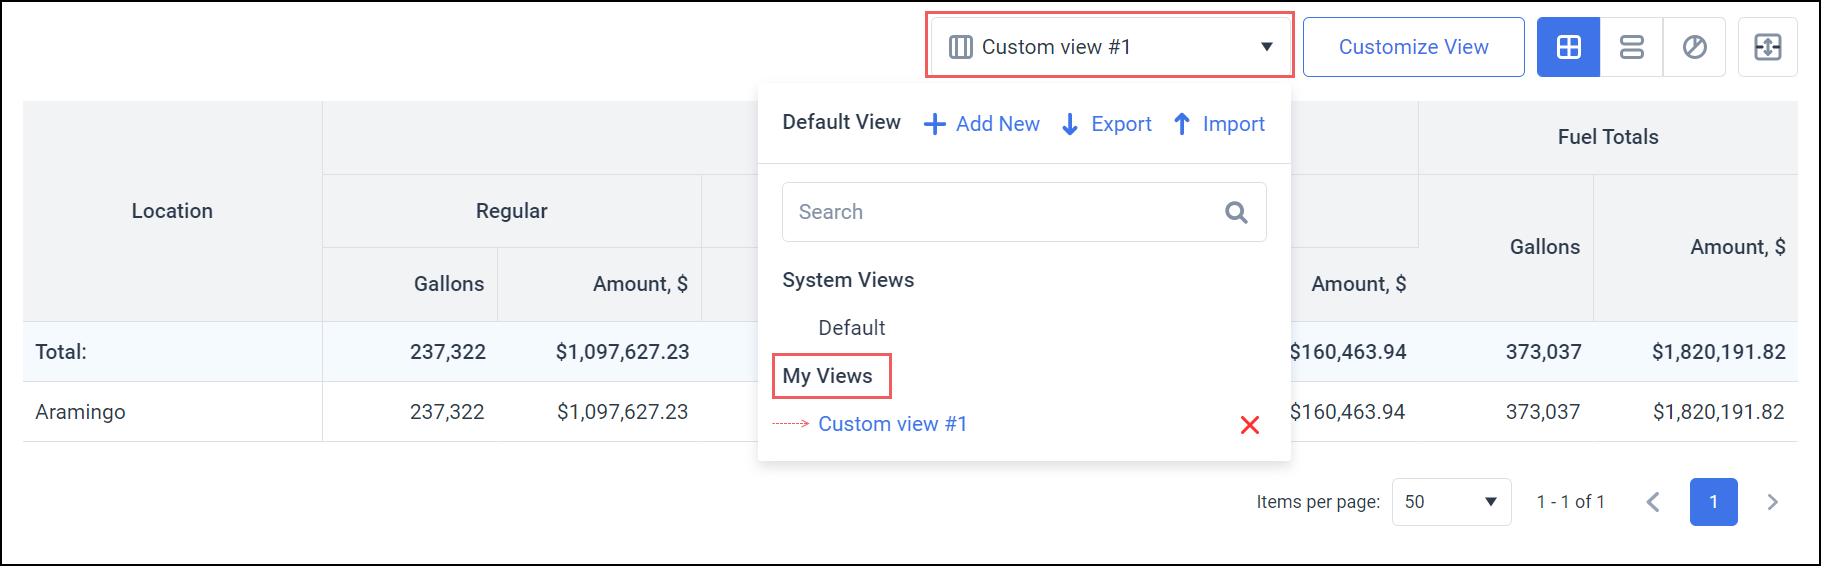
All custom views created or edited by you are available in the Views dropdown list under My Views.
Editing Custom Views
You can edit any custom view created by you or shared with account users. You can also use the default view as a basis for your custom report, however, the default view itself cannot be modified.
To edit a custom view for the Daily Sales Summary report:
- Open the Daily Sales Summary report. The data is displayed using the view applied at the previous login (either default or custom).
- Click Customize View to edit the currently opened report.
- Use the view configuration form to make the required changes to the current view. For more details, refer here.
- Once done, you can preview your report without yet saving it. To do that, simply click Preview under the view configuration form.
The report structure is generated and displayed below. You can check and either proceed to saving it or adjust the settings in the view configuration form.
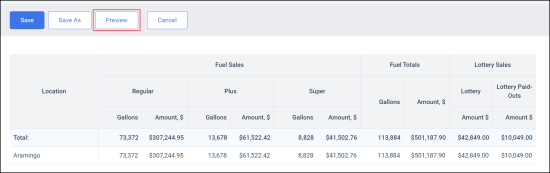
- Now, save the edited custom view.
- Click Save to apply changes to the current view. Note that will option is disabled when working with the default view and custom views created by other users.
- Click Save As to create a new custom view leaving the current view unchanged. In the editable field, provide a new name for the custom report and click the green checkmark.
- Click Cancel to cancel the changes and close the form.

All custom views created or edited by you are available in the Views dropdown list under My Views.


Exporting Custom View
To export a custom view:
- Open the Daily Sales Summary report. The data is displayed using the view applied at the previous login (either default or custom).
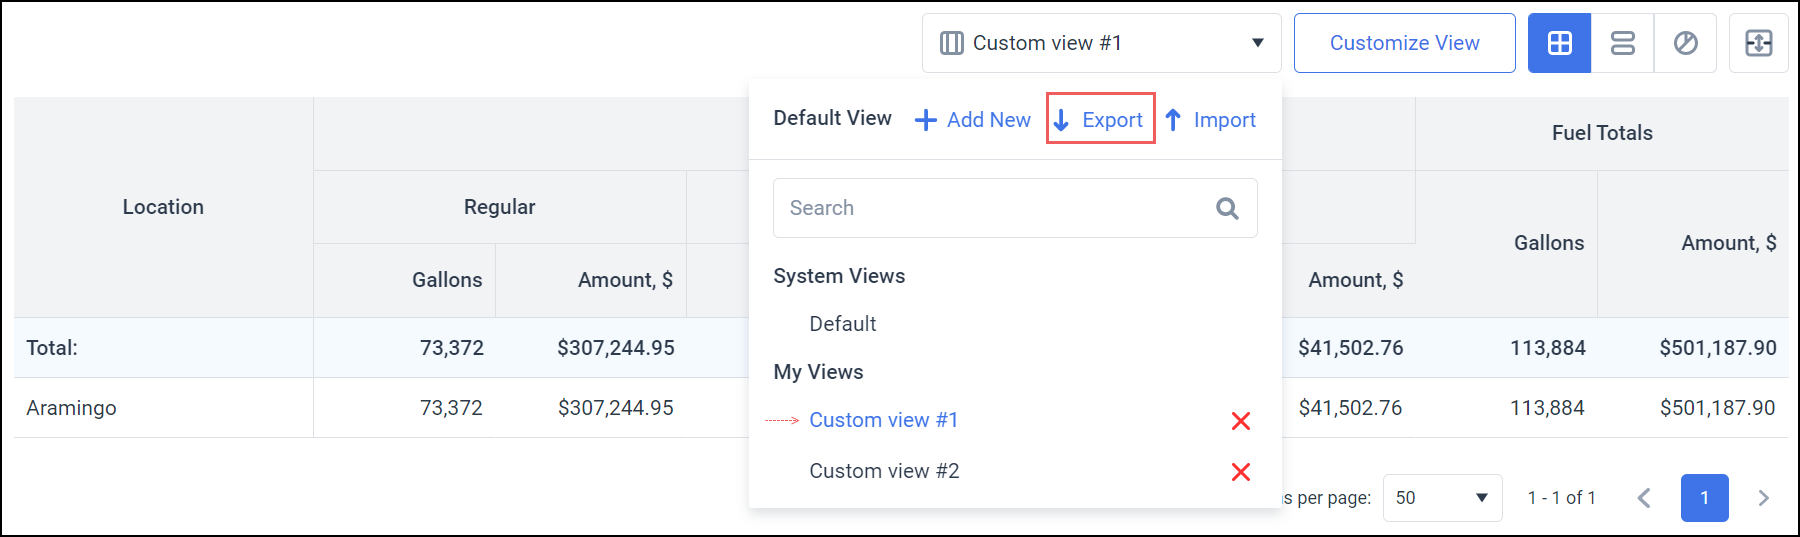
- From the Views dropdown list, select the report you would like to export. Currently displayed view is highlighted in blue.
- Open the Views dropdown list again, and click Export.

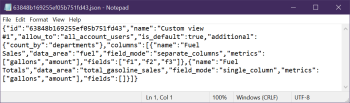
- Save the file in JSON format in the preferred location. You can then use it to import the settings in another account or system.

Importing Custom Views
To import a custom view:
- Open the Daily Sales Summary report. The data is displayed using the view applied at the previous login (either default or custom).
- Expand the Views dropdown list, and click Import.

- Select the JSON file saved on your machine and click Open.
- The custom view is added to the Views list under My Views.

Deleting Custom Views
To delete a custom view:
- Open the Daily Sales Summary report. The data is displayed using the view applied at the previous login (either default or custom).
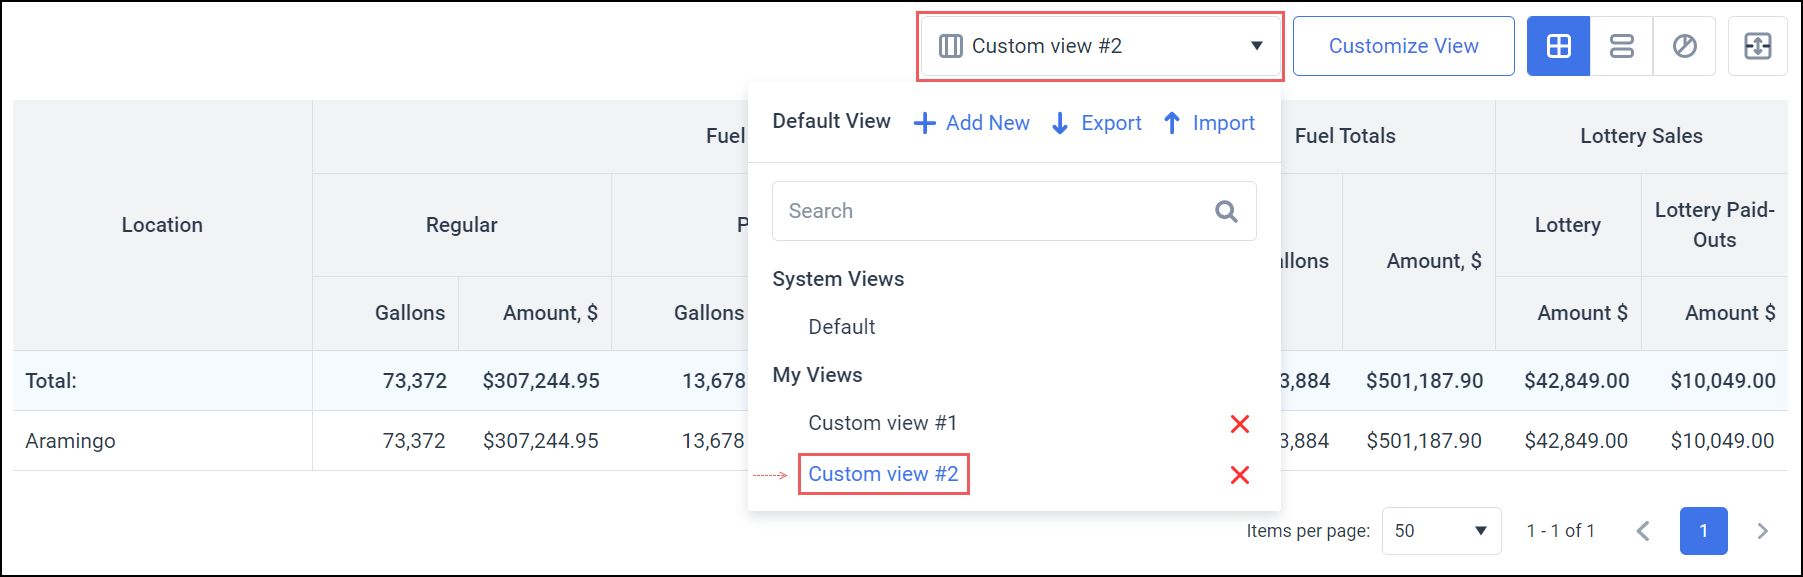
- Expand the Views dropdown list and click the red cross icon against the required custom view to delete it.

The view is deleted from the list and the report structure is reset back to default.

Viewing and Searching Views
To view and find a custom view:
- Open the Daily Sales Summary report. The data is displayed using the view applied at the previous login (either default or custom).
- Expand the Views dropdown list to see the list of all available views:
- System View: Contains the default view.
- My Views: Contains the custom views created or edited by the user.
- Account Views: Contains the custom views created and shared by other account users. If the account view is edited by the logged in user, it moves to My Views.


- To look for a custom view, start typing in the Search field. The results will be displayed in the list below.


